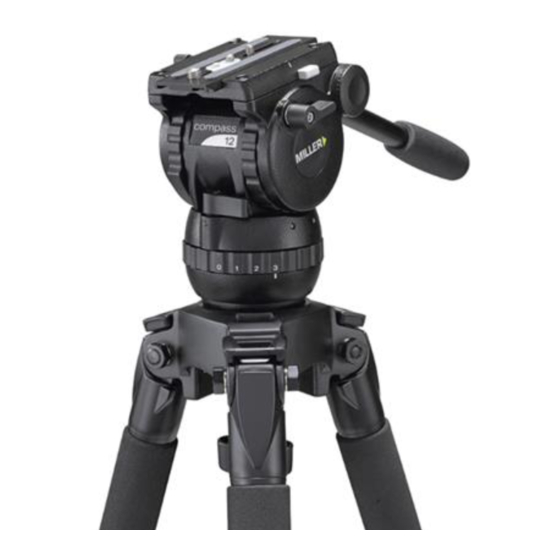
Miller 1033 Panduan Operator
Jelajahi secara online atau unduh pdf Panduan Operator untuk Aksesori Kamera Miller 1033. Miller 1033 2 halaman. Fluid head

compass
Fluid Head
OPERATOR'S
MANUAL
#1033 Compass 12 Fluid Head
Features and Controls
1/4" and Pin Carriage
k
Camera Plate
k
Release Knob
Tilt Drag Control
Accessory Mounting
t
1
Technical Data
Weight
2.3 kg (5.0 lbs)
Payload Range
2.0 - 9.0 kg (4.4 - 19.8 lbs)
Max. Capacity
20.0 kg (44.0 lbs)
Tilt Drag
3 Selectable fluid drag positions + 0
Tilt Range
+ 90º / -75º
Tilt Lock
Positive Lock caliper brake system
Pan Drag
3 Selectable fluid drag positions + 0
Pan Range
360º
Pan Lock
Positive Lock caliper brake system
Counterbalance
4 Selectable positions
System
(see performance graph)
Camera Platform
Quick release sliding camera plate
Type
with 60 mm (2.4") travel and 1/4", 3/8"
and 1/4" + Pin Carriage
Mounting Base
Ø75 mm (3.0") Ball Levelling
Ball Level Range
10º
Handle
Standard black anodised pan handle with
adjustable angle
Temperature range
-40º to +65º C (-40º to +149º F)
Construction
Lightweight diecast Aluminium alloy,
moulded reinforced plastics
Sealing
Water & Dust resistant
Finish
Matt black (low sheen) durable powder
coated with anti-corrosive pre treatment
Warranty
3 Years.
12
Counterbalance Selector
2
Fig. 3
4
Features and Controls
Sliding Platform Lock
Pan Handle Clamp
Pan Handle
Introduction
Thank you for purchasing the Compass 12 Fluid
Camera Screws
Head. The Compass 12 Fluid Head has been
designed to suit payload capacities from DSLR
to DV camera configurations.
The robust design and construction of the
Compass 12 Fluid Head offers maximum
stability, accuracy and durability and includes
precision ball bearing mounted Fluid Drag Plate
system in the Pan and Tilt assembly to deliver
true fluid drag performance over the entire
temperature and payload range.
The Fluid Drag and the Counterbalance system
were designed to provide excellent control
and repeatability and offer progressive equal
increments of drag and torque.
The Compass 12 Fluid Head also offers
Illuminated Bubble level.
The Compass 12 Fluid Head will give best
performance when used on a wide range of
Miller tripods, including SOLO DV (#1501,
#1630), and Lightweight (#440, #420) tripod.
This will ensure maximum system stability to
Bubble Level
suit any professional set-up. The Compass 12
Fluid Head will suit most industry standard
75 mm tripods as well, please refer to
manufactures' manual for mounting details.
Pan Drag Control
Fig. 2
Operating Instructions
The operating instructions are described in six steps.
Please read and understand these instructions before
using this equipment. Do not omit any steps.
1. Fluid Head Set-up
1.1 Loosen the PAN HANDLE CLAMP fully then
rotate the PAN HANDLE until it is
approximately perpendicular to the
THREADED STUD (fig. 4) and tighten the PAN
HANDLE CLAMP - avoid contact wear between
the serrations on the Fluid Head and the PAN
HANDLE CLAMP , if this occurs then unwind the
PAN HANDLE CLAMP further.
1.2 Ensure that the TRIPOD BOWL is approximately
horizontal. Place the Fluid Head into the
TRIPOD BOWL, adjust the BUBBLE LEVEL
(fig. 4) such that the bubble is inside
the black circle and tighten the
CLAMP NUT.
1.3 Set the initial control settings as
follows – see Figure 1 & 2:
Select Counterbalance to position 4
(top setting).
Select Pan & Tilt Drag to position 0.
Tighten the PAN LOCK, TILT LOCK
and the SLIDING PLATFORM
LOCK.
Sliding Platform
Tilt Lock
Pan Lock
Threaded Stud
Clamp Nut
1
Safety Instructions
Attaching / removing the
camera
Please use this manual to familiarise yourself
with the operation of the Compass 12 Fluid
Head and observe these instructions to prevent
any damage to your equipment. Ensure that all
equipment is operating correctly and free from
defects and damage, also please ensure that
the tripod is steady, secure and that the bowl
is approximately horizontal when attaching the
camera. The operator is responsible for the safe
operation of this piece of equipment.
Do not exceed the maximum payload capacity
of the Fluid Head.
Do not leave the camera unattended on the
Fluid Head.
Do not release the SLIDING PLATFORM LOCK
whilst the camera is at an angle.
Do not adjust the tripod whilst the camera is
attached to the Fluid Head.
Ensure PAN HANDLE CLAMP and CLAMP NUT
is securely tightened.
Apply TILT LOCK when adding/removing
equipment from the camera or when attaching/
removing the camera from the Fluid Head.
Hold camera securely whilst changing
Counterbalance, Pan Drag or Tilt Drag settings.
Hold the camera securely whilst releasing the
RELEASE KNOB.
Hold camera securely whilst adjusting the
CLAMP NUT to level the Fluid Head.
3
Pan Handle Clamp
Pan Handle
Illumination Button
Bubble Level
Threaded Stud
Clamp Nut
Fig. 4
5
Fig. 1
