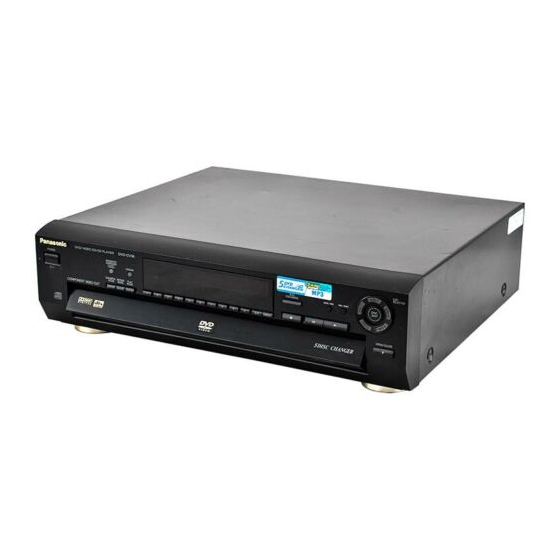
Panasonic DVD-CV37 Panduan Petunjuk Pengoperasian - Halaman 5
Jelajahi secara online atau unduh pdf Panduan Petunjuk Pengoperasian untuk Sistem stereo Panasonic DVD-CV37. Panasonic DVD-CV37 24 halaman. Dvd/cd player
Juga untuk Panasonic DVD-CV37: Panduan Petunjuk Pengoperasian (24 halaman), Panduan Petunjuk Pengoperasian (32 halaman), Panduan Petunjuk Pengoperasian (29 halaman), Panduan Cepat (2 halaman), Panduan Petunjuk Pengoperasian (24 halaman)

Control reference guide
POWER
SKIP
STOP
TOP MENU
DISPLAY
SUBTITLE
DISC
PROGRAM
SEQUENTIAL
FL SELECT
A.SRD
A
RANDOM
?
<
POWER
/ I
ADVANCED
CD
SURROUND
SEQUENTIAL
1
T U
Disc tray number
Buttons such as 1 function the same as the controls on the remote control.
Disc information
∫ Discs that can be played
DVD-Video
DVD-R
Indication used in instructions
[DVD-V]
§ § § § §
Including CD-R/RW and discs recorded with MP3 (and WMA for
[DVD-CV52] [DVD-CV47]).
Do not use irregularly shaped discs (e.g. heart-shaped), as these can
damage the unit.
∫ Discs that cannot be played
DVD-Audio, PAL discs, DVD-ROM, DVD-RAM, CD-ROM, CDV, CD-G,
iRW, DVD-RW, CVD, SVCD, SACD, Divx Video Discs and Photo CD.
∫ DVDs that can be played
This unit has a Dolby Digital decoder so you can play
DVDs with this mark.
This unit does not have a DTS decoder. Connect this
unit to equipment that has a DTS decoder to enjoy
DVDs with this mark.
∫ Playing DVDs and Video CDs
The producer of these discs can control how they are played so you may
not always be able to control play as described in these operating
instructions. Read the disc's instructions carefully.
SLEEP
SETUP
OPEN/CLOSE
SLOW/SEARCH
PAUSE
PLAY
MENU
ENTER
RETURN
AUDIO
ANGLE QUICK REPLAY
DISC1
DISC2
DISC3
1
2
3
DISC4
DISC5
4
5
6
7
8
9
CANCEL
0
10
BASS
CINEMA
D.ENH
B
C
D
A-B
POSITION
REPEAT
REPEAT
MEMORY
Q
R
S
DISC
DISC
EXCHANGE
SKIP
4
E
V
3
G
W
Audio CD
Video CD
§ § § § §
[CD]
[VCD]
1 Standby/on switch (POWER Í) ..................................................... 7
Press to switch the unit from on to standby mode or vice versa.
In standby mode, the unit is still consuming a small amount of power.
2 Skip buttons (:, 9 SKIP) ...................................................... 10
3 Stop button (∫ STOP) ..................................................................... 7
4 Pause button (; PAUSE) ................................................................ 7
5 Top menu button (TOP MENU) ................................................... 8, 9
6 Cursor buttons (3, 4, 2, 1)/Enter button (ENTER) ................... 8
7 Display button (DISPLAY) ............................................................. 14
8 Audio button (AUDIO) ................................................................... 13
9 Subtitle button (SUBTITLE) .......................................................... 13
: Disc select button (DISC), Disc buttons (DISC1 – DISC5) ........... 8
; Program button (PROGRAM) ........................................................ 11
< Sequential button (SEQUENTIAL) .................................................. 8
= FL select button (FL SELECT) ........................................................ 8
> Cancel button (CANCEL) .............................................................. 11
? Advanced Surround button ([A] A.SRD) ....................................... 12
@ Bass plus button ([B] BASS) ......................................................... 13
A Random play button (RANDOM) .................................................. 11
B Repeat button (REPEAT) ............................................................... 12
C Sleep button (SLEEP) .................................................................... 10
D Setup button (SETUP) ............................................................... 7, 17
E Drawer open/close button (< OPEN/CLOSE) ............................... 7
F Slow/Search buttons (6, 5 SLOW/SEARCH) ....................... 10
G Play button (1 PLAY) ...................................................................... 7
H Menu button (MENU) ................................................................... 8, 9
I Return button (RETURN) ................................................................. 7
J Angle button (ANGLE) ................................................................... 13
K Quick replay button (QUICK REPLAY) .......................................... 8
L Numbered buttons (1–9, 0, S S S S S 10) .................................................... 8
M Cinema button ([C] CINEMA) ......................................................... 13
N Dialogue Enhancer button ([D] D.ENH) ........................................ 13
OPEN/
O Position memory button (POSITION MEMORY) ............................ 9
CLOSE
P A-B repeat button (A-B REPEAT) ................................................. 12
Q Drawer ............................................................................................... 7
R Skip, Search buttons (: 6, 5 9) .................................. 10
X
S Display
T Advanced Surround indicator
U CD sequential indicator ................................................................... 8
V Disc exchange button (DISC EXCHANGE) .................................... 8
W Disc skip button (DISC SKIP) ......................................................... 7
X Remote control signal sensor
∫ CD-R and CD-RW discs
This unit can play CD-DA (digital audio) and video CD format audio CD-R
and CD-RW that have been finalized (a process that enables CD-R/
CD-RW players to play audio CD-R and CD-RW) upon completion of
recording. It may not be able to play some CD-R or CD-RW due to the
condition of the recording.
∫ DVD-R discs
Panasonic DVD-R recorded and finalized on a Panasonic DVD video
recorder are played as DVD-Video on this unit.
It may not be possible to play these discs in all cases due to the type of
disc or condition of the recording.
∫ Handling precautions
≥Do not write on the label side with a ball-point pen or other writing
instrument.
≥Do not use record cleaning sprays, benzine, thinner, static electricity
prevention liquids or any other solvent.
≥Do not attach labels or stickers to discs. (Do not use discs with exposed
adhesive from tape or left over peeled-off stickers.)
≥Do not use scratch-proof protectors or covers.
≥Do not use discs printed with label printers available on the market.
Page
5
