Crestron CLW-LSWEX-2GD Panduan Instalasi dan Pengoperasian
Jelajahi secara online atau unduh pdf Panduan Instalasi dan Pengoperasian untuk Beralih Crestron CLW-LSWEX-2GD. Crestron CLW-LSWEX-2GD 2 halaman. Wireless lamp switch
CLW-LSWEX-1GD/CLW-LSWEX-1GU/CLW-LSWEX-2GD
Wireless Lamp Switch
Installation and Operation Guide
Description
The CLW-LSWEX-1GD, CLW-LSWEX-1GU, and CLW-LSWEX-2GD are plug-in switches
designed to operate as part of a complete Crestron
via the in NET EX
wireless control network. Without the need for additional control wiring,
®
the CLW-LSWEX-1GD, CLW-LSWEX-1GU, and CLW-LSWEX-2GD easily act in place of a
standard light switch for conventional oor and table lamps.
The CLW-LSWEX-1GD, CLW-LSWEX-1GU, and CLW-LSWEX-2GD are functionally
identical. For simplicity within this guide, the term "CLW-LSWEX" is used except where
noted.
CLW-LSWEX Speci cations
SPECIFICATION
Power Requirements
120 Vac, 60 Hz
Load Ratings
Incandescent/
600 W total*
Tungsten Halogen
Magnetic Low-Voltage
600 VA / 450 W total*
Environmental
Temperature
32 °F to 104 °F (0 °C to 40 °C)
Humidity
10% to 90% RH (noncondensing)
* The load can be split across both channels in the CLW-LSWEX-2GD.
Additional Resources
Visit the product page on the Crestron website (www.crestron.com)
for additional information and the latest rmware updates. Use a QR
reader application on your mobile device to scan the QR image.
Installation
NOTE: Before using the CLW-LSWEX, ensure the device is using the latest rmware.
Check for the latest rmware for the CLW-LSWEX at www.crestron.com/ rmware.
Firmware is loaded onto the device using Crestron Toolbox™.
To install the CLW-LSWEX:
1. Plug the CLW-LSWEX into a wall outlet.
2. Use the wall plate screw to secure the CLW-LSWEX to the wall plate (optional).
3. Plug the controlled lamp(s) into the receptacle(s) located on the bottom of the
CLW-LSWEX.
4. Acquire the CLW-LSWEX to the in NET EX network.
Operation
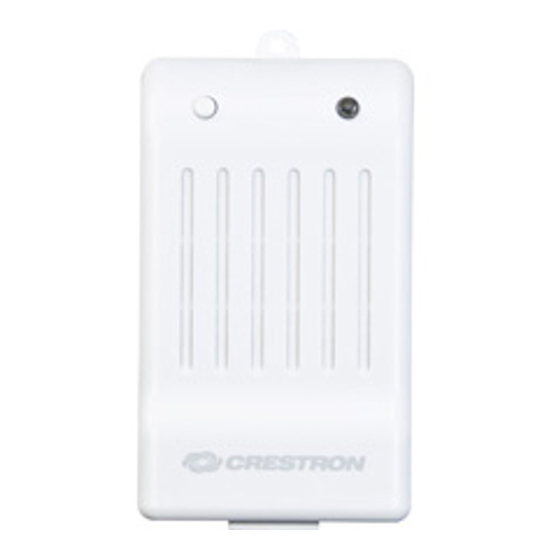
Refer to the following diagram when operating the CLW-LSWEX.
Operating the CLW-LSWEX (CLW-LSWEX-2GD Shown)
Button 1:
Press this button to toggle
load 1 on and off.
The green LED lights to indicate
that the receptacle is energized.
Load 1 receptacle
Load 2 receptacle
(CLW-LSWEX-2GD only)
automation system communicating
®
DETAILS
Button 2 (CLW-LSWEX-2GD Only):
Press this button to toggle
load 2 on and off.
The green LED lights to indicate
that the receptacle is energized.
Wireless Communications
The device connects to the Crestron network via the in NET EX communications protocol.
Use the procedures outlined below to join or leave an in NET EX network and to verify
communications between the device and the control system.
Joining an in NET EX Network
Before a device can be used in a lighting system, it must rst join an in NET EX network.
To join an in NET EX network, the device must be acquired by an in NET EX gateway.
NOTE: A device can be acquired by only one gateway.
1. Put the in NET EX gateway into Acquire mode from the unit itself or from Crestron
Toolbox. Refer to the gateway's manual at www.crestron.com/manuals for details.
NOTE: In an environment where multiple gateways are installed, only one
gateway should be in Acquire mode at any time.
2. Put the device into Acquire mode.
a. Tap button 1 on the device three times, and then press and hold it down
(tap-tap-tap-press+hold) until the LED on the device blinks once (this can take up
to 10 seconds).
NOTE: On the CLW-LSWEX-2GD, button 1 or 2 can be used.
b. Release the button to start the acquire process. The top LED blinks slowly to
show that the device is actively scanning the in NET EX network.
• The LED turns on for 5 seconds to show that the device has been successfully
acquired by the infiNET EX network.
• The LED blinks fast to indicate that the device was not successfully acquired
by the infiNET EX network. Tap the top button to acknowledge the failure.
Ensure the gateway is in Acquire mode and within range before attempting the
acquire process again.
3. Once all devices have been acquired, take the gateway out of Acquire mode. Refer
to the gateway's manual for details.
Leaving an in NET EX Network
To leave an in NET EX network, put the device into Acquire mode, as described in
"Joining an in NET EX Network" above, when no gateway is in Acquire mode.
Verifying Communications Status
To check the communications status of the device, tap the button three times, and then
press and hold it down (tap-tap-tap-press+hold) for up to 2 seconds. The LED blinks to
indicate the communications status. Refer to the following table for details.
LED
Turns on for 5 seconds
The device is communicating with the control system.
Blinks three times
The device is communicating with the gateway, but the
gateway is not communicating with the control system.
Blinks twice
The device is not communicating with the gateway.
Blinks once
The device is acquired but is not communicating with
the network.
Stays off
The device is not joined to the network.
Troubleshooting
The following table provides corrective actions for possible trouble situations. If further
assistance is required, please contact a Crestron customer service representative.
CLW-LSWEX Troubleshooting
TROUBLE
POSSIBLE CAUSE(S)
The lamp does not
The CLW-LSWEX is not
function.
plugged into a live wall
outlet.
The lamp is not turned on.
The lamp is not connected
to the CLW-LSWEX.
The lamp cannot be
The CLW-LSWEX is not
controlled from the control
acquired to the network.
system.
COMMUNICATIONS STATUS
CORRECTIVE ACTION
Verify that the
CLW-LSWEX is plugged
into an ac outlet and that
the circuit breaker is
closed. The green LED
on the CLW-LSWEX
lights when the device is
energized.
Turn on the load locally
at the lamp (i.e. at the
lamp switch).
Connect the lamp to the
CLW-LSWEX.
Acquire the
CLW-LSWEX to the
network.