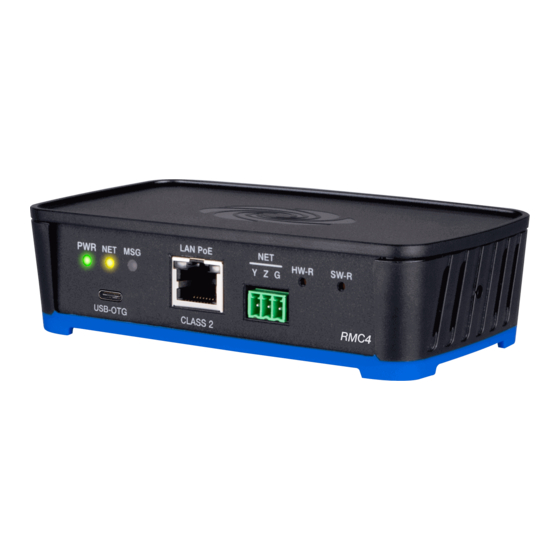
RMC4
4-Series™ Control System
COM 1 Connections
Port
RS-232
G
GND
GND
TX
TX (from RMC4)
TX- (from RMC4)
RX
RX (to RMC4)
RX+ (from RMC4)
RTS
RTS (from RMC4)
TX+ (from RMC4)
CTS
CTS (to RMC4)
RX- (to RMC4)
1. RS-422 transmit and receive are balanced signals that require two lines plus a ground
in each direction. RXD+ and TXD+ should idle high (going low at start of data
transmission). RXD- and TXD- should idle low (going high at start of data
transmission). If necessary, RXD+/RXD- and TXD+/TXD- may be swapped to maintain
correct signal levels.
2. A ground terminal connection is recommended but not required.
Configure the Control System
The control system may be configured using the provided web
configuration interface. The interface can be accessed using the control
system IP address or the Crestron XiO Cloud® service.
Configuration via IP Address
To access the web configuration interface using the control system
IP address:
NOTE: The control system ships with DHCP enabled. A DHCP server is
required to access the web configuration interface via the device
IP address.
RS-422
1
RS-485
2
GND
TX-/RX-
Not used
TX+/RX+
Not used
1. Connect the control system to the network.
2. Use the Device Discovery tool in Crestron Toolbox™ software to
discover the control system and its IP address on the network.
3. Enter the control system IP address into a web browser.
Configuration via Crestron XiO Cloud
The Crestron XiO Cloud service allows supported Crestron devices across
an enterprise to be managed and configured from one central and secure
location in the cloud. Supported devices are configured to connect to the
service. Use of the service requires a registered Crestron XiO Cloud
account.
NOTE:
The device may be disconnected from the service by navigating to
the Cloud Services tab in Crestron Toolbox software (Functions >
Device Info > Cloud Services). For details, refer to the Crestron Toolbox
help file.
To access the web configuration interface using the Crestron XiO Cloud
service:
1. Connect the control system to the network.
2. Record the MAC address and serial number that are labeled on the top
of the control system. The MAC address and serial number are
required to add the device to the service.
3. Do either of the following
For existing accounts, access the Crestron XiO Cloud service at
l
https://portal.crestron.io.
For new accounts, register for a Crestron XiO Cloud account at
l
www.crestron.com/xio-cloud-registration.
4. Claim the device to the service as described in the
User Guide (Doc.
8214).
5. Select the device from the cloud interface to view its settings.
Quick Start
Crestron XiO Cloud
4