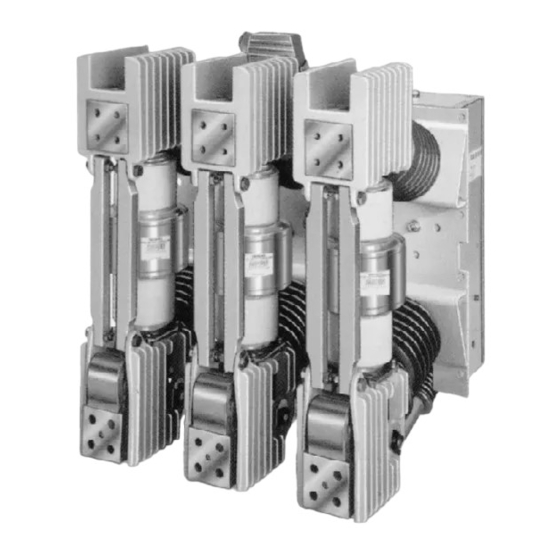
Siemens 3AH Petunjuk Manual - Halaman 31
Jelajahi secara online atau unduh pdf Petunjuk Manual untuk Peralatan Industri Siemens 3AH. Siemens 3AH 38 halaman. Vacuum circuit breaker operator module
Juga untuk Siemens 3AH: Petunjuk, Pemasangan, Pengoperasian, Pemeliharaan (33 halaman), Pengoperasian & Pemeliharaan Instalasi (20 halaman)

Overhaul
2.4 Fasten the pole head to the post insulator ( 1 6.1 )
"finger tight" using hex head bolt, lock washer a n d
flat washer.
2.5 Attach struts (28) to the upper pole su pport (20),
replace h a rdware ( M 10). but do not tighten at this
time.
2.6 Couple levers (48.6) and drive link (48.9) to the eye
bolt (36.3), using the pin supplied. Apply retaining
clips. Appropriate pin is modestly chamfered, not
to be confused with pin for the insulating coupler.
2.7 Raise the terminal clamp (29.2) against the step
or the spacer (if applicable) of the moving contact
(36.1 ) of the vacu um interrupter (30) so that the
ra dius of the movable contact faces the connect
ing surface of the flexible connector (29.1 ). Refer to
Figure 20 and employ technique ill ustrated to fasten
terminal clamp. Note opposing wrenches.Tighten
the bolt(s) of the terminal clamp to a torq ue of 40
Nm (30 ft. lbs.), taki ng care to see that the terminal
of the vacuum interrupter is not subjected to exces
sive bending movement.
NO T E: Excessive bending movement exerted while
fastening the terminal clamp will damage the vacuum
interrupter.
2.8 Align pole head (20) correctly and tighten bolt fasten
ing it to the post insulator. Fasten secu rely a l l bolts
associated with struts (28).
2.9Tighten vacuum interrupter fastening bolt (31.2) on
the pole head (20) holding the vacuum interrupter
firmly by its upper insu lator a n d operate levers
(48.6), by hand, to see whether the movable contact
moves freely. If any binding or lack of freedom is
noted, loosen bolt (31.2) and adj ust the vacuum
interrupter in pole head by turning and moving it
slig htly.
2.10The centeri ng ring (28.1 ) has been loose and "float
i n g " d uring installation of the vacuum interrupter.
Check that the movable contact is free to move ver
tically without binding, and then tighten the hard
ware which secures the centering ring. Re-check
that the movable contact is free to move vertically
without binding.
2.11 Attach insulating coupler (48) a n d lever (48.6)
together, using pin (48.5). Apply retaining clips.
Correct pin has ends which h ave been generously
chamfered.
2.1 2 Open and close circuit breaker several times a n d
then check t o s e e that all bolted joi nts and devices
are tight.
3. Checking the Contact Stroke
3.1 Open the circuit breaker.
3.2 Free insulating coupler (48) by removing pin (48.5).
The vacu u m interrupter contacts m ust now close
a utomatically as a consequence of atmospheric
pressure.
3.3 Observe the terminal clamp (29.2) th rou g h the open
ings on each side of the pole bottom (40). Using
vernier calipers (automatic circuit breaker test
equipment preferable) measure the d istance from
the bottom surface of the terminal clamp to the bot
tom edge of the cutout opening. M easure carefu lly
a n d record your result.
3.4 Connect the insulating coupler (48) using pin (48.5)
and the reta i n i n g clips provided.
3.5 Repeat the measurement described in step 3.3 again
with care to maximize accu racy. Record your result.
3.6 Determine difference between the measurements
made under steps 3.3 and 3.5. You r resu lts should
be per Table
7.
3.7 If you fa i l to achieve the listed results, ca refu lly
repeat the entire procedure making certain of your
measurements.
3.8 Loosen eyebolt locking nut on insulating coupler (48),
and retain position of the eye. M a ke adjustments
in one-half turn increments. After adj ustment is
completed, tighten eyebolt locking n ut to 26-34 ft-lb.
(35-45 N m ) .
4. After eyebolt is tightened t o proper torq ue, repeat all
measurement procedures, making certain they are in
agreement with values ind icated in 3.6.
5. Complete all other maintenance procedures. Completely
reassembled circuit breaker should pass high potential
test before it is ready for service.
Hydraulic Shock Absorber
The mechanism is equipped with a hydraulic shock absorber
that functions when the circuit breaker opens. See item 6 1 .8
(Figure 6a) . The shock absorber should req uire no adj u st
ment. However, at maintenance checks, the shock absorber
should be examined for evidence of leaking. If evidence of
fluid leakage is found, the shock absorber must be replaced
to prevent damage to the vacuum interrupter bellows.
31
