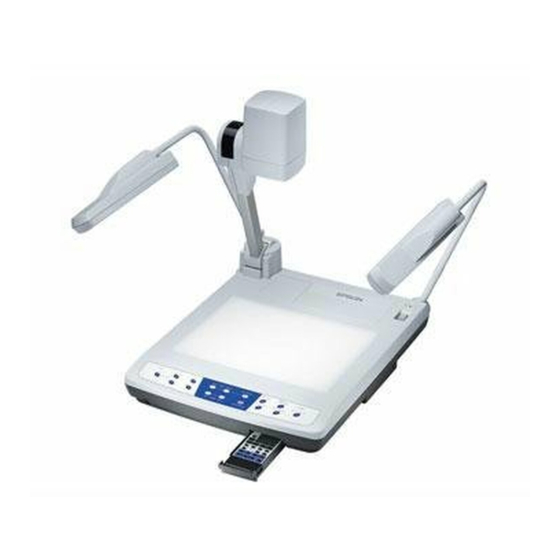
Epson ELPDC05 - High Resolution Document Imager Camera Tips - Halaman 3
Jelajahi secara online atau unduh pdf Tips untuk Proyektor Epson ELPDC05 - High Resolution Document Imager Camera. Epson ELPDC05 - High Resolution Document Imager Camera 3 halaman. High resolution document camera
Juga untuk Epson ELPDC05 - High Resolution Document Imager Camera: Ringkasan Teknis (7 halaman), Spesifikasi (2 halaman), Panduan Pengguna (29 halaman)

General Steps:
1. If the document camera is not ready to use, you may need to raise the lamp unit and
adjust the lamps.
a. There are two lighting arms on either side of the unit. Raise the arm for the left
lighting unit until it stops. Then raise the arm for the right lighting unit until it
stops.
b. Position the lighting units so they face the stage (downward).
c. Press the camera arm release button [located where the arm meets the platform
(left rear corner of unit)] as you raise the camera arm. When the camera arm
stops, release the button to lock the arm into place.
d. Rotate the camera head so the lens faces the stage (downward).
2. Make sure the video/data projector is on and ready to project.
3. Make sure the document camera is on [the light by the
of unit) should be illuminated and the leftmost light on the front panel (
MAIN/CAMERA
4. Place the object on the light box and adjust the camera head to face to object (the camera
head is on top of the main support arm that expends upward from the left rear corner of
the unit).
5. Select a proper lighting source using the
time you press the button the upper lamps will go on, or the light box (lower light) will
go on, or all lights will go off. Use the upper lamps to project a paper document or other
materials. Use the light box to project transparencies. NOTE: It may take a few seconds
for the lower light to come on.
6. To focus the object, use the
indicator light flashes until the image is focused).
7. To adjust the size of your image, use the
8. To adjust the brightness of the object, turn off the auto iris feature (the light
AUTO/MANUAL
and
IRIS CLOSE
the overall image.
9. To adjust the color, press the
time to return to automatic white balancing.
10. To change the object projected during the presentation, freeze the image on the screen by
pressing the
PAUSE
cancel the freeze and display the new image.
) should be illuminated].
AUTO FOCUS
light will not be illuminated when auto iris is off) and use the
buttons. "Open" will lighten the overall image and "close" will darken
WHITE BALANCE
button, then change the object. Press the
button (right rear corner
ON/OFF
button on the document camera. Each
LAMP
button (it automatically focuses for you and the
buttons (
or
ZOOM
TELE
button once. Press the button a second
PAUSE
MU Locations with Epson ELPDC05s:
•
Conservation Auditorium
•
114 Physics
•
126 Physics
•
103 Schlundt
•
18 Tucker
Academic Support Center
University of Missouri-Columbia
505 East Stewart Road
Columbia, Missouri 65211-2040
Copyright © 2004 MU.
Revised: 06 August 2004
INPUT
).
WIDE
IRIS OPEN
button again to
