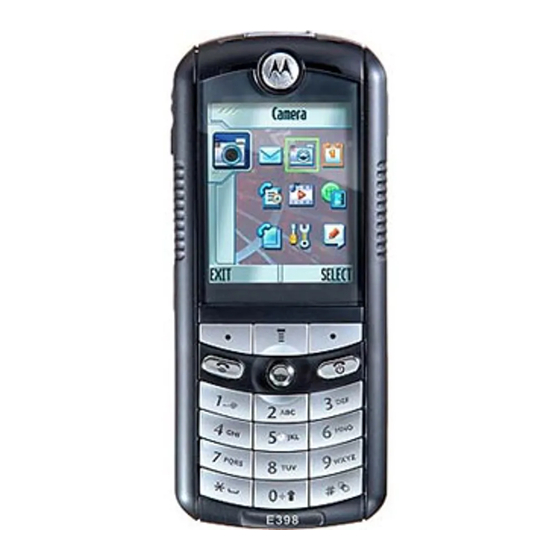
Motorola E398 series Panduan Pengguna - Halaman 10
Jelajahi secara online atau unduh pdf Panduan Pengguna untuk Telepon Tanpa Kabel Motorola E398 series. Motorola E398 series 31 halaman. Tri-band wireless telephone
Juga untuk Motorola E398 series: Panduan Servis (44 halaman), Lembar data (3 halaman), Panduan Pengguna (29 halaman), Panduan Pemecahan Masalah dan Debug (12 halaman)

Copying Objects to Another Device
You can use a Bluetooth wireless connection to copy a picture,
sound, phonebook entry, datebook event, or bookmark from your
phone to your memory card, another phone, computer, or
hand-held device.
Copying a Multimedia Object
Highlight the object on your phone that you want to copy to the
other device, then press M >
Select a recognised device name listed in the
or
[Look For Devices]
to search for the device to which you want to
copy the object.
Copying a Phonebook Entry, Datebook Event, or
Bookmark
Highlight the item on your phone that you want to copy to the other
device, then press M >
Send
Select a recognised device name listed in the
or
[Look For Devices]
to search for the device to which you want to
copy the item.
Taking and Sending a Photo
Shortcut: Press the camera key to activate the camera. Press the
camera key again to take a photo.
To activate your phone's camera using the menu system:
M >
Find the Feature
Tip: When you want to take photos in low-light settings, press
M >
Light
>
On
to activate the built-in camera light.
28 - Highlight Features
Press
To
4
SELECT
(+)
perform the storage option
Press M to open the
Pictures Menu
Pictures Menu
can include the following options:
Option
Description
Go To Pictures
View pictures and photos stored on
your phone.
Auto-Timed Capture
Set a timer for the camera to take a
photo.
Delete all pictures.
Delete All
Open the setup menu to adjust
Pictures Setup
picture settings.
Switch Storage Device
Save the photo in phone memory or
on a memory card.
View Free Space
See how much memory remains for
storing pictures.
Activate the camera light for photos
Light
taken in low-light settings.
Changing Phone Skin
Change the look and feel of your phone's display by selecting a
different skin setting.
M >
Find the Feature
Your phone displays the new skin. Press
previous skin.
30 - Highlight Features
Copy.
Object Exchange
>
Bluetooth.
Object Exchange
Multimedia
>
Camera
when the camera is active. The
Settings
>
Personalise
>
Skin
> skin
BACK
(-) to return to the
The active viewfinder image appears on your display.
Press S up or down
menu,
or increase image
Press BACK (-) to return to
menu,
Point the camera lens at the photo subject, then:
Press
1
CAPTURE
2
STORE
DISCARD
3 S
Sending a Multimedia Message
phone users, and to email addresses.
Find the Feature
Press
1 keypad keys
2 M
3 S
4
SELECT
5 S
6
SELECT
7 S
8
SELECT
9 M
10 S
11
SELECT
IMAGE
to zoom in or out
AREA
Press S left or
Photo Viewfinder
right to decrease
Memory Used:72%
BACK
brightness
Press M to open Pictures Menu
previous screen
To
(+)
take a photo
(+)
view storage options
or
(-)
delete the photo and return to active
viewfinder
If you choose to store the photo,
continue to step 4.
scroll to
Apply as
Apply as Screen
Apply as Phonebook Entry
A Multimedia Messaging Service (MMS) multimedia
message contains one or more slides with text and
embedded media objects (including photos, pictures,
animations, sounds, voice records, and/or video clips).
You can send the multimedia message to other wireless
M >
Messages
>
New Multimedia Msg
To
enter slide text
open the
scroll to
(+)
display a list of items you can insert
scroll to Picture,
Video,
New
Contact Info
(+)
select the file type
highlight the file you want
(+)
insert the file
To add another slide to the message,
continue to step 9.
To send the message, go to step 14.
open the
slide
scroll to
(+)
display a list of items you can insert
Photo Storage Space
Used (Phone or
Memory Card)
Press CAPTURE (+) to
CAPTURE
take a photo
Send in
Message,
Store
Only,
Wallpaper,
Saver, or
Highlight Features - 29
>
Create Message
MMS Menu
Insert
Voice
Record, Sound,
Note, or
Page,
Quick
MMS Menu
to insert a new
Insert
Highlight Features - 31
