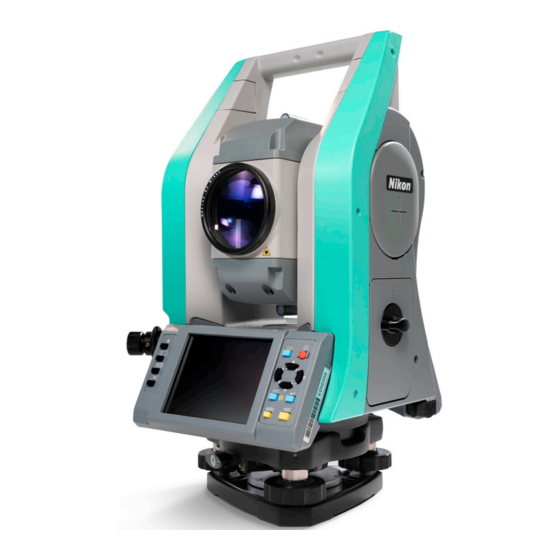
Nikon XF SERIES Panduan Memulai Cepat - Halaman 2
Jelajahi secara online atau unduh pdf Panduan Memulai Cepat untuk Alat Ukur Nikon XF SERIES. Nikon XF SERIES 2 halaman. Total station
Juga untuk Nikon XF SERIES: Panduan Memulai Cepat (4 halaman)

1
2
3
4
5
6
7
8
Item
Description
1
Carrying handle
2
Optical sight (Finder)
3
Telescope focusing ring
4
Telescope eyepiece
5
Diopter ring
6
Reticle plate cover
7
Face-1 display / keyboard
8
Tribrach clamp knob
9
Laser Safety label. Attached underside when
the instrument is laser plummet model.
10
Horizontal clamp
11
Horizontal tangent screw
12
Battery box release knob
13
Battery box
14
Vertical tangent screw
17
18
16
15
14
13
19
12
11
10
9
20
21
22
23
Item
Description
15
Vertical clamp
16
Horizontal axis indication mark
17
Laser Safety label. Attached to the telescope.
18
Objective. LASER LIGHT IS EMITTED FROM THIS
PART.
19
Optical or optional laser plummet. (This picture
shows the optical plummet.)
20
Leveling screw
21
Tribrach
22
Circular level
23
CFR label. Attached to the underside of the
keyboard.
24
FCC label. Attached to the underside of the
keyboard.
25
Data output / external power / input connector.
CAUTION: Input voltage shall be 4.5-5.2 V DC
26
USB ports (x2)
27
Laser Safety label. Attached to the telescope.
2
Standard components
27
• Instrument main body
• Battery pack (x 2)
• Battery charger
• AC adapter
• Adjustment pin, Allen wrench
16
Charging the battery pack
Warning: Before charging or connecting the battery, please refer to the battery safety information in the
C
13
Nikon XF Series Total Station Instruction Manual.
12
The battery pack is supplied partly charged. Before using the battery for the first time, charge the battery
completely using the supplied battery charger.
Inserting the battery pack
26
Before inserting the battery pack, clear any dust or other foreign particles from the battery contacts.
25
24
1
1. Turn the battery box release knob counterclockwise and open the battery box cover.
2. Put the battery pack into the battery box. Insert the battery pack with the connectors bottom first, facing
inside.
3. Close the battery box cover and turn the knob clockwise until the secure click sound is heard.
C
CAUTION: If the battery box cover is not closed, this could adversely affect the watertightness of the
instrument.
• Objective lens cap
• Rain/dust cover
• Carrying case
• Shoulder strap (x 2)
• USB cable
2
3
3
