Disaster Area Designs micro.ghost Panduan Pengguna - Halaman 2
Jelajahi secara online atau unduh pdf Panduan Pengguna untuk Konverter Media Disaster Area Designs micro.ghost. Disaster Area Designs micro.ghost 4 halaman. Usb midi interface

I
ntrOductIOn
Thank you for your interest in the micro.ghost USB MIDI Interface!
The micro.ghost was designed as a complliment to your existing MIDI controller solution,
adding USB Host functionality to support MIDI devices that don't have a 5-pin port. The
micro.ghost converts the MIDI data to and from your controller, DAW, or pedal into the native
USB protocol that some devices require, and vice-versa.
We've been making compact MIDI controllers for a while now, so we have a pretty good han-
dle on the pitfalls and problem spots when dealing with MIDI on your pedalboard. We'll do
our best to guide you through the process step-by-step, but we can't cover every special case.
If you read through the whole manual and your question isn't covered, please email us from
the Contact page on our website and we'll do our best to sort you out as quickly as we can.
I
O
ns and
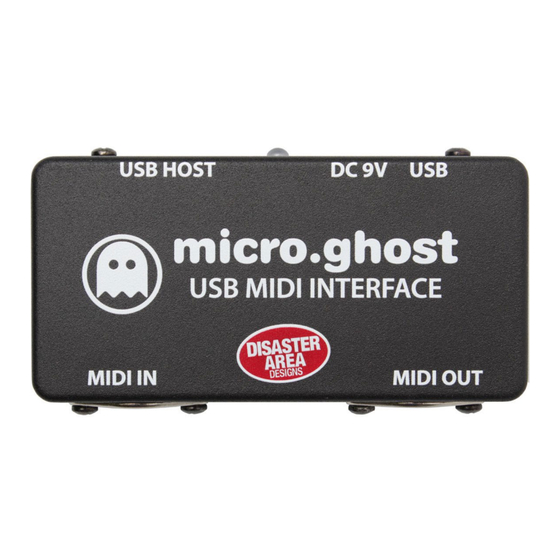
The micro.ghost is a pretty straightforward little box. It has a few inputs and outputs, which
we'll explain here:
On the upper side of the box, you'll find a large USB Host port, a small USB device port, and
a standard 9V DC barrel jack. You'll also see a status LED, which indicates power, USB status,
MIDI activity, and more.
USB DEVICE
On the bottom side of the micro.ghost there are two standard 5-pin MIDI ports for input and
output / thru.
Turn the enclosure over to reveal the eight configuration switches. These allow you to config-
ure the micro.ghost to respond on a particular MIDI channel, disable the MIDI thru function,
and more.
We'll cover the configuration switches later in the manual. The default setting is all switches
OFF.
uts
DC 9V
MIDI IN
LED
USB HOST
MIDI OUT
