Balmar Smartgauge Panduan Instalasi dan Operator - Halaman 6
Jelajahi secara online atau unduh pdf Panduan Instalasi dan Operator untuk Alat Ukur Balmar Smartgauge. Balmar Smartgauge 20 halaman. Battery monitor

SECTION 3.0 – INITIAL START-UP
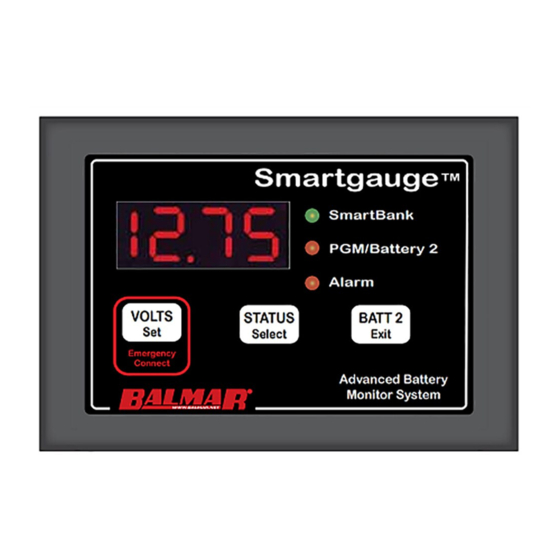
OFF = No SmartBank Connected
Fast Flash = SmartBank Standby
Slow Flash = SmartBank High Voltage Disconnect
Display Battery 1
(House Battery Bank)
Volts
On powering up Smartgauge™ for the first time, the display will show the software revision information. The fol-
lowing are just examples. They are required for troubleshooting.
r1.03 = Software revision 1.03
b1.05 = Battery model revision 1.05
Smartgauge™ will then display "SC" indicating that it's determining system battery voltage. Depending on the
system voltage detected during the system check, the Smartgauge™ will display "SC12" or "SC24". Refer to the
chart at the end of this manual headed "12.1 – First time power up or following factory reset" for specifics.
The next display will indicate "bt 1". This is your opportunity to select the battery type. Refer to Section 4.2,
headed "Battery types", for further details. Pressing the STATUS button will scroll through the available battery
types. Pressing the VOLTS button will store the battery program you select based on your battery type. The
display will flash four times to signify the data has been written to computer memory. The display will then show
the current battery voltage.
That completes the installation and initial set-up.
SECTION 3.1 – DETERMINING BATTERY CHARGE STATUS
Once the Smartgauge™ has completed its initial start-up routine, you can determine the
charge status of the primary (house) battery bank by pressing the STATUS button. The
charge status will be displayed as a percentage. During the first operation, the monitor
will display "C 75", indicating 75 percent charge. As the Smartgauge™ goes through
its first charge cycle, it will begin to "learn" the actual condition of the batteries, and it
will more accurate during subsequent periods of operation. If you know the actual level
of charge, you also have the option to manually set the charge status. See page 7 for
multiple methods for calibrating the monitor to ensure accuracy.
To revert to the Battery Voltage, press the VOLTS button. Pressing the BATT 2 button
will show the voltage on Battery 2 if the Smartgauge has been wired to both house and
starting batteries. The PGM/Batt 2 LED will be lit whenever voltage at the starting battery is being displayed.
To revert to the voltage or charge status of the house battery bank, press the VOLTS button or the STATUS
button.
Smartgauge
SmartBank
SmartBank
PGM/Battery 2
Alarm
VOLTS
STATUS
BATT 2
Set
Select
Exit
Emergency
Connect
Advanced Battery
Monitor System
ON = Battery 2 Voltage Displayed
Flashing = Programming Mode
™
ON = Alarm Triggered
Display Battery 2 Volts
(Engine Battery)
Display Battery 1
(House Battery Bank)
Status (State of Charge)
PAGE 6
