ClearCube A3100 Panduan Memulai Cepat - Halaman 3
Jelajahi secara online atau unduh pdf Panduan Memulai Cepat untuk Pemanjang ClearCube A3100. ClearCube A3100 3 halaman. Upgrading
Juga untuk ClearCube A3100: Panduan Memulai Cepat (2 halaman), Mulai Cepat (2 halaman), Panduan Memulai Cepat (2 halaman)
2. From the top, pull the bezel toward yourself and lift it up
slightly.
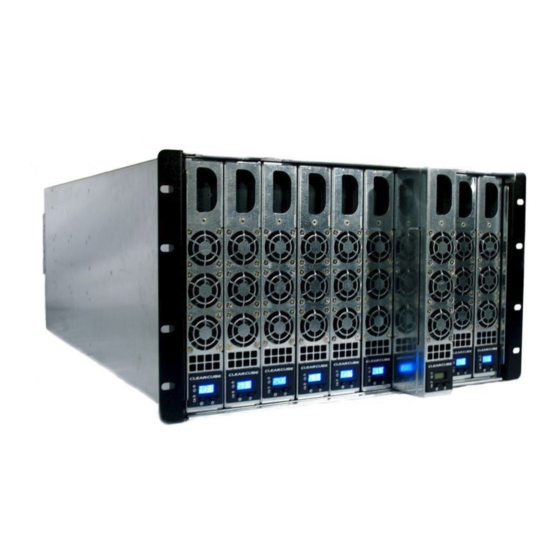
3. To insert a Blade PC, hold the blade so the D-shaped
handle in the front panel is upright and is facing you.
Align the Blade PC with the top and bottom guides in the
chassis and slowly insert the Blade PC into the chassis.
(Chassis slots are numbered from 1 to 10.)
There is a slight resistance when Blade PC signal and
power connectors are inserted into backplane connectors.
When properly seated, a Blade PC is flush with the front
edge of the bottom guide bracket.
4. Replace the bezel after inserting Blade PCs.
5. Insert Ethernet cables in the active port or ports, located
on the expansion backplane, for each Blade PC in the
chassis. Active ports are indicated by illuminated LEDs.
6. To power on a Blade PC, press the right-most button
on the front of the Blade PC.
To remove an A–Series Blade PC
1. Open the chassis front bezel by pressing in on the latch
located on the upper-right side of the chassis.
WEEE Disposal Guidelines
In the European Union, this electronic product falls under the European Directive (2002/96/EC) WEEE. When it reaches
the end of its useful life or is no longer wanted, it should not be discarded with conventional waste, but disposed of at an
approved designated recycling and/or treatment facility. Laws are different in each country, so please check with your
local authorities for proper disposal instructions. For assistance, contact ClearCube at [email protected].
ClearCube Technology, Inc.
3700 W Parmer Lane
Austin, Texas 78727
2. Power down the Blade PC by pressing the power button
(the right-most button
Blade PC).
3. Use the D-shaped handle on the front panel to pull gently
on the blade until it slides out. Support both ends of the
blade when you remove it completely from the chassis.
Related Documentation
See A–Series Setup and Installation Guide for additional
information about A–Series Chassis and Blade PCs.
Documentation is available on the ClearCube Support site.
Contacting Support
Email
Web site
www.clearcube.com/support/
Toll-free
(866) 652-3400
Phone
(512) 652-3400
(512) 652-3500
Page 3 of 3
located on the front of the
www.clearcube.com
G020097 Rev C, 1.2.06.05.2013