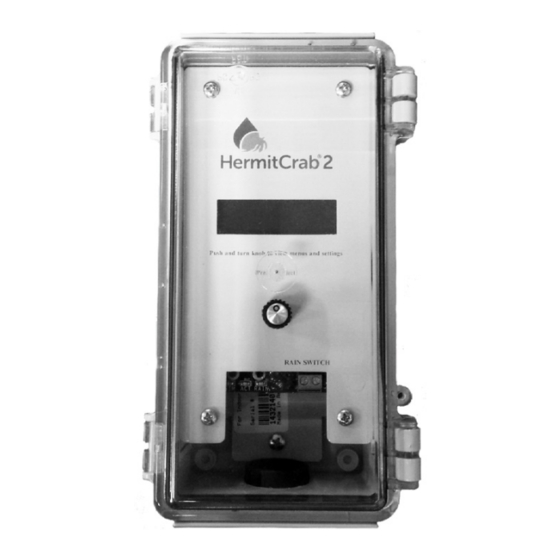
ET Water HermitCrab 2 Panduan Instalasi Pengguna - Halaman 4
Jelajahi secara online atau unduh pdf Panduan Instalasi Pengguna untuk Pengontrol ET Water HermitCrab 2. ET Water HermitCrab 2 12 halaman.

Step 3: Mount your HermitCrab
First, attach the swivel-out brackets to the bottom corners of the plastic enclosure. Then position
the HermitCrab on the mounting surface and anchor it using the included screws. For anchoring to a pedestal,
use self-tapping metal screws. For stainless steel enclosures, drill a pilot hole, and then use a tapered bit to
increase the hole size. Always wear proper safety equipment including gloves, goggles, and if producing dust,
a dust mask.
Step 4: Connect communications cable to your HermitCrab
Plug the communications cable into the 9-pin port located at the base of your HermitCrab.
NOTE: If using conduit, first insert a conduit connector through the hole at the bottom of the
HermitCrab enclosure and tighten with a locknut. (Note: We recommend threading the cable and any
rain sensor wires through the conduit starting at the host controller.)
Step 5: Connect communications cable to host controller
Attach the communications cable to your host controller. Refer to the picture gallery starting on
Page 9 for connection locations and any instructions specific to the brand and model of your
controller.
Optional: Connect rain sensor
If your host controller has a rain sensor, remove the wires and connect them to the Rain Switch
terminals on your HermitCrab. If you have a wireless sensor, leave the sensor receiver power wires attached
to the host controller, but splice them with two lengths of wire and attach them to the HermitCrab Rain Switch
terminals. The blue wire connects to the left terminal; the white wire connects to the right terminal. You will
need to configure your HermitCrab to look for rain sensor input (see Step 10 for instructions).
Step 6: Power the host controller.
The LCD on the HermitCrab will illuminate and show the Setup Menu.
Step 8: Select the Host Controller.
On the HermitCrab Setup Menu the display defaults to highlighting the first selection. Press the knob to access
the host list, turn the knob to highlight your selection and press the knob to select it.
HOST CONTROLLER ______________________________________________________
NOTE: IF YOU DON'T SELECT A HOST, OR IF YOU SELECT THE WRONG HOST, YOUR
HERMITCRAB WILL NOT OPERATE CORRECTLY.
Step 9: Activate a station.
It is important to ensure the HermitCrab can activate a station on the host controller.
On the HermitCrab Setup Menu, turn the knob to highlight station test.
Press the knob to access the station test screen.
Turn the knob to select the station you want to activate, and then press the knob to select it.
Use the same procedure to enter the run time minutes.
Highlight the Begin selection and press the knob.
Page 4
Step 10: Enable the rain sensor (if applicable).
On the HermitCrab Setup Menu, turn the knob to select Rain Sensor Disabled, press the knob and highlight
Enable. Press the knob to make the selection.
Step 11: Execute a Test Dial
A Test Dial initiates a connection to the ET Water servers where all of your account information,
landscape profiles, and watering schedules are stored. Turn the knob to highlight the Test Dial
selection and press the knob to make the selection. You'll see a graphic that displays signal
strength. Make sure there is a cellular signal. At the bottom of the screen, highlight the Dial
selection and press the knob to make the selection. The HermitCrab will display that it is
transmitting ("TX") and will show that it is receiving ("RX") and it will display the number of data
packets that are received. When the communication is finished, you will see "Done".
NOTE: You may execute a Test Dial at any time. With each connection, your HermitCrab
downloads the latest watering schedules, so this feature is especially useful if you have made
changes to your landscape profile.
Step 12: Complete the HermitCrab Setup.
You can complete the setup process by turning the knob and selecting Setup Complete. Press the knob to
make the selection.
Some Key Facts to Remember
Your HermitCrab is designed to send watering commands to your host controller based on
smart irrigation schedules it retrieves daily from your account at www.etwater.com.
Your HermitCrab receives its power from your host controller. When the host controller is
turned off, your HermitCrab will also be turned off.
If you want to use a remote control, you will need to disconnect the HermitCrab
communications cable and reconnect it once the remote operation is complete. You can also
purchase the QuickDraw service from ET Water Systems. The service lets you use your
Smartphone to turn stations on and off as well as suspend the controller.
If you add watering stations or change your landscape profile, there's no need to reprogram
your HermitCrab. You simply edit your landscape profile online, and the new information will
download to your HermitCrab automatically.
Your HermitCrab can connect to any compatible host controller—just be sure you have
selected the correct Host type and that you are using the correct communications cable. Then,
update your landscape profile if you move it to a new location.
You can stop watering at any time by turning the knob to select Cancel. The LCD screen will
display which station is currently being irrigated. The cancel selection is at the bottom right of
the LCD screen.
Page 5
