CYP CLUX-18W Panduan Pengoperasian - Halaman 7
Jelajahi secara online atau unduh pdf Panduan Pengoperasian untuk Kabel dan konektor CYP CLUX-18W. CYP CLUX-18W 12 halaman. 1 by 8 hdmi 1.3 splitter
Juga untuk CYP CLUX-18W: Panduan Pengoperasian (13 halaman)

6. Installation
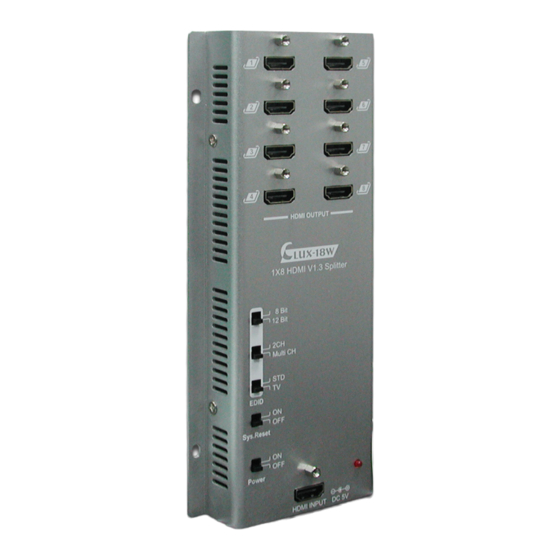
Front Panel
⑤
① . HDMI OUTPUT 1~8:
Connect your LCD TV or HD monitor with
HDMI cables.
② . EDID selection:
STD/TV – By switching to STD the user
can select the deep color and audio
channel functions, if switching to TV the
unit will read the TV ' s EDID and will then
①
send the image from the HDMI source.
Note: When in STD mode it is suggested
switching to 8 bit when displaying media
from the system.
2CH/Multi CH – Supports either 2
channels or Multi audio channels. This
option is only available when EDID is in
STD mode.
Note: Before selecting Multi CH please
be sure the connected TV/display
supports it, otherwise the TV/display
will have no audio output unless HDMI
output connects to an AVR and then to
the TV/display.
②
8/12 bit – Support 8 or 12 bit ' s deep color
function. This selection is only available
when EDID is in STD mode.
Note: When HDMI output has both 8 bit
③
and 12 bit displays, in order to ensure
all output will display properly, please
④
switch the first HDMI output to 8bits. On
the other hand when all outputs are of
the same strength, then switch to either
12 bit or 8 bit accordingly. The splitter will
not function properly if the displays are
of different bit strength, it cannot output
two different bit strengths at the same
time.
③ . Sys. Reset: System reset function.
It is always suggested to have this
function switched off except when
doing a system reset. By switching this
function on the system will reset HDMI
output to HDMI 1 in 8~10 minutes,
switching this off means CEC bypass.
Note: The system reset function only
works when the displayer has a built in
CEC function.
④ . Power & LED: Power switch On/Off Red
LED illuminate when power is on.
⑤ . HDMI INPUT: Connect your source
equipment with HDMI cables.
3
