Euro-Pro S3325H Manuale d'uso - Pagina 5
Sfoglia online o scarica il pdf Manuale d'uso per Pulitore a vapore Euro-Pro S3325H. Euro-Pro S3325H 8. Canister steam cleaner 120v., 60hz., 1500 watts

USAGE SUGGESTIONS FOR THE STEAM CLEANER
Wood, Vinyl and Marble Floors
Use the floor brush with a terry cloth
attached. Move the brush across the floor
as if you are mopping. When the towel is
soiled, allow to cool, then turn the towel
over or replace it with a clean towel. If
you are working on a very dirty area, you
can move the brush over the area slowly,
several times. If it is a wood floor, move
fast to avoid heat or moisture buildup in
the wood. By cleaning with the towel over
the brush, you will not affect the shine on
the floor.
To Strip Wax: Use floor brush for open
areas; detail brush for corners or tight
areas - no towel, slow strokes. Work a
small area at a time - remove the
emulsified wax from the floor. When all of
the wax has been stripped, immediately
clean the floor and brushes with water
before residue has a chance to harden on
them. Go back over the stripped area with
the floor brush with a towel to remove any
remaining residue before waxing.
To Clean Waxed Floors: Wrap clean
towel around the floor brush, brush
quickly. This will cause the dirt to be
removed but not the wax.
Vinyl Floors: Do not allow heat to buildup
in any kind of vinyl, since it can soften it
enough to affect its texture. Work fast on
vinyl.
Tile Floors: Use the concentrator with the
nylon detail brush attached to an
extension. Have the floor brush with cloth
attached ready as well. Clean the grout
between the tiles with the detail brush.
Remove the detail brush and attach the
floor brush, move the brush across the
floor to clean the tile and remove excess
moisture and residue. For areas of tile that
are very dirty, remove the towel and
agitate with the brush. Do not let the area
dry before you wipe with a towel.
Spot Cleaning (Carpets)
Use the concentrator with or without the
nylon detail brush. Move slowly over the
soiled area, allowing the steam to
penetrate. Agitate with detail brush or
clean towel. Dab the spot with the towel
(do not rub). Repeat as necessary to
remove stain. Vacuum only after the
carpet has completely dried.
Always test color fastness of carpet in an
inconspicuous area before cleaning.
If your steam cleaner fails to remove
stubborn stains a commercially available
carpet shampoo may be required.
Do NOT add cleaning solutions, scented
perfumes, oils or any other chemicals to
the water used in this appliance as this
may damage the unit or make it unsafe
for use.
Upholstery
Use the floor brush attached directly to
the hand grip with a clean white terry
cloth towel. Use fast, light strokes,
avoid getting the fabric wet. Be patient
with stubborn spots; work on a spot
gently for no more than a minute at a
time, then wait five minutes for the area
to dry and repeat. Use circular
movements or back-and-forth and side-
to-side movements to get all sides of
surface fibers then blot with a towel.
Finish with a brushing in one direction
that will give the fabric a uniform
appearance.
CAUTION:
Always
determine the color-fastness
of any fabric-especially with
reds or blues - by taking a clean,
moist, warm towel and gently
rubbing a small area as far down on
the back or other out of the way
place on the furniture as possible. If
color comes off on the towel, you
may need to have the piece dry
cleaned.
10
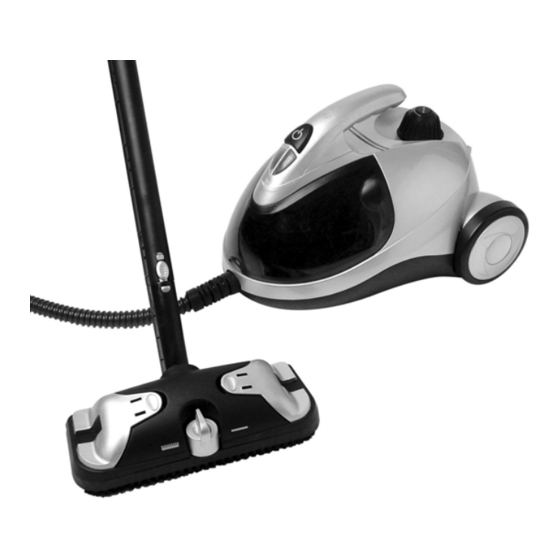
GETTING TO KNOW YOUR CANISTER STEAM CLEANER
1.
On/Off Switch
11. Hose Hand Grip
2.
Heating Light (Red)
12. On/Off Steam Switch
3.
Steam Ready Light
13. Floor Brush
4.
Water Tank Safety Cap
14. Towel Clamps
5.
Carrying Handle
15. Carpet/Floor Selector
6.
Transparent Accessory
16. Large Brass Bristle Brush
Compartment
17. Small Nylon Bristle Brush
7.
Extension Tubes (x2)
18. Angle Concentrator
8.
Latch Release Button
19. Window Squeegee
9.
Floor Brush Angle Adapter
20. Steam Diffuser
10. 6-ft Flexible Steam Hose
Technical Specifications
Voltage:
120V., 60Hz.
Power:
1500 Watts
Water Capacity:
47 U.S. Fl. Oz. (1400 ml)
Steam Generator: Stainless Steel
IMPORTANT: Before assembling the steam cleaner for the first time, make sure to
remove any protective film from the accessory and hose ends.
21. Accessory Adapter
22. Concentrator Nozzle
23. Towel For Floor Brush
24. Steam Diffuser Bonnet
25. Measuring Cup
26. Funnel
27. Parking System
28. Replacement O-Rings
(x3)
3
