American Standard EB-FB110SW Manuale d'installazione e d'uso - Pagina 3
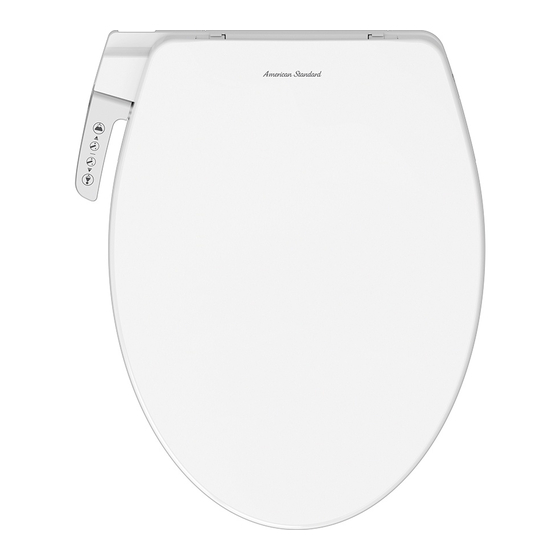
Sfoglia online o scarica il pdf Manuale d'installazione e d'uso per Servizi igienici American Standard EB-FB110SW. American Standard EB-FB110SW 7. Slim smart washer

ส่ ว นประกอบ
1.Main body
ส่ ว นประกอบหลั ก
3.Fixing Components
อุ ป กรณ์ ย ึ ด ต่ อ
Connecting bolt (2)
Expansive nut (2)
สลั ก เกลี ย วยึ ด
น๊ อ ตต่ อ ยื ด
Sliding plate (2)
Rubber gasket (2)
แผ่ น รองเลื ่ อ น
ประเก็ น ยาง
4.T-shaped connector
5.Water hose
ข้ อ ต่ อ รู ป ตั ว ที
สายน้ ำ ดี
Filter
ไส้ ก รอง
Note:
There are two methods for installation. The way of employing expansive nuts is recommended. Another way is
using butterfly nuts. Please choose one for specific case.
หมายเหตุ :
การติ ด ตั ้ ง สามารถทำได้ ส องวิ ธ ี ทางบริ ษ ั ท แนะนำให้ ใ ช้ ว ิ ธ ี ท ี ่ ใ ช้ น ็ อ ตต่ อ อี ก วิ ธ ี ค ื อ วิ ธ ี ท ี ่ ใ ช้ น ็ อ ตบิ ด กรุ ณ าเลื อ กใช้ อ ั น ใดอั น หนึ ่ ง แล้ ว แต่ ค วามเหมาะสม
2.Installation template
แผ่ น แบบติ ด ตั ้ ง
น็ อ ตหางปลา
Butterfly nut (2)
แหวนรอง
Washer (2)
Adaptable panel
บานปรั บ
6.Installation and User Manual
คู ่ ม ื อ การติ ด ตั ้ ง และการใช้ ง าน
Installation and User Manual
การติ ด ตั ้ ง
Please make sure you read the instructions carefully and install it properly.
เพื ่ อ การติ ด ตั ้ ง ที ่ ถ ู ก ต้ อ งเหมาะสม กรุ ณ าอ่ า นคำแนะนำในการติ ด ตั ้ ง อย่ า งละเอี ย ด
Cautions
คำเตื อ น
1. The water pressure limit is from 0.07 to 0.75 MPa (10 to 106.7 PSI ). Please use as instructed.
ขี ด จำกั ด ของแรงดั น น้ ำ อยู ่ ร ะหว่ า ง
ถึ ง
MPa หรื อ
0.07
0.75
2.The water shutoff valve should be near where the product can be installed and dismantled.
วาล์ ว ปิ ด เปิ ด น้ ำ ควรอยู ่ ใ กล้ บ ริ เ วณที ่ ต ิ ด ตั ้ ง หรื อ ถอดประกอบผลิ ต ภั ณ ฑ์
Product Installation Procedure
ขั ้ น ตอนในการติ ด ตั ้ ง
Pre-installation
ก่ อ นติ ด ตั ้ ง
1. Stick the rubber gaskets into the adaptable panel.
ผนึ ก ประเก็ น ยางเข้ า กั บ บานปรั บ
As shown in figure, stick the rubber gaskets into the slots of the adaptable panel.
ผนึ ก ประเก็ น ยางลงในช่ อ งของบานปรั บ ดั ง ภาพ
2. Insert the connecting bolts into the sliding plates.
ใส่ ส ลั ก เกลี ย วยึ ด เข้ า กั บ แผ่ น รองเลื ่ อ น
As shown in figure, insert the connecting bolts into the holes of sliding plates.
ใส่ ส ลั ก เกลี ย วยึ ด ลงในรู ข องแผ่ น รองเลื ่ อ น ดั ง ภาพ
3. Assemble the sliding plates with the adaptable panel.
ประกอบแผ่ น รองเลื ่ อ นเข้ า กั บ บานปรั บ
As shown in figure, insert the sliding plates (with connecting bolts) in the holes
of the adaptable panel.
ใส่ แ ผ่ น รองเลื ่ อ นที ่ ม ี ส ลั ก เกลี ย วลงในช่ อ งของบานปรั บ ดั ง ภาพ
ถึ ง
PSI กรุ ณ าปฏิ บ ั ต ิ ต ามคำแนะนำ
10
106.7
