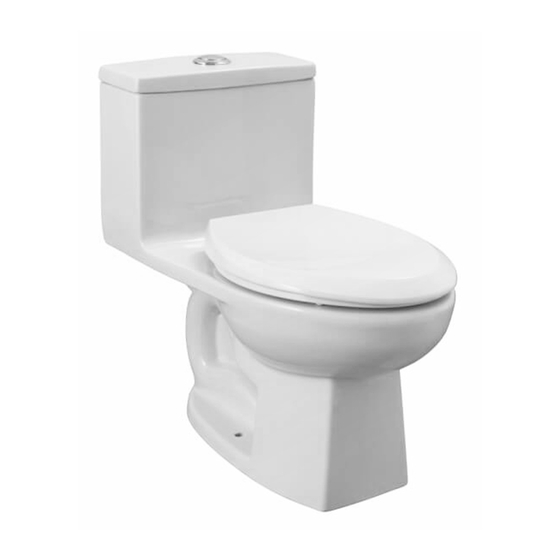
American Standard EQUIX Series Manuale di istruzioni per l'installazione - Pagina 5
Sfoglia online o scarica il pdf Manuale di istruzioni per l'installazione per Servizi igienici American Standard EQUIX Series. American Standard EQUIX Series 10. One piece toilet

5.
INSTALACIÓN DEL INODORO: Alinee el inodoro con la pared y, con un movimiento de vaivén,
presione la taza completamente sobre el anillo de cera y el reborde. De manera alternada, apriete
las tuercas hasta que el inodoro quede firmemente asentado en el piso.
PRECAUCIÓN:¡NO APRIETE EXCESIVAMENTE LAS TUERCAS O SE PUEDE DAÑAR LA BASE!
B. Instale las tapas sobre las arandelas. (Si es necesario, corte los tornillos a la altura adecuada
antes de instalar las tapas.)
C. Alise el borde de sellador alrededor de la base. Remueva el exceso de sellador.
INSTALLING THE TOILET
Align the toilet with the wall and, with a reciprocating movement, press the cup completely over the
wax ring and the flange. Alternately, tighten the nuts until the toilet is firmly seated on the floor.
CAUTION: DO NOT OVER TIGHTEN THE NUTS OR THE BASE MAY BE DAMAGED!
B. Install the caps on the washers. (If necessary, cut screws to proper height before installing covers.)
C. Smooth the sealant edge around the base. Remove excess sealant.
TAPA PERNO
6.
Antes de continuar, determinar el tipo de unión entre el suministro de agua que se muestran a
continuación y utilice las piezas de montaje apropiadas que requiere para volver a conectar
correctamente el suministro de agua. No utilice masilla para sellar estos accesorios.
Before proceeding, determine the type of connection between the water supply shown and then
use the appropriate mounting hardware required to reconnect properly the water supply.
Do not use putty to seal these accessories.
Estas partes se deben de utilizar según
la ilustración para asegurar la conexión
hermética.
El uso de tuerca suministradas puede
dar lugar a fugas de agua.
El tubo de suministro de agua o la
tubería debe estandard por lo menos
1/2" dentro de vástago roscado de la
válvula (no aplica para tubos con brida).
SELLO
CÓNICO
These parts must be used according
SEAL
to the illustration to ensure the hermetic
CONICAL
connection.
The use of nut supplied can lead to
water leakage.
The water supply pipe or the pipe must
be standard at least 1/2 "inside stem
Valve thread (not applicable).
For flanged tubes).
PRECAUCIÓN: No usar el sello
cónico con una línea plástica
de suministro de agua
CAUTION: do not use the conical
seal with one plastic line of
water supply
PERNOS
Usar la tuerca y sello suministrado.
Use the supplied nut and seal.
METAL/ TUBERÍA
METÁLICO
DE COBRE
CON FLANGER
METAL / PIPE
METAL
COPPERMADE
WITH FLANGER
TUERCA
NUTS
TUERCA DE
ACOPLAMIENTO
NUT OF
COUPLING
CIERRE DE
CIERRE DE
AGUA
AGUA
WATER
WATER
CLOSURE
CLOSURE
CONECTOR DEL DESAGÜE
Usar el cono para espiral
sumnistrado
Use the spiral cone
Submitted
METÁLICO
ESPIRAL
METAL
TUERCA
NUTS
SPIRAL
TUERCA
SELLO CÓNICO
NUTS
SUMINISTRADA
TUERCA
SEAL CONICAL
SUMINISTRADA
PROVIDED
NUT
TUERCA DE
PROVIDED
ACOPLAMIENTO
NUT OF
TUERCA DE
COUPLING
ACOPLAMIENTO
SUMINISTRADA
CIERRE DE
NUT OF
AGUA
COUPLING
WATER
PROVIDED
CLOSURE
ATENCIÓN: Apretar demasiado
la tuerca de acoplamiento
puede resultar en la rotura y/o
el derrame de agua.
CAUTION: Tighten too much the
c o u p l i n g n u t m a y r e s u l t i n
breakage and / or the water spill.
Todas las partes incluidas.
No adicione otro tipo de sellos.
All parts included.
Do not add any other type of stamps.
CONECTOR DE
VINIL TRENZADO
CONNECTOR OF
BRAIDED VINYL
TUERCA
NUTS
TUERCA DE
ACOPLAMIENTO
NUT OF
COUPLING
CIERRE DE
AGUA
WATER
CLOSURE
5
