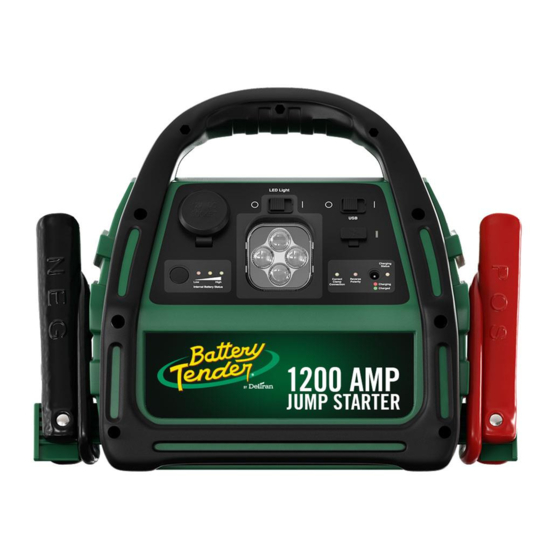
Battery Tender 030-0004 Manuale di istruzioni - Pagina 3
Sfoglia online o scarica il pdf Manuale di istruzioni per Pacco batteria Battery Tender 030-0004. Battery Tender 030-0004 6. Battery booster pack

WARNING: Fire hazard
The jump start feature is designed for short term operation only—less than 2-3 seconds.
Operating the jump start feature for more than 3 seconds may cause damage to the unit.
Allow the Battery Booster Pack to cool down for at least 3 minutes after each jump start .
WARNING:
Do not charge the unit through the 12VDC socket!
WARNING:
Ensure that there are no 12VDC appliances connected to the Battery Booster
Pack while the unit is being recharged.
3. Features
8
9
10
11
12
13
1
2
3
4
56
7
(1) Battery status button – When pressed, LED indicator displays level of charge left in
the battery and determines if the unit needs to be charged. See item (2) for details.
(2) Battery level LED indicator – Identifies the level of charge remaining in the internal
battery. When the 3rd (green) LEDs light up, the unit is over 75% charged. When the 2nd
(yellow) LEDs light up, the unit is about 50% charged and should be recharged. When the
1st (red) LED lights up, the unit is only 25% charged and needs recharging immediately.
14
15
13
3
(3) Emergency LED light.
(4) Correct Connection Indicator – Green LED indicates when the battery clamps are
properly connected (vehicle battery voltage over 2.5V).
(5) Reverse/Incorrect Connection Indicator – Red LED indicates when the battery clamps
are reversed or improperly connected to the battery (vehicle battery voltage over 2.5V).
(6) AC charging jack – Use the included external AC charger to recharge the unit through
this charging jack. Only use the suppliled AC charger to charge this unit.
(7) Charging indicator: Red LED indicates when the unit is being recharged, when it turns
to green, the unit is fully charged.
(8) 12V DC power port – Easy-access port for powering a variety of 12V accessories.
(9) LED light switch – Slide it to turn on or turn off the emergency light.
(10) USB switch – Slide the switch to turn USB power on or off.
(11) USB port – It provides 5V USB power for electronic devices.
(12) USB on indicator – When USB power is on, this green LED indicator will illuminate.
(13) Boosting cables – These cables connect clamps and Booster Pack.
(14) On/Off Switch – When jump starting a vehicle, ensure this switch is in the "off" position
before connecting the unit to the vehicle battery. Once properly connected, the unit should
be switched to the "on" position.
(15) 15A Fuse – 15A over current protection for 12V DC outlet.
WARNING:
Before starting the vehicle, ensure that the clamps are connected in the right order and the
green indicator light is on (vehicle battery voltage over 2.5V).
CAUTION:
The unit is not intended for use as an UPS (Uninterrupted Power Supply).
4
