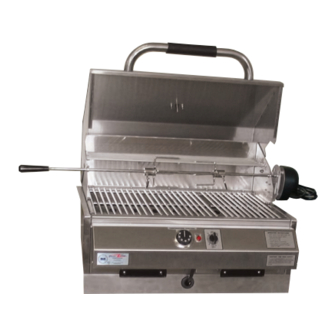
Electri-Chef 4400-EC-336 Manuale d'uso - Pagina 10
Sfoglia online o scarica il pdf Manuale d'uso per griglia Electri-Chef 4400-EC-336. Electri-Chef 4400-EC-336 10. Flameless electric grills

4.0 Unpacking Instructions
for 336-I, 336-IM & 336-JA/CT
This section describes how to unpack your Electri-Chef
Step 1
A. Cut nylon straps holding carton.
B. Lift carton off grill.
C. Remove all foam packing.
D. Before continuing read Owner's Manual.
Step 2
F. Remove grill from carton bottom.
G. Remove all items from boxes or shipping enclosures.
H. Remove tape from grease tray.
I. Open grill hood and remove warming rack from corrugated sheet and remove
all other packing material from under cooking grids and stainless steel
heat plate.
Step 3.1 Assembly
J. See Island Cut-Out Information Page (see page 10)
Shipment Inventory
Below is a complete list of grill components and hardware that you should
have received with your shipment. If you are missing any of the items listed
below, immediately contact the dealer from whom you purchased your grill or
contact Electri-Chef
®
Grills customer service at 1-800-442-7207
A. Items in carton
1. Grill body
2. One (1) Owner's Manual.
3. One (1) warming rack.
4. Four (4) cooking grids.
5. Three (3) Lower Grill Flange Mounting Screws
No grill assembly is required for the
Model 4400-EC-336-I or IM.
The grill comes fully assembled.
Mounting in Island Kitchen is
required before use.
9
Model 4400-EC-336 Grill
®
4.1 Assembly Instructions
for Island Model (continued)
CAUTION
Step 3.1
Place grill in island cut-out
Island Cut-Out
(JA/CT)
A
Top View
Notes
1. No under grill support required on the island.
2. Grill has mounting flanges on sides & back which sit on top
of island surface, tile, etc.
3. Grill cut-out should be:
Island Model 224-I
A. 16 ¼" left to right
B. 16 ¼" front to back
C. 7 ¾" from top of island surface
Island Model 336-I
A. 24 ¼" left to right
B. 16 ¼" front to back
C. 7 ¾" from top of island surface
Model 336-JA/CT
A. 29" left to right
B. 21" front to back
4. Be sure 220 Volt @16 amp outlet is located behind island.
5. Island should be constructed of fire resistant materials or grill cut-out
should be lined with ½" thick fire resistant materials.
6. Continue to 4.2 Assembly Instructions to attach Lower Grill Flange.
Island enclosures must be built of
fire resistant materails.
B
C
35"
top of
tile
18" x 18"
door opening
Door
Opening
18 ¼"
4"
Front View
Side View
Island Model 224-IM
A. 16
/
" left to right
5
8
B. 16 ⅞" front to back
C. 7 ¾" from top of island surface
Island Model 336-IM
A. 25 ⅝" left to right
B. 16 ⅞" front to back
C. 7 ¾" from top of island surface
7"
10
