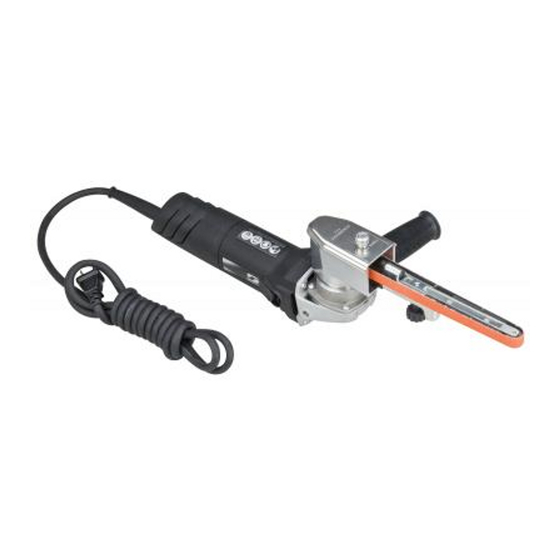
Electric Dynafile 11021 Istruzioni per l'uso e la sicurezza - Pagina 2
Sfoglia online o scarica il pdf Istruzioni per l'uso e la sicurezza per Utensile elettrico Electric Dynafile 11021. Electric Dynafile 11021 4.
Carefully read all instructions before operating or servicing any Dynabrade® Abrasive Power Tool.
Warning: Hand, wrist and arm injury may result from repetitive work motion and overexposure to vibration.
Operating Instructions:
Warning:Eye, face and body protection must be worn while operating power tools. Failure to do so may result in serious injury or death.
Follow safety procedures posted in workplace.
1. With power source disconnected from tool, securely fasten abrasive/accessory on tool.
2. Connect power source to tool. Be careful not to switch on in the process.
3. Hold tool by the motor housing only. One or two hands may be used. Do Not hold tool by head/housing assembly. Keep hands away from all
grinding/sanding edges and moving parts.
4. Switch on to start tool, switch off to stop tool.
5. While tool is running, Adjust belt tracking by tuning 95218 Rough Adjustment Knob to the left or right accordingly, so as abrasive belt rides
evenly over contact arm.
6. Always work off the return-side of the abrasive belt. This will ensure superior tracking and reduce downtime of tool.
Abrasive Belt/Contact Arm Change Instructions
To Change Belt:
1. Disconnect power source.
2. Remove 11005/E Belt Guard by lifting up front "lip"and unhooking latches.
3 Gently pull back on idler arm to expose internal workings of tool.
4. Depress idler arm lever and pll belt away from the contact wheel.
5. Slip belt over contact wheel.
To Replace Belt
1. Create a loop with belt by pinching together the sides of belt in the middle.
2. Slip one loop under the no. 12 Drive Wheel and around idler arm.
3. Depress idler arm lever and pull belt toward the contact wheel.
4. Slip belt over contact wheel, connect to power source.
5. Adjust belt tracking using 95218 Knob.
Safety Instructions:
Warning:Eye, face and body protection must be worn while operating power tools. Failure to do so may result in serious injury or death.
Follow safety procedures posted in workplace.
Important: User of tool is responsible for following accepted safety codes such as those published by the American National
Standards Institute (ANSI).
• Operate machine for 30 seconds before application to workpiece to determine if machine is working properly and safely before work begins.
• Always disconnect power supply before changing abrasive or making machine adjustments.
• Inspect abrasives and accessories for damage or defects prior to installation on tools.
• Please refer to Dynabrade's Warning/Safety Operating Instructions Tag (Reorder No. 95903) for more complete safety information.
Warning:Hand, wrist and arm injury may result from repetitive work, motion and overexposure to vibration.
Grounded tools require a three wire extension cord. Double insulated tools can use either a two or three wire extension cord. As the distance from the
supply outlet increases, you must use a heavier gauge extension cord. Using extension cords with inadequately sized wire causes a serious drop in
voltage resulting in loss of power and possible tool damage. Refer to the table below to determine the required minimum wire size.
Nameplate
Amperes
0–5.0
5.1–8.0
8.1–12.0
12.1–15.0
15.1--20.0
The smaller the gauge number of the wire the greater the capacity of the cord. For example a 14 gauge cord can carry a higher current than a 16 gauge cord.
When using more than one extension cord to make up the total length, be sure each cord contains at least the minimum wire size required. If you are using
one extension cord for more than one tool, add the nameplate amperes and use the sum to determine the required minimum wire size.
• If you are using an extension cord outdoors, be sure it is marked with the suffix "W-A" ("W" in Canada) to indicate that it is acceptable for outdoor use.
• Be sure your extension cord is properly wired and in good electrical condition. Always replace a damaged extension cord or have it repaired by a qualified
person before using it.
• Protect your extension cords sharp objects, excessive heat and damp or wet areas.
Important Operating and Safety Instructions
Extension Cords
Extension Cord Length
25'
50'
75'
16
16
16
16
16
14
14
14
12
12
12
10
10
10
10
Guidelines For Using Extension Cords
Read and save all instructions for future reference
To Change Contact Arm Assembly:
1. Disconnect power source.
2. Remove 11005/E Guard by lifting up front "lip" and unhooking latches.
3 Gently pull back on idler arm to expose internal workings of tool.
4. Depress idler arm lever and pull belt away from the contact wheel.
5. Slip belt over contact wheel.
6. Remove 95218 Rough Adjustment Knob.
7. Remove contact arm and replace with desired arm, making sure that
the tab on the end of the arm is facing forward.
8. Replace 95218 knob.
9. Install abrasive belt and replace belt guard.
10. Connect power source and adjust belt tracking by turning 95218 knob.
100'
150'
200'
*Based on limiting the line voltage
14
12
12
drop to live volts at 150% of the
12
10
–
rated amperes
10
–
–
10
–
–
–
–
–
2