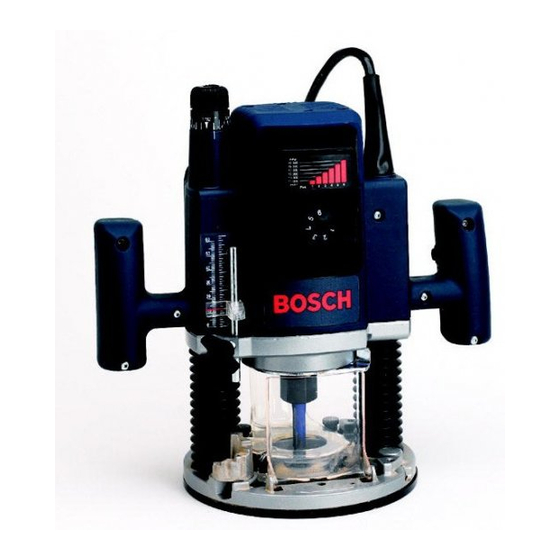
Bosch 1613EVS Manuale di istruzioni - Pagina 7
Sfoglia online o scarica il pdf Manuale di istruzioni per Utensile elettrico Bosch 1613EVS. Bosch 1613EVS 28. Plunge router
Anche per Bosch 1613EVS: Manuale di istruzioni (28 pagine)

out u ntil t he cutters are approximately
1/8" t o
1/4" a way from the collet chuck face. Withthe
router bitinserted and the spindle lockfully
engaged,
tighten t hecollet c huck a ssembly
firmly inaclockwise
direction, (viewed from
under the router), with the wrench supplied.
To
avoid d amaging
the collet chuck, never tighten
the collet chuck u nless arouter bitofproper
shank size isinserted into the collet.
Toensure proper gripping ofthe router bitand
minimize run-out, the shank ofthe router bit
should always beinserted atleast 5/8".
CAUTION! T o prevent damage
totool. D o
nottightencollet
without abit. N OTE: Thebit
shank and chuck s hould beclean a nd free of
dust, wood, residue and grease before assem-
bling.
CAUTION!Donot u se router bits greater
than1-5/8" indiameter asthey will notfit
through the base casting.
Removing
the Router
Bit
Use the spindle
lock and wrench
as described
above, and turn the collet chuck assembly
in a
counter-clockwise
direction.
Once the collet
chuck assembly
is !oosened,
continue
to turn
the collet
chuck
until it pulls
the collet
free
from its taper, and the router bit can be re-
moved.
NOTE:
The collet chuck is self-extracting;
it is
NOT necessary
to strike the collet chuck to free
the bit.
Collet
Chuck
Care
With the router bit removed,
continue
to turn
the collet
chuck counter-clockwise
until it is
free of the shaft.
To assure
a firm grip, occa-
sionally
blow out the collet
chuck
with com-
pressed
air, and clean the taper in the armature
assembly
shaft with a tissue or fine brush.
The
collet
chuck
is made
up of three component
parts
as illustrated;
check to see that the re-
taining
ring 21 is prop-
erly located
around
the
collet
22 and seated
in
the inner groove
of the
collet chuck nut 23 and
lightly
thread
the collet
chuck
back onto
the
armature
shaft.
Replace
worn
or damaged
collet chucks
immediately.
Plunge
Mechanism
To release
the plunge
mechanism,
grasp
the
router handles firmly with both hands and press
the plunge lock/release
lever 16 with the thumb
of the left hand.
The motor may then be raised
or lowered
to the desired position.
The plunge
lock/release
lever is spring-loaded,
and will
hold the router motor in position
when pressure
on the lock lever is released.
When plunging,
always
apply uniform
firm pressure
to both
handles
to avoid
cocking
the motor
on the
posts.
Indicator
Rod
and
Turret
The depth
indicator
rod 3 and the revolving
depth turret 7 are used to control cutting depth
as follows;
With the bit installed,
gently
lower
the motor
until the tip of the router
bit just contacts
the
level surface the router is sitting on. This is the
"zero"
position,
from which
further
depth ad-
justments
can be accurately
made.
To set a
desired
depth
of cut,
rotate
revolving
depth
turret until the lowest
step is aligned
with the
depth
indicator
rod.
Loosen
depth
indicator
lock/release
knob 5 and lower the depth indica-
tor rod until it contacts
the lowest
step of the
turret. Slide the depth
indicator
4 until the red
line indicates
zero on the depth scale, indicating
the point at which the bit just contacts
the work.
To set a desired
cutting
depth,
slide the depth
indicator
rod up until the red depth
indicator
line attains
the desired
cutting
depth,
and se-
cure the rod in position
by firmly tightening
the
depth indicator
lock/release
knob. The desired
depth of cut may now be achieved
by plunging
the router until the depth indicator
rod contacts
the selected
stop on the revolving
depth turret.
To be certain that your depth
settings
are accu-
rate, you may want to make test cuts in scrap
material
before beginning
work. Once the de-
sired
final depth
has been
set on the lowest
depth
turret
setting
with the depth
indicator
rod, it is possible
to make progressively
deeper
cuts by starting
with a higher flat on the depth
turret and after each cut, rotating
the revolving
