Andor Technology iVac 324 Manuale di avvio rapido - Pagina 2
Sfoglia online o scarica il pdf Manuale di avvio rapido per Strumenti di misura Andor Technology iVac 324. Andor Technology iVac 324 2.
Anche per Andor Technology iVac 324: Manuale di avvio rapido (2 pagine)

4
Connecting your Camera to a Spectrograph
Refer also to your Spectrograph User Guide
Attach the iVac to the Spectrograph
1. Carefully remove the protective film from the
front face of the camera.
2. Remove the blanking plate from the
spectrograph mounting plate.
3. Align the camera to the mounting plate of
the spectrograph as shown below.
4. Secure the camera to the spectrograph as
shown below, using the 4 screws provided.
Connect the cables between the iVac and
the spectrograph
The spectrograph shutter can be controlled
through the SMA connection.
1. Connect the SMA to BNC cable to the
camera shutter connection.
2. Connect the other end of the SMA to BNC
cable to the spectrograph shutter BNC
connection.
5
Aligning your Camera to a Spectrograph
Refer also to your Spectrograph User Guide
If you bought an Andor spectrograph with your iVac it should come ready to use, but occasionally the mounting flange
can become misaligned during shipping. If this has occurred, refer to the camera alignment section in the spectrograph
manual.
If you want to attach your iVac camera to a spectrograph other than one ordered with your camera, refer to the manual
supplied with the product for further information on alignment and focusing.
Attaching the iVac to a Spectrograph
Align the Camera
with the spectrograph
mounting plate
Secure the
camera using
the 4 screws
6
Connecting your Camera to the PC and Switching it on
Ensure the mains power cable is not connnected before attaching the PSU
to the camera.
1. Insert the power cable from the power supply into the power
connector at the rear of the camera. Secure in position using
the screwlock.
2. Insert the mains cable into the camera power supply unit.
3. Connect the USB cable to the camera and an available USB
port on the PC.
Note: the PC is connected to both the spectrograph and the
camera by USB connections.
4. Ensure the camera and spectrograph cable connections have
been made as outlined in Section 4.
5. Switch on the spectrograph.
6. Switch on the camera.
7. Start your software.
8. View and adjust the acquisition settings as required.
9. Start acquiring data.
?
Troubleshooting
Camera is not recognized by PC
•
Check that the camera power and USB cable are connected securely and the mains power cable is inserted.
•
Ensure the spectrograph is powered up before the camera is powered up.
•
Check that the drivers have been installed properly
(Control Panel – System – Hardware – Device Manager – Imaging Devices).
For additional troubleshooting information please refer to the user manual
For further technical information about the Andor iVac CCD series go to:
You can find the latest user manuals on
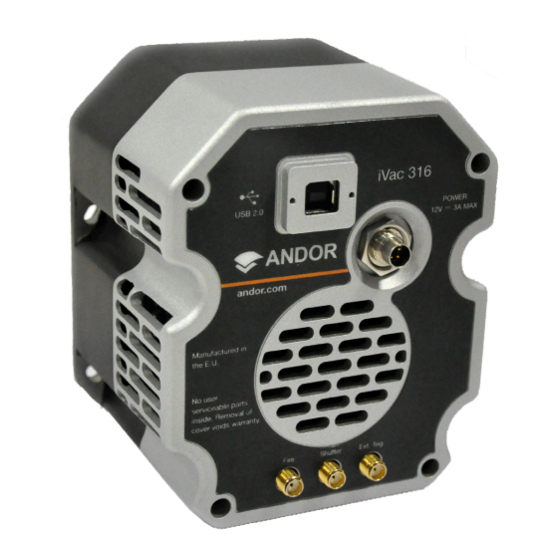
iVac Rear Panel Connections
www.andor.com/oem-solutions
MyAndor (http://my.andor.com/login.aspx)
MAN-08933
IVSG 1217 R1
