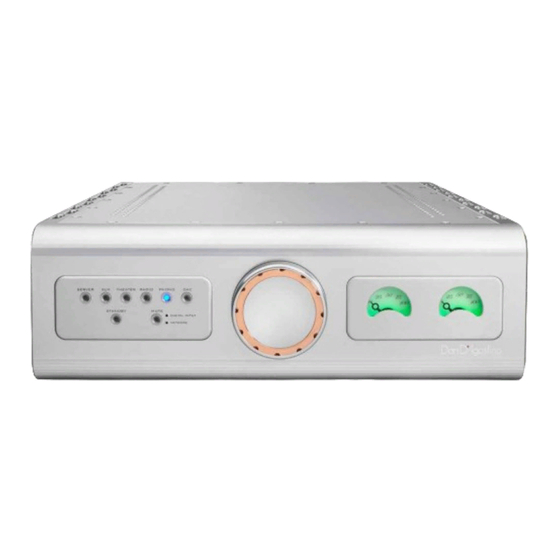
Dan D'Agostino PROGRESSION Manuale d'uso - Pagina 6
Sfoglia online o scarica il pdf Manuale d'uso per Amplificatore Dan D'Agostino PROGRESSION. Dan D'Agostino PROGRESSION 14.

Headphone jack
This 1/4-inch jack allows connection of headphones to the Progression Integrated Amplifier.
Headphones with a 1/8-inch plug may be connected using a 1/8-inch-to-1/4-inch adapter.
Bluetooth antenna
Affix the included Bluetooth Antenna to the screw post marked Antenna.
OPERATION
Initial power-up of the Progression Integrated Amplifier
Once the Progression Integrated Amplifier is plugged into an AC outlet, it is in standby mode.
Press the Standby button on the front of the Progression Integrated Amplifier. This will power
up the amplifier and illuminate the volume indicators. After power is switched on, the amplifier
requires approximately 30 minutes to reach optimal operating temperature. Although the
Progression Integrated Amplifier will sound excellent upon initial listening, the sound quality
will improve as it warms up.
Basic operation
The Progression Integrated Amplifier offers basic functions on the front panel: Standby on/off,
volume up/down, output options, and source selection. The remote control adds balance, mute,
and polarity operation to these front panel functions.
Standby: When the Progression Integrated Amplifier is in standby (off) mode, the Standby
LED will be illuminated. Press the button to turn the unit on. When power is on, the Standby LED
will go off and the multi-function meters and active source will illuminate. Press the button again
to return to standby. The volume indicator meters and source LEDs will go out and the Standby
LED will illuminate again.
Volume: Turn the volume knob clockwise to raise the volume and counterclockwise to lower it or
use the Volume +/- buttons on the remote. The needles in the multi-function meters indicators
will move toward the right as you increase the volume and to the left as you decrease it. We
recommend you turn the volume down when you initially power up the system and raise it only
when you are assured that all components in the system are operating properly.
Note: The Progression Integrated Amplifier uses a high-accuracy relay-controlled stepped
attenuator for its sound quality and excellent left-to-right gain accuracy. This high-performance
volume control emits a small mechanical click as the volume setting is changed. This is normal
operation and once the changes have been made, no other sounds will be made by the control.
The multi-function meters display three pieces of information. During normal playback, the
meters function as signal level meters indicating average signal level of the music being played.
8
When volume or balance is adjusted, the meters indicate the settings of each function. The multi-
function meter reverts to signal level operation after volume or balance adjustment.
Source selection: Press the front-panel button or remote button that corresponds to the desired
source. The LED for the currently active source will illuminate.
Theater: The Theater input allows you to interface the Progression Integrated Amplifier with a
multichannel home theater audio system. To use it, connect the left- and right-channel outputs of
your surround sound-processor to the Progression Integrated Amplifier's Theater input. This input
bypasses the amplifier's volume control, setting it at a fixed level, and uses your surround-sound
processor's volume control instead. The front panel and remote volume controls are disabled.
Push the Theater button on the front panel or remote when you want to listen to surround sound.
Push any other source button to return the system to stereo mode.
Dark mode: Dark mode blanks out the multi-function meters and LEDs after 15 seconds of
illumination. The Dark mode is selected or unselected by holding the Standby button in for
several seconds while the unit is in standby mode. All front panel lights are disabled unless
a change is made on the front panel or remote to any of the controls. During a change the LEDs
are illuminated but will re-extinguish shortly after the changes are made.
Remote control operation: The Progression Integrated Amplifier remote control uses Bluetooth
rather than typical IR operation. Bluetooth offers great improvement in usable range and does not
require line-of-sight for proper operation.
Remote pairing: The remote control requires an initial pairing to the Progression Integrated
Amplifier. Once paired, the remote control will stay paired to the amplifier. Re-pairing will be
required when batteries are changed in the remote control.
The pairing process is automatic but requires a few seconds after a new set of batteries is
installed in the remote. Make sure the Progression Integrated Amplifier is plugged into the
wall and that the switch on the AC inlet is turned on. The Progression Integrated Amplifier can
be on or in standby for this pairing to take place. If there is no response from the Progression
Integrated Amplifier after this process, simply cycle power to the amplifier and remove/replace
the batteries in the remote, and the pairing should be successful.
Headphone operation: To activate the headphone function on the Progression Integrated
Amplifier, press and hold the Theater button on the front panel of the unit for 3 seconds. This
will deactivate the speaker outputs and switch to the headphones. When the unit is returned to
standby, the speaker outputs will be reactivated.
9
