Elite Acoustics Engineering A2-5 Manuale rapido - Pagina 2
Sfoglia online o scarica il pdf Manuale rapido per Amplificatore Elite Acoustics Engineering A2-5. Elite Acoustics Engineering A2-5 5. Acoustic amplifier with 4 channels, mixer, effects, battery powered and bluetooth
Anche per Elite Acoustics Engineering A2-5: Manuale (11 pagine)
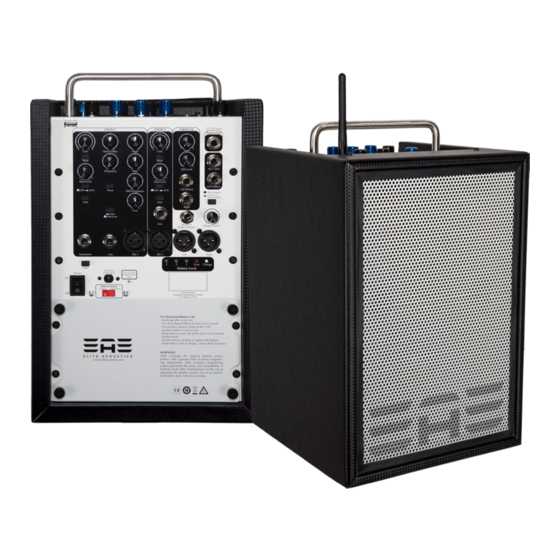
Superb functionality and compact portability provides unparalleled versatility. A2's
light weight yet fully featured Mix, Digital Effects, and Mastering sections seamlessly
combine to elevate your performance. A2 offers extensive input EQ and an adjustable
Notch Filter to tame Feedback or add that final degree of clarity when needed. An all-
wood cabinet combined with a 5-1/4" high-sensitivity woofer and 1" silk-dome tweeter
deliver full frequency clarity with impressive bass response.
1.
Battery Switch [49] is set to Connect. (Battery Switch is a built in circuit breaker to
preserve battery life.)
2.
Make sure the SPEAKER VOLUME [3] control is down before you turn the POWER [50]
on.
3.
Connect your microphone to the MIC IN [29]. Or you can connect a 1/4 " line input from
an Instrument [27] or Line Level[28]. Connect additional inputs as required.
4.
Turn on the POWER [50] switch
5.
Connect device to Bluetooth® [13]
6.
Turn on your source signal(s) and adjust the volume on the source signal for normal
operation (Refer to Step 8). Note if you are using an iPhone or iPad via Bluetooth®, set
the volume on your device about halfway. Maximum volume will distort.
7.
Adjust the SPEAKER VOLUME [3] to a comfortable level.
8.
Turn up GAIN [14] until there is a solid green light showing "signal" at desired level,
without a red "peak" light, indicating too much signal.
9.
For USB charging of your source device, use USB Port [51]
Power LED:
BLUE [1]: Indicate unit is ON
+48V LED [2]: Indicates Phantom Power is on
Master Output Controls
Speaker Volume [3]: Control speakers' volume level
Mono [4]: Changes speaker output from Left Only to Mono
Equalizer [5]: Adjust High, Mid, and Low Frequency response
Peak LED [6]: RED indicate Signal Clip
Signal LED [7]: GREEN indicate Signal Present
Aux Input/Level [8]: Connect audio source with 1/8" jack from MP3/CD player, etc.
Effects Controls
Effects Mix [9]: Amount of effect being added to output
Rate/Decay [10]: Controls the duration of the effect
Effects Knob Selector [11]: Select effect of choice
EFX Bypass [12]: Turn effects on or off (When LED is on, the effects are turned off)
Channel 1
Gain [14]: Apply gain for level control
Mute [15]: Mute Channel
EFX/AUX Send Level [16]: Adjust the level to "send" out
EFX/AUX select [17]: select whether you are sending to internal EFX or external AUX bus
PAD [18]: fixed attenuation for "hot" signals
Notch Filter [19]: set amount of cut or boost for Notch Filter
Frequency [20]: set the frequency of the Notch Filter
Phase [21]: Reverse the phase of input waveform
Instr-Mic/Line [22]: Select input source; Instrument or Mic/ Line input
High [23]: set amount of High Frequency cut or boost
Mid [24]: set amount of Mid Frequency cut or boost
Mid Frequency [25]: set the frequency of the Mid cut or boost
Low [26]: set amount of Low Frequency cut or boost
Instrument [27]: 1/4" TS input
Line [28]: 1/4" TS input
Mic [29]: XLR for Microphone Input