Belanger H2Flo B90-130 Manuale - Pagina 2
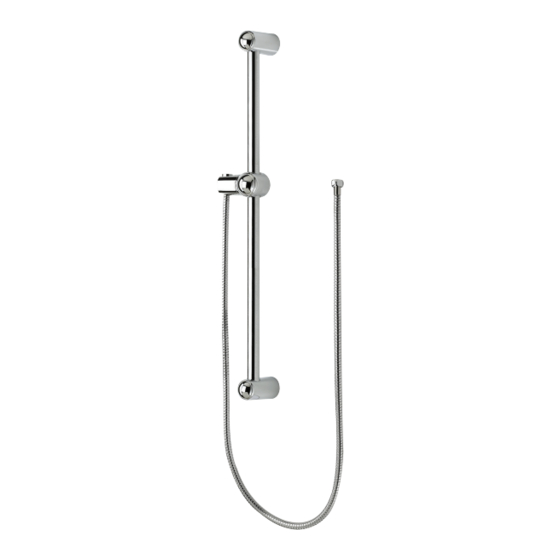
Sfoglia online o scarica il pdf Manuale per Prodotto idraulico Belanger H2Flo B90-130. Belanger H2Flo B90-130 2. Sliding bar kit with flexible hose
IMPORTANT
The slide bar is not to be used as a grab bar or for support. It is
intended for holding a handshower only. WE DENY ALL LIABILITY
RELATED TO ANY ACCIDENT, INCIDENT OR BREAKAGE
FOLLOWING ANY USAGE IN BREACH OF THIS WARNING.
La barre à glissière ne doit en aucun cas être utilisée comme barre d'appui. Elle a été
conçue pour supporter une douche à main. NOUS NOUS DÉGAGEONS DE TOUTE
RESPONSABILITÉ POUR QUELQUE ACCIDENT, INCIDENT OU BRIS OCCASIONNÉ
SUITE À UN USAGE QUI NE TIENT PAS COMPTE DE CET AVIS.
Technical drawing - Dessin technique
RECOMMENDED TOOLS / OUTILS RECOMMANDÉS
Thread seal tape
Ruban d'étanchéité
pour joints letés *
* Apply Bélanger thread seal tape
on threaded connections.
Appliquez du ruban d'étanchéité Bélanger
sur les connexions letées.
The model shown in the installation steps may differ
from the one in box however connection type and
installation steps are the same.
Le modèle démontré dans les étapes d'installation peut
différer du produit en boîte, mais le type de connexions
et d'installation demeure le même.
B90-130
B90-130
Finished wall / Mur ni
ANCHORING
ANCRAGE
Locate the drilling point "A"
and drill. Assemble, install
and level the sliding bar to locate
B
B
point "B" before drilling.
Localiser le point de perçage "A"
et percer. Assembler, installer
A
et mettre à niveau la glissière
pour bien localiser le
point de perçage "B"
avant de percer.
Installation steps - Étapes d'installation
B
30 "
(762 MM)
A
1
2