cassini C-900M Istruzioni per l'uso - Pagina 3
Sfoglia online o scarica il pdf Istruzioni per l'uso per Microscope cassini C-900M. cassini C-900M 4. 300x/600x/900x 98pc. microscope kit
M
P
S
AKING A
ERMANENT
LIDE
1.
Start with a clean slide and slide cover. Take care when handling these slide
covers.
2.
Follow Steps 2 and 3 above.
3.
Before placing the slide cover over your sample add several drops of gum
media, Canada balsam, or transparent glue.
4.
Place the cover glass gently over the sample and gently squeeze out any air
bubbles.
5.
Place your new slide in a safe place and let it dry for a day.
Now you can observe your slide.
T
B
S
H
HE
RINE
HRIMP
ATCHERY
Brine shrimp are tiny swimming animals that are members of the crustacean family.
Crustaceans have shells and antennae. Brine shrimp's cousins are crabs, lobsters,
and other shrimp. Brine is water with salt in it, like sea water. So brine shrimp live in
salt water.
This set includes a shrimp hatchery, sea salt, and dried brine shrimp eggs. The eggs
should remain alive for several years if they are kept dry, and not allowed to freeze or
get too warm. You will need a clean container and some yeast (yeast used for bread
making is inexpensive and easy to locate. Ask your parents if you have any yeast in
the kitchen, and if you may have a small amount.
Into a large, well-washed plastic bottle (such as a 1.5 or 2 liter soda pop bottle, or a 1
or 2 quart milk jug, pour 0.95 liters (1 U.S. Quart) of tap water. Let this water stand at
room temperature for one day to allow chlorine in the water to dissipate.
After the water has been standing for a day, check the temperature. It should be be-
tween 70º and 80ºF (21º and 26ºC). Place about one sixth of the brine shrimp eggs in
the salt water and leave the container alone for between 24 and 48 hours. The eggs
will hatch into nauplius larvae. These nauplii only have one eye. In one to three days
these larvae will look like small brine shrimp, with two eyes!
Using a pipette or eye dropper, place some of the newly hatched larvae into one of
the shrimp hatchery chambers.
Place some of the salt water into the next chamber of your shrimp hatchery. Add a
few grains of yeast to this chamber. Transfer some of the brine shrimp from the first
chamber into the chamber with the yeast.
The yeast acts as food for the larvae, and helps them grow. You can also use green
algae from a fish tank, or even a few drops of raw, liquid egg yolk. If you do not feed
the larvae they will live for about three days. If you feed them and care for
them they can live up to three months.
6
C
ONTENTS
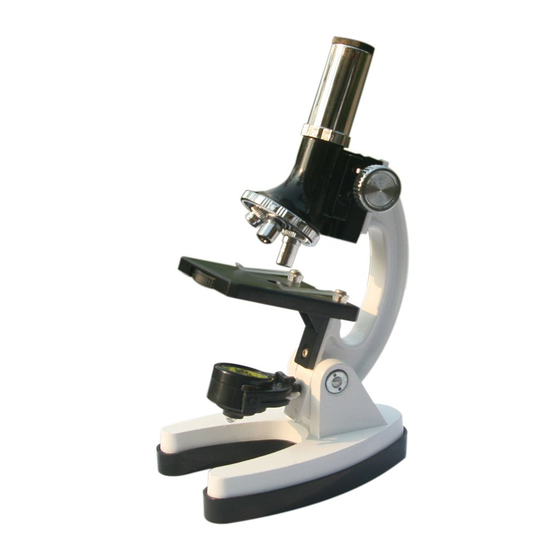
300X/600X/900X microscope with mirror and electric
light 1 Petri dish with 1 cover
1 Shrimp hatchery with 1 cover
5 Prepared plastic slides
7 Blank slides
1 Test tube with lid
1 Scalpel
1 Tweezers
1 Stirring rod
10 Slide labels and 10 static slide labels
1 Vial of sea salt
1 Vial of brine shrimp eggs
1 Vial of gum media
3 empty vials
Instructions
Carrying case
Read all instructions before use. Follow them and keep them for future reference.
Keep small children and animals away from any experiments or projects. Store your
microscope set out of reach of small children. Eye
Your microscope has been designed to provide hours of enjoyment. Have fun! Al-
ways wash your hands carefully after handling any samples and
any samples in a safe manner. When working with
away from your mouth and eyes.
H
H
ELPFUL
INTS
1.
The most important parts of your microscope are the lenses. Handle them with
care. If the lenses are dirty or dusty you can clean them with a soft cotton cloth
or a special lens cleaning tissue. Do not wipe them with a finger or a regular
facial tissue.
2.
Protect your microscope from dust and moisture by always storing it in its box
or case.
G
S
ETTING
TARTED
First, turn the microscope over. Insert two AA alkaline batteries in the base of the
microscope. In order to remove the bottom cover of the microscope you will need a
Phillips head (+) screwdriver. Insert the batteries as shown, making sure that the
(+)and (-) terminals are properly identified. Replace the bottom cover and reinsert
the screw. Do not over-tighten.
protection is not included.
always dispose of
samples, keep your hands
3