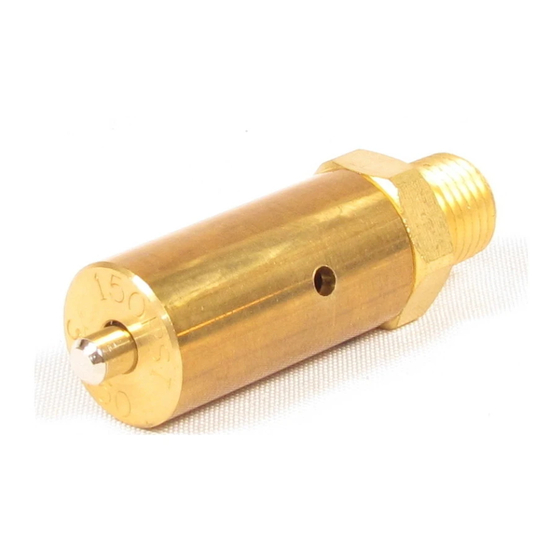
BENDIX ST-3 Manuale di avvio rapido - Pagina 2
Sfoglia online o scarica il pdf Manuale di avvio rapido per Unità di controllo BENDIX ST-3. BENDIX ST-3 4. Safety valve
Anche per BENDIX ST-3: Manuale (4 pagine)

REMOVAL AND INSTALLATION
REMOVAL
1. Block the wheels or otherwise secure the vehicle and
drain the reservoirs.
2. Using the wrench flat closest to reservoir, unscrew valve
from reservoir.
INSTALLATION
The safety valve should be installed in the same reservoir
that the compressor discharge line is connected to. Install
the valve in a convenient location in a top port of the
reservoir. If the safety valve is installed horizontally the
exhaust port should point down and the stem of the valve
should face the rear of the vehicle.
DISASSEMBLY: BENDIX
VALVE
1. Clamp the lower wrench flat in a vise (flat nearest the
pipe thread).
2. Using the upper wrench flat, unscrew the locknut.
Unscrew and remove the spring cage from body of
valve.
3. Remove the ball valve, spring and the release pin from
the spring cage.
DISASSEMBLY: BENDIX
NON-ADJUSTABLE VALVE
1. Clamp the spring cage in soft jawed vise.
2. Using the wrench flat, unscrew the body from spring
cage.
3. Remove the ball valve, spring and release pin from
spring cage.
CLEANING AND INSPECTION
Clean all parts in mineral spirits. Inspect all parts thoroughly.
All parts not considered serviceable should be replaced
with genuine Bendix replacement parts.
ASSEMBLY: ST-1 ADJUSTABLE VALVE
1. Place the ball valve in the body.
2. Install the spring and release pin in the spring cage with
the adjusting screw.
3. Position the release pin over the ball valve. Screw the
body with the ball into the spring cage. Tighten securely.
4. Adjust for proper setting (see the "Adjustment" section).
ASSEMBLY: ST-3 NON-ADJUSTABLE VALVE
1. Install the spring and release pin in the spring cage.
2. Position the ball valve in the body and screw the spring
cage onto the body.
3. Hold the spring cage in a soft jawed vise and tighten
the body securely.
2
ST-1
ADJUSTABLE
®
™
ST-3
®
™
ADJUSTING
NUT
SPRING
CAGE
BALL
VALVE
PIPE
THREAD
SPRING
CAGE
BODY
PIPE
THREAD
TO RAISE THE PRESSURE SETTING
1. Loosen the locknut.
2. Turn the adjusting nut clockwise to obtain the correct
pressure setting.
3. Tighten the locknut.
TO LOWER THE PRESSURE SETTING
1. Loosen the locknut.
2. Turn the adjusting nut counter clockwise to obtain the
correct pressure setting.
3. Tighten the locknut.
TESTING OF REBUILT SAFETY VALVES
Perform the operating and leakage checks.
RELEASE
PIN
LOCKNUT
SPRING
BENDIX
ST-1
®
SAFETY VALVE
BODY
RELEASE
PIN
SPRING
BALL
VALVE
BENDIX
ST-3
®
SAFETY VALVE
™
™
