Celestron StarSense AutoAlign Manuale - Pagina 6
Sfoglia online o scarica il pdf Manuale per Telescope Celestron StarSense AutoAlign. Celestron StarSense AutoAlign 15.

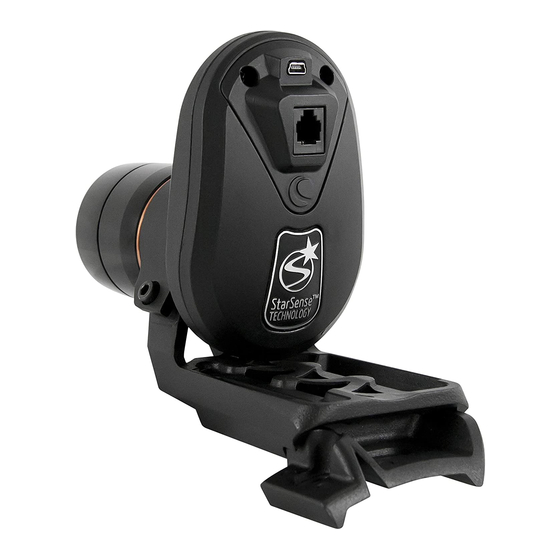
USING WITH A FINDER
Although StarSense replaces the need for a finder-
scope, you may still wish to use a finder for quick
reference, or to assist with the one-time center
calibration of the StarSense camera and telescope .
Some optical tubes, like Schmidt-Cassegrains and
EdgeHDs have threaded holes to accept finder-
scope brackets in multiple locations .
The large accessory dovetail bar that is used for
guide scopes on Celestron 8" Schmidt-Cassegrains
and EdgeHD telescopes will obstruct the Star-
Sense's Large Camera Bracket . The CPC 800 fork
arm also obstructs with the StarSense camera . To fit
the camera in this configuration, attach the base and
Large Camera Bracket backwards as shown .
Base and bracket installed backwards
Finder and StarSense installed on CPC 800
10
I
CONNECTING STARSENSE HAND
CONTROL TO YOUR TELESCOPE
The StarSense Hand Control replaces your Nex-
Star Hand Control and retains the computerized
GoTo functionality, but with added StarSense
features such as auto align, multi-star calibration,
and a graphical 4-line LCD . The StarSense Hand
Control must be used . The NexStar Hand Control
does not communicate with the camera .
1. Remove the NexStar Hand Control from
your mount .
2. Plug the phone jack type connector on the Star-
Sense Hand Control into "Hand Control" outlet
on your mount .
Tip: If you are plugging the hand control into a NexStar SE
inside of the fork arm, remember that the connector
tab on the cable faces outward .
NexStar Hand Control replaced with StarSense Hand Control
QUICK START: ALIGNING STARSENSE
Set up your telescope in a relatively unobstructed
System Objects and establishing the horizons on
area that shows most of the sky . If you have
EQ mounts) . You only need to enter this information
obstructions like buildings or trees, StarSense will
once for a given observing location .
skip them during the auto alignment procedure .
6. When prompted with the Select Time Source
screen, select the time source available for
Connect the StarSense Hand Control and camera
your telescope . StarSense will choose the best
to your telescope as described in Assembly .
source found . A checkmark indicates which time
Remove the camera's dust cap .
source is selected . Press ENTER to continue .
1. Set your telescope up with an eyepiece and
7. Enter or confirm your local time and date . Press
position the telescope in its home position or
ENTER to move the cursor through the time and
index marks . The tripod does not need to be
date fields .
level . Equatorial mounts should be roughly polar
aligned, but precise polar alignment is not
Time is in 24-hour HH:MM:SS format . For example,
required . Alt-Az mounts should have the altitude
9:30 PM would be 21:30:00
aligned to its index marks with the tube level to
Date is in MM/DD/YYYY format . For example June
the ground .
14th, 2012 would be entered as 06/14/2012
2. Turn your telescope on . The StarSense Hand
Press ENTER to move the underline cursor over to
Control and Camera will boot up . In about 30
the next value . To enter the time zone and to toggle
seconds, the Hand Control will display "Star-
DST (Daylight Savings) YES/NO, scroll UP/
Sense Ready . "
DOWN (also 6 and 9 keys) to make the selection,
3. Press ALIGN, then select STARSENSE AUTO
then press ENTER .
and press ENTER .
8. Confirm your telescope is positioned in its home
4. Press BACK to accept the time, date, and
position or index marks . Press ENTER when you
location information . Press ENTER to edit
see the "Set Align Start" screen .
the information .
5. Press ENTER to select Location by City .
StarSense will begin the alignment procedure . The
Choose your country and city by scrolling
telescope will begin moving to different areas of
through the menus provided . Alternatively,
the sky automatically . The hand control will display
you can enter your longitude and latitude
"Acquiring Position, " followed by "Acquiring Image, "
by pressing the OPTION button on the
followed by "Sensing" . Once sensing is
OPTION Button
lower left of your hand control's keypad . Press
complete, the number of stars found will be displayed .
ENTER to move the underline cursor over to the
If no stars are found, a message "Too Few Stars" will
next value .
display and StarSense will move the telescope to
another region of sky .
Once the location is entered, StarSense will check
your telescope for information it may already have,
Once StarSense has begun its alignment process,
such as GPS or site information saved from a Real
it is important not to touch or move the telescope
Time Clock (RTC) . If none of this information is
in any way. Also, while imaging the sky, do not
available, StarSense will prompt you for time and
obstruct, cover or shine light into the camera lens.
date (this is primarily needed for locating Solar
I
11
