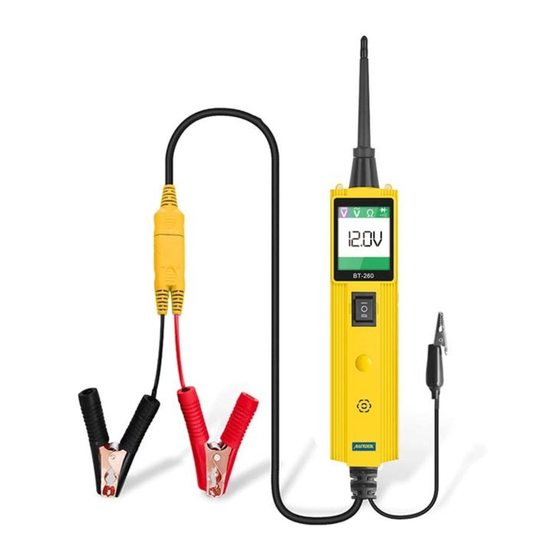
Autool BT 260 Manuale d'uso - Pagina 3
Sfoglia online o scarica il pdf Manuale d'uso per Apparecchiature di prova Autool BT 260. Autool BT 260 7. Electric system tester

⑦ Mode Button – Selects the work mode: AC voltage, DC voltage, resistance, tone.
⑧ Speaker – When the audio tone is turned on, a beep will be heard.
⑨ Auxiliary Ground Lead – Assists test as a ground lead.
⑩ Adaptor – Connects to the battery.
Specifications
•
Display: TFT color display (160 x 128 dpi)
•
Operating Temperature: 0 to 60 ° C (32 to 140 F ° )
•
Storage Temperature: -40 to 70 ° C (-40 to 185 F ° )
•
External Power: 12.0 or 24.0 V power provided via vehicle battery
•
Dimensions: Length---126 mm (4.96") ,Width—46.5 mm (1.83") , Height—35 mm (1.38")
•
NW: 0.105kg (0.23lb), GW: 0.726 kg(1.6lb)
Accessories Included
•
User ' s Manual.
•
Cigarette lighter adapter.
•
Battery hookup clips
•
Probe tip.
•
20ft. extension cable.
•
Well designed case.
General Description
The tool is the best electrical tester for reducing diagnostic time in all 6- to 30-volt vehicle
electrical systems. After a simple hook-up of the tool to the vehicle's battery, you can:
•
Determine at a glance if a circuit is positive, negative, or open without having to reconnect
clips from one battery pole to another.
•
Test for continuity with its built-in auxiliary ground lead.
•
By depressing the power switch, conduct a positive or negative battery current to the
probe tip for testing the function of an electrical component without the use of jumper
wires.
•
Test for poor ground contacts instantly without performing voltage drop tests. The tool is
also short-circuit protected; its internal circuit breaker will trip if it becomes overloaded.
•
Follow and locate short circuits without wasting fuses. The tool's long cable allows you to
test along the entire length of the vehicle without constantly searching for suitable vehicle
grounds.
Power
The tool is powered via the vehicle battery. Connect the RED battery clamp to the POSITIVE
terminal of the vehicle ' s battery, and the BLACK clamp to the NEGATIVE terminal. When
the tool is first connected to a battery (power source), it will sound a beep and the Head
Lights will be on to illuminate the test area of the probe tip.
3
Quick Self-Test
Before you test a circuit or component, be sure your tool is in good order by doing a quick
self-test.
With the tool connected, perform a quick self-test. The power switch is a momentary rocker
switch located on the tool's body. Flanking the switch are positive and negative Markings.
Press the Power Switch forward to activate the tip with a
positive voltage. The Red LED should light and the LCD
display will read the battery voltage. If the tone feature is
turned on, a high pitched tone will sound. Let go of the
power switch and the LED will turn off and the high tone will
cease.
Press the Power Switch rearward to activate the tip with a
negative voltage. The Green LED should light and the LCD
display will read the „ 0.0V ‟ (ground). If the tone feature is
turned on, a low pitched tone will sound. Let go of the power
switch and the LED will turn off and the low tone will cease.
Your tool is working correctly and is now ready for use.
IMPORTANT: When powering-up components, you can increase the life of power switch in
the tool if you first press the switch, then contact the tip to the component. The arcing will
take place at the tip instead of the contacts of the switch.
Circuit Breaker
The tool is short-circuit protected. Its internal circuit breaker will
trip if it becomes overloaded. The circuit breaker is a valuable
test tool as well as a safety measure to protect the tool from
Overload. When circuit breaker tripped, the LCD will display as
below. All other functions of the tool are still active, which means
you can still probe a circuit and observe the voltage reading.
When the circuit breaker is tripped, the tool will NOT be able to
conduct battery current to the tip even when the power switch is
pressed. Intentionally tripping the breaker and using the tool to
probe can be considered an added precaution against
accidental pressing of the power Switch.
Work mode
There are four modes to diagnose the electrical systems, which can be accessed
by depressing the Mode Button and cycling through each one.
4
