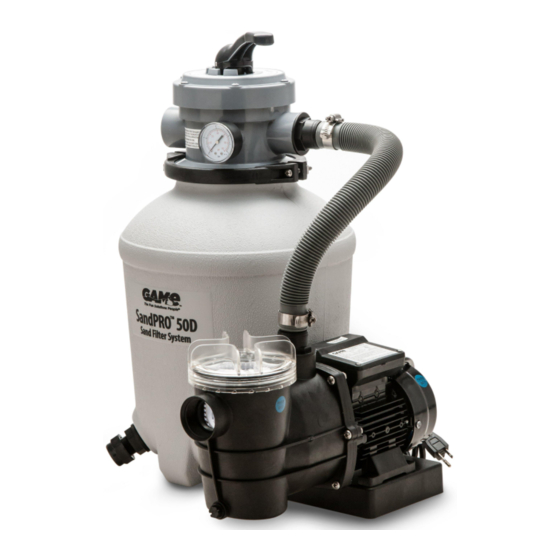
GAME SandPRO 75D Manuale d'uso - Pagina 8
Sfoglia online o scarica il pdf Manuale d'uso per Sistemi di filtrazione dell'acqua GAME SandPRO 75D. GAME SandPRO 75D 20. Pool filter system

- 1. Table of Contents
- 2. Safety Warnings
- 3. General Information
- 4. Technical Specifications
- 5. Parts List/Reference
- 6. Getting Started
- 7. Assembly Instructions
- 8. Connecting the Filter System
- 9. Valve Operations
- 10. Filter Operations
- 11. Maintenance
- 12. Troubleshooting
- 13. Limited Warranty Statement
- 14. Appendix: Exploded Parts Diagram
6.
ASSEMBLY INSTRUCTIONS (some parts may be pre-assembled)
Follow the steps below and the corresponding diagrams for assembly.
1. NOTE: This step is for model 35D only. Be sure o-ring is in place and seated properly
on the strainer housing threads. Thread the strainer basket housing (5 full turns
maximum) into the pump motor. Do not overtighten. Secure with the clip.
2. Place the strainer basket into the strainer housing. Be sure that the opening in the
basket is aligned with the opening in the housing. Secure lid.
Note: The filter system should be in its permanent location before filling the tank
with sand. Otherwise the unit may difficult to move.
3. Secure the pump to the filter base with the mounting screws. The side of the pump
WITHOUT the metal ID plate should face towards the groove.
4. Installing the drain valve.
a. Place a gasket onto the threaded body of the drain valve. Place the valve through
the drain hole in the bottom of the tank (from the inside, threaded section to the
outside).
b. Place a gasket on the outside of the drain valve, pressing it to the tank and screw
on the threaded collar.
c. Ensure all of the components are tight, then screw the drain cap onto the valve.
5. Place the filter tank into the notch located in the base plate.
6. Place the manifold assembly into the tank.
7. Filling the filter tank with sand.
CAUTION: AVOID BREATHING IN DUST. USE A BREATHING MASK APPROVED
FOR DUST & SAND AND EYE PROTECTION WHILE FILLING THE TANK.
a. Fill the tank 1/3 full with water.
b. Place the sand shield on the center stem of the manifold. This will ensure
that when filling the tank, no sand will enter the manifold assembly.
c. Carefully fill the filter tank with the correct amount of #20 silica sand noted below.
• SandPRO 35D (item 4706, 1/3 hp) requires 25 lbs (11.3 kg)
• SandPRO 550D (item 4728, 1/2 hp) requires 25 lbs (11.3 kg)
• SandPRO 50D (item 4710, 1/2 hp) requires 50 lbs (22.6 kg)
• SandPRO 75D (item 4711, 3/4 hp) requires 75 lbs (34 kg)
Do not exceed the recommended quantity/weight of sand.
IMPORTANT: Remove the sand shield after adding sand. Keep for future use.
8. Securing the 4 way valve to the tank.
IMPORTANT: Be sure center
a. Install the tank o-ring onto the bottom of the 4 way valve.
NOTE: Apply a silicone grease or pool lube around the seal before installing it onto
the valve. This will allow for an easier installation and provide a better seal.
b. Place the valve onto the tank. Install flange clamp around tank and valve flange.
Tighten just enough so that the valve may be rotated on tank for final positioning.
Align the valve so the PUMP port is facing the pump motor OUTLET.
9.
Connecting the pump to the valve.
a. Attach adapters to the OUTLET on the pump and the PUMP port on the valve.
b. Connect the ports with the filter hose. Secure with the hose
the ends of the hose clamps.
c. Tighten screws on the clamp until there is less than a 1/4" (6.3mm) gap between
the 2 halves.
10.
Remove the pressure gauge plug and attach the pressure
Keep the plug for future use.
11.
Screw the plug into the WASTE (backwash) port. Remove when backwashing.
SAVE THESE INSTRUCTIONS
pipe of the manifold is nested in the 4
way valve.
clamps. Place tips over
gauge. Do not overtighten.
8
Step 1A ~ Model 35D only
Clip
Strainer Housing Threads
Strainer Housing
O-ring
Step 1B ~ Model 35D only
Clip
Step 2
Strainer Basket
Strainer Housing
Step 3
Screws &
Washers
Pump
Strainer Lid
Pump
Stainer
Housing
Forward
Groove
