JADO 875/614/191 Istruzioni per l'installazione - Pagina 3
Sfoglia online o scarica il pdf Istruzioni per l'installazione per Unità di controllo JADO 875/614/191. JADO 875/614/191 4. Rough valve for 3/4" thermostatic mixing valve with integral stops
1
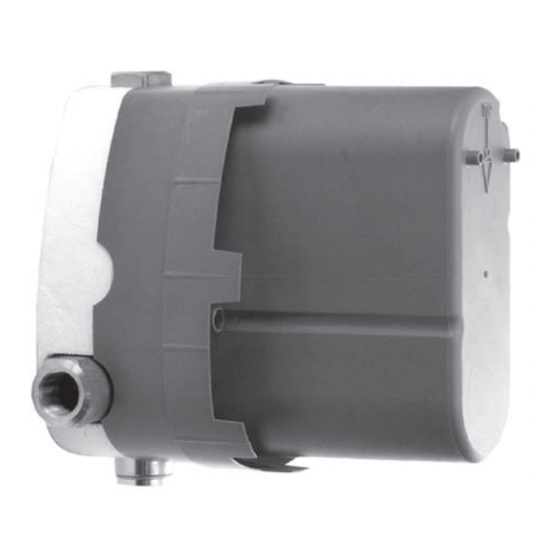
ROUGHING-IN THE VALVE
Prepare water supplies per ROUGHING-IN DIMENSIONS. Make sure
the finished wall is between the minimum 1-11/16" and maximum 2-1/2" rough dimension.
Install VALVE (1) at indicated height and depth. Make sure the "TOP" marking on the PLASTER
For support, use pipe BRACES (3) secured to wooden braces.
GUARD (2) is up.
Connect the hot and cold water supplies. Assemble all connecting pipes. Close off the tub
port if it is not needed using a commercially available pipe plug. Connections are 3/4" NPT.
IMPORTANT! INSTALL ANY REQUIRED SHUT OFF OR DIVERTER VALVE INTO THE PIPING SYSTEM.
DO NOT SOLDER DIRECTLY TO THE VALVE BODY (1); THIS WILL DAMAGE
WARNING
THE TEMPERATURE CONTROL ELEMENT AND CHECK STOP VALVES.
Remove PLASTER GUARD (2) if still installed.
If the CHECK STOPS (4, 5) were removed during installation, ensure the hot and cold
CHECK STOPS (4, 5) are not reversed. The hot CHECK STOP (4) has a red top and the cold
CHECK STOP (5) has a blue top.
CHECK STOPS (4,5) are supplied in the open position. Close using 5/32" (4 mm) hex
wrench to pressure test and to check for leaks.
To flush lines, remove the CHECK STOPS (4,5) and run water. If desired, the TEMPERATURE CONTROL UNIT
can be removed. Reinstall CHECK STOPS (4,5) and CONTROL UNIT (6), if it was removed.
Reassemble PLASTER GUARD (2) and FINISH WALL.
Beware of Freezing. No water should remain in the MIXING VALVE if freezing is a possibility.
Remove the CHECK STOPS (4,5) to completely drain the MIXER UNIT (1).
2
BACK TO BACK INSTALLATION OR
TRANSPOSED SUPPLY PIPING
If the system is delivering All Hot or All Cold and
no mixed water, the pipes are probably transposed.
Should the hot and cold water supply pipes
have been transposed making adjustment
impossible, proceed as follows:
Shut off water at main supply.
Remove check stops and reinstall them
transposed.
Important note: RED CHECK STOP (4) is now
on the right of the mixer body and the BLUE
CHECK STOP (5) is now on the left.
Turn the water supply back on and perform
the temperature calibration in step 3.
3
INSTALLATION OF SEAL SET
Important! Inform the tiler - see Figures 1 & 2
Ready plastered and pretreated wall. Fig. 1.
Use the PLASTER GUARD (1) for fixing the
SEALING FRAME (2). Fig. 1.
Glue on the SEALING FRAME (2). Fig. 1.
Finish tiling the wall. Fig. 2.
Turn off hot and cold water
CAUTION
supplies before beginning.
WOOD BRACE
1
ROUGH WALL
1
COLD
HOT
6
3
PLUG TUB
PORT
4
CHECK STOP
(HOT RED)
Fig. 1
2
FINISHED WALL
COLD
HOT
5
CHECK STOP
(COLD BLUE)
2
Fig. 2
2
H 9 6 5 5 5 1 R e v . 1 . 1