Bristan WASTES W BATH09 C Istruzioni per l'installazione e manuale d'uso - Pagina 2
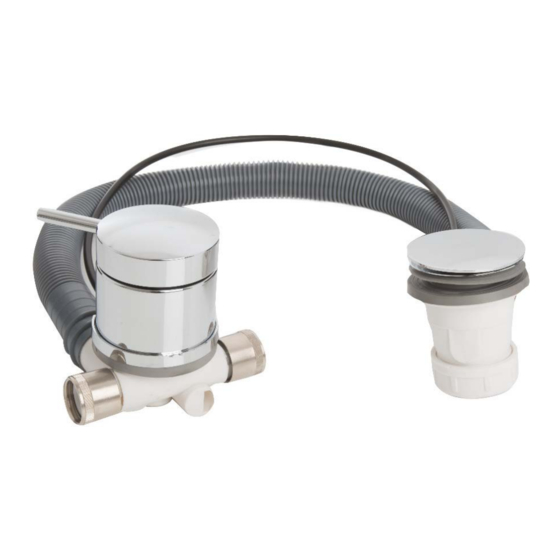
Sfoglia online o scarica il pdf Istruzioni per l'installazione e manuale d'uso per Prodotto idraulico Bristan WASTES W BATH09 C. Bristan WASTES W BATH09 C 4. Bath filler with pop-up waste & overflow
Introduction
Thank you for choosing Bristan, the UK's leading taps and showers expert. We have designed this
product with your enjoyment in mind. To ensure that it works to its full potential, it needs to be fitted
correctly. These fitting instructions have been created to give you all of the information you need
and, if you need any further help, please do not hesitate to give us a call on 0330 026 6273.
Installation
1.
Identify all components are present prior to installation.
2. Fit the waste body (8) and flange (6) to the bath securing using screw (4) and washer (5); ensure
sealing washer (7) is placed through the bath before this is done as shown on diagram. Use a pure
Silicon sealant where necessary.
3. Fit the overflow/filler elbow (15) to the bath ensuring overflow washer (16) is in place, assemble
plastic 'C' plate (17) with filler outlet (19). Plastic spacer (18) is optional depending on thickness
of bath. Secure to bath using o-ring (20), washer (21) and retaining nut (22). Use a pure Silicon
sealant where necessary.
4. Connect flexible tube (13) to the waste body (8) using the plastic nut (12) and washers (9, 10 and
11) fitted in the correct order as shown.
5. Connect the overflow elbow (15) to the flexible tube (13) ensuring o-ring (14) are fitted.
6. Fit the handle (23) to the control spindle by pushing on firmly.
7. Connect water supplies to inlets. The elbows are 3/4" BSP. Two flexible connectors (24) are
supplied that can be used to connect the elbows to 22mm pipe work, depending on the
installation. A blanking plug is also supplied to close off one inlet if mixed water is to be
connected to the overflow filler.
8. Check all joints and connections for leaks.
Components
1.Plug
2.Adjusting nut
3.Adjusting screw
4.Flange screw
5.Space washer
6.Waste flange
7.Flange/body sealing washer
8.Waste body
9.O-ring
10.Conical washer
11.Nylon washer
12.Plastic nut
13.Flexible tube
14.O-ring
15.Overflow./filler elbow
16.Overflow washer
17.Plastic 'C' plate
18.Plastic spacer
19.Filler outer
20.O-ring
21.Washer
22.Filler retaining nut
23.Handle
24.Flexible connector