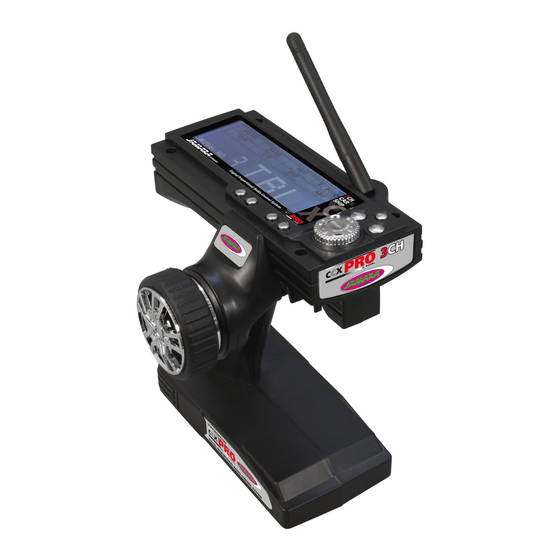
Jamara CCX Pro Istruzioni - Pagina 2
Sfoglia online o scarica il pdf Istruzioni per Trasmettitore Jamara CCX Pro. Jamara CCX Pro 12. 2,4 ghz
Anche per Jamara CCX Pro: Manuale di istruzioni (20 pagine), Istruzioni (12 pagine), Istruzioni (12 pagine), Istruzioni (4 pagine), Manuale di istruzioni (16 pagine)

ES - Dispositivos para la carga
Cuando se usa un cargador NiCd o NiMH en la emisora, asegúrese que las células estén com-
pletamente cargadas, la tiene que volver a recargalas nuevamente después de cada uso. Preste
atención a que está utilizando el número recomendado de células.
Asegúrese de poner un cargador adecuado, por ejemplo ref.150004, usted debe consultar a su
distribuidor. Después de las baterías están totalmente cargadas,desconecte la emisora, a la toma
de carga del sistema de recepción y quitar el cargador de la toma.
Retire las pilas en la emisora y el modelo, si usted no lo usa durante un periodo prolongado.
Carga la batería de la emisora, siga estos pasos:
1. Inserte las pilas con la poridad correcta.
2. Enchufe el cargador en un tomacorriente de pared
3. Enchufe el cargador en la toma de carga de la emisora.
4. Retire el cargador del enchufe y desenchufe el cargador una vez
que las baterías están totalmente cargadas.
¡Atención!
Durante la carga, al abrir el compartimiento de la batería.
5
6
Vista lateral derecha
1.
Antena 2,4GHz
2.
Volante
3.
3 Canales
4.
Batería/Compartimiento de la batería
5.
Canal 1 Dual Rate
6.
Canal 3 Trim
Vista trasera
7. On/Off
Programación
B.
Pantalla LCD
C. Volver
D. Clave de enlace
E.
Fin/ Selección de menú
F.
Confirmación ( derecha/izquierda)
G. Trim canal 2 detrás
H. Trim canal 2 delante
I.
Trim canal 1 izquierda
J.
Trim canal 1 derecha
Display
Mediante un acuerdo razonable de botones, teclas y pantalla LCD, la emisora CCX Pro 2,4GHz
puede ser programada forma rápida y sencilla. Todos los canales se pueden recortar, también llevó
a invertir
la dirección. Además, hay funcciones disponible como Dual-Rate, La EXPO y ABS.
2
1
2
3
4
Vista lateral izquierda
8.
Conexión para el cable del simulador
9.
Toma de carga
A.
Acelerador
I
J
GB - Charging The Batteries
If you use NiCad or NiHm rechargeable cells for your transmitter ensure that the cells are fully
charged before using the system. Please be aware that due to the self-discharge characteristics of
this type of cells that they should always be fully charged prior to use. Please refer to the battery
manufacturers recommendations regarding charging current etc.
Use only a high quality charger which is suitable for this type of cells such as our item 15 0004.
For further information please contact your local dealer. Once charging is complete, always discon-
nect the batteries from the charger and unplug the charger from the mains supply.
Remove the batteries from the model and transmitter if you do not intend to operate it for a
longer period of time. To charge teh transmitter batteries please proceed as follows:
1. Fit the batteries observing the correct polarity.
2. Plug the charger into the household mains.
3. Connect the charging cable to the transmitter.
4. Remove the charging cable and unplug the charger as soon as the batteries are full.
Warning!
Remove the battery hatch cover whilst charging!
7
Right - side view
1.
2,4 GHz Antenna
2.
Steering Wheel
3.
3 channel
4.
Battery Hatch
5.
Dual Rate channel 1
6.
Trim channel 3
Rear View
7.
ON/OFF Switch
B
C
D
E
F
G
H
Display
Thanks to the logical and well thought out lay-out of the Programming Panel and the positioning of
the switches and LEDs the CCX Pro 2,4 GHz transmitter can be quickly and simply programmed. All
channels can be trimmed and the direction changed.
Furthermore the transmitter is equipped with a Dual Rate, a EXPO- and ABS-Function.
8
9
A
Left - side view
8.
Connection for
simulator cable
9.
Charging socket
A.
Throttle Lever
Programming Panel
B.
LCD display
C. Back
D. Binding Button
E.
Selection for sub-menu
F.
Confirmation ( right / left)
G. Trim channel 2 back
H. Trim channel 2 front
I.
Trim channel 1 left
J.
Trim channel 1 right
