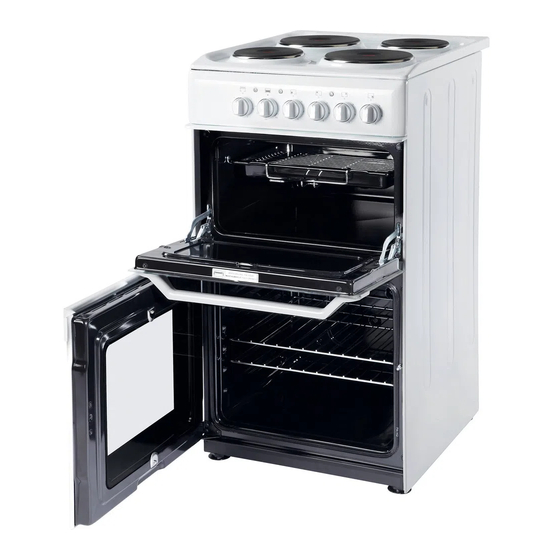
Indesit RIT50E/UK Manuale di istruzioni per l'uso - Pagina 14
Sfoglia online o scarica il pdf Manuale di istruzioni per l'uso per Fornelli Indesit RIT50E/UK. Indesit RIT50E/UK 20. 50cm free standing electric cooker

Care and Cleaning
Electric sealed hotplates
GB
The cleaning of sealed hotplates should be done when
they are cold, using a soap filled Brillo pad, following
the grain of the hotplate. This will ensure that any
stubborn, burnt on spillages are removed. Wipe over
with a damp clean cloth, making sure that all the
cleaner has been removed.
Finally, turn on hotplate to warm for a few minutes,
then smear with a little cooking oil to provide a
protective coating, or the restorative agent Homecare
Four Hob, available from our spares department or
leading supermarkets. The bezels will mellow with use
to a burnished gold colour, a soap filled Brillo pad will
help to keep them bright, care should be taken not to
damage the vitreous enamel hob surface.
Note: We do not recommend the use of decorative
covers over the hot hotplates as these can hold
condensation and cause corrosion. Accidental
operation with a cover in place can cause intense
heat. Never place saucepan lids on the hotplates, as
this may cause corrosion.
Grill
Remove the grill pan and the wire grid food support, it
is best to wash these items immediately after use to
prevent stains from being burnt on when used again.
Wipe out the Grill compartment, use a fine steel wool
soap pad to remove stubborn stains from the grill
runners and the floor of the compartment. Wipe over
the control panel with a damp cloth and polish with a
dry cloth.
Control Panel
Do not use cream cleaners, oven cleaners or
aerosols, scouring pads or abrasive powder for
cleaning the plastic knobs as damage will occur.
Decorative Trims
It is advisable to clean the decorative trims regularly to
prevent any build up of soiling. The recommended
method of cleaning is to wipe over the trims with a soft
cloth wrung out in warm water or mild non-abrasive
cleaner. (If in doubt try the cleaner on a small area of
trim which is not noticeable in normal use). Then, after
wiping with a cloth wrung out in clear water, dry with a
soft clean cloth.
Doors
Wipe over the outer door glass panels with a cloth
wrung out in warm soapy water, then after wiping with
a cloth wrung out in clear water, dry with a soft clean
cloth. Ensure that glass doors are not subjected to
any sharp mechanical blows.
14
Glass Inner Door Panel (where fitted) – open the
door fully and unscrew the two screws securing the
glass panel, taking care not to allow the glass to fall.
The glass panel may now be washed at the sink.
Stubborn stains can be removed by using a fine steel
wool soap pad. Ensure the glass panel is not
subjected to any sharp mechanical blows. Take
particular care not to damage the inner surface which
is coated with a heat reflective layer. After cleaning,
rinse and dry with a soft cloth. For slight soiling the
inner glass panel may be cleaned, while still warm,
without removing it from the door.
Warning: Oven must not be operated with inner
door glass removed.
Take care during cleaning not to damage or distort
the door seals. Do not lift the door seal from the oven
chassis, if necessary remove the seal by carefully
unhooking the corner clips.
Take care that the rating label edges are not lifted
during cleaning, and furthermore that the lettering is
not blurred or removed.
Ovens
Remove the rod shelves and grill pan. Use a fine steel
wool soap pad to remove stubborn stains from the rod
shelves, grill pan and the floor of the oven.
Oven Shelf Supports
The shelf supports are removable and dishwasher
safe.
To remove hold the support at the front and pull away
from the oven side, this can then be cleaned in a sink
or a dishwasher. When removed it allows access to
the oven side, which can be cleaned with warm soapy
water.
To refit the support, insert the longer leg into the rear
fixing hole and push in the front leg.
Oven Lamp Replacement
Open the oven door and remove the rod shelves.
Using a suitable cloth to protect the fingers grip the
light glass dome, unscrew anti-clockwise and lift.
Reach into the aperture with fingers, and unscrew the
lamp anticlockwise. Fit replacement lamp (25W
300°C rated SES), refit dome.
WARNING: To avoid electric shocks - please
ensure that the electricity supply to the appliance
is switched off and the appliance is fully cold,
before removing the lamp lens.
