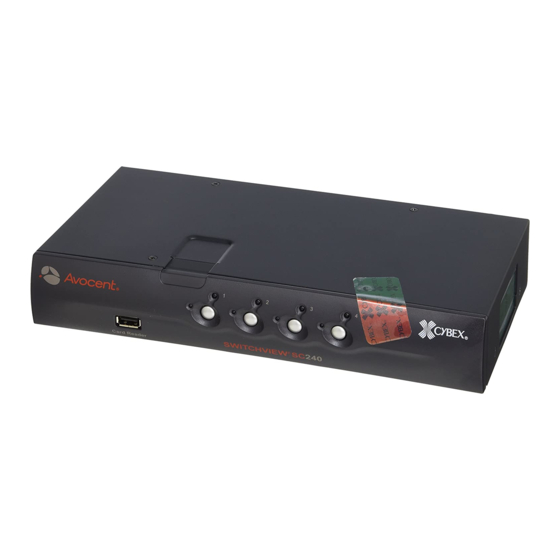
Avocent SwitchView SC220 Manuale di installazione rapida
Sfoglia online o scarica il pdf Manuale di installazione rapida per Interruttore Avocent SwitchView SC220. Avocent SwitchView SC220 2. 2/4-port vga/usb and ps/2 switches
Anche per Avocent SwitchView SC220: Specifiche tecniche (2 pagine), Manuale di installazione rapida (2 pagine)

The following will help you install your
SwitchView SC switch easily.
Should you require further assistance, please
contact Avocent Technical Support.
1
Connecting local peripherals
Turn off all servers that will be part of your
SwitchView SC switching system. Plug your
VGA monitor, keyboard and mouse cables into
the appropriate CONSOLE ports on the back
of your SwitchView SC switch.
2
Powering your system
Plug one end of the power cord into the
SwitchView SC switch power supply. Then,
plug the power supply into the SwitchView SC
switch. Next, plug the other end of the power cord
into an AC wall outlet. Turn on your switch first,
then all attached servers.
3
Connecting your servers
Using the SwitchView SC switch's peripheral
cable set (USB or PS/2), plug the cables
into the corresponding ports on your server.
Plug the other end into any of the available server
ports on your SwitchView SC switch. Repeat
this process until all servers are
SwitchView SC
switch. A green LED indicates
the target device is turned on.
To Contact Avocent Technical Support: Visit www.avocent.com
Avocent, the Avocent logo, The Power of Being There, the Cybex logo and SwitchView are registered trademarks of Avocent Corporation or its affiliates. ©2007 Avocent Corporation. All rights reserved.
Quick Installation Guide
SwitchView
For models: 120/140/220/240
To install the SwitchView SC switch
SwitchView SC240
switch shown
4
Switching your servers
Press the appropriate numbered front panel button to
access servers via your SwitchView SC switch.
5
Using the front panel card reader port
attached to the
SwitchView SC 220 and 240 series switches are
equipped with a front panel USB card reader port to
support Common Access Card (CAC) functionality.
Front panel push-buttons allow you to switch KVM
sessions and the card reader together. A yellow LED
indicates the target device to which the KVM session
and card reader port is connected.
Mechanical
H x W x D = 1.72" x 10.36" x 5.68"
Weight = 2.3 lbs
5
2
1
The Power of Being There
SC Switch
®
Environmental
Operating Temperature: 32˚ (0˚C) to 104˚ (40˚C)
Storage Temperature: 4˚ (-20˚C) to 122˚ (50˚C)
Input Power: .8A; Operating Voltage 100-240 VAC
Power Frequency: 50-60 Hz
Supported hardware and specifications
Servers: IBM, Sun, PC/AT, USB, PS/2 and
100% compatibles
Video Modes: VGA, SVGA, XGA, SXGA, UXGA,
WVGA, WSVGA, WXGA, WSXGA, WUXGA,
and HDTV
Maximum Resolution: 2048 x 1536 @ 85Hz
Peripherals: USB and/or PS/2 keyboard and mouse
USB Common Access Card readers
®
4
3
590-718-501A
