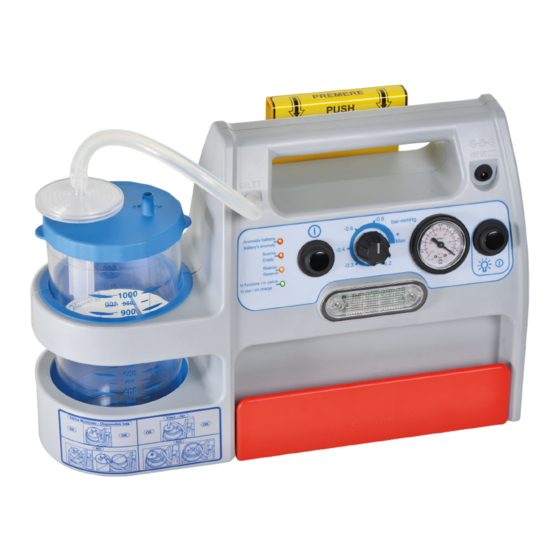
3A HEALTH CARE MINIASPEED Battery Evo Plus Manuale di istruzioni - Pagina 9
Sfoglia online o scarica il pdf Manuale di istruzioni per Prodotto respiratorio 3A HEALTH CARE MINIASPEED Battery Evo Plus. 3A HEALTH CARE MINIASPEED Battery Evo Plus 14.
Anche per 3A HEALTH CARE MINIASPEED Battery Evo Plus: Manuale di istruzioni (13 pagine), Manuale di istruzioni (13 pagine), Manuale di istruzioni (14 pagine)

fit into the hole marked VACUUM/VUOTO, which is outlined in yellow. The antibacterial filter also protects
the aspiration circuit from any contaminating agents sucked in during use. Do not use the aspirator without
the antibacterial filter, because from a bacteriological point of view, it becomes dangerous for the
patient. Keep the device vertical to allow the overflow to function correctly.
All the components of the vessel can be sterilised using a conventional system in an autoclave at a
temperature of 121° C, or by boiling for 10 minutes. We recommend replacing the complete vessel at every
30 sterilisation cycles. Do not overturn the vessel during use, in order to prevent the intervention of the non-
return valve (3-4-5); should this occur, switch the aspirator off and detach the tube connected to the
antibacterial filter. Never use the aspirator without the secretion collection vessel and/or without the
antibacterial filter.
4.1.1 Connection: connect one end of the short, sterilisable silicon tube (7) to the antibacterial filter connector
(6) and insert this latter into the "VACUUM" hole of the blue top (2); connect the other end to the "INLET"
connector of the aspirator. Connect one end of the long sterilisable silicon tube (8) to the "PATIENT/PAZIENTE"
connector of the blue top (2); to the other end, connect the disposable, sterile manual regulator (11) and
connect the disposable, sterile cannula (10) to this latter.
4.2 Secretion collection vessel with disposable bag (9). The aspirator can be used with the re-usable 1000 ml.
transparent secretion collection vessel (1) and with the disposable bag (9) supplied. In this case, the
antibacterial filter is integrated in the disposable bag and therefore the antibacterial filter (6) and blue top
with valve (2) are not used. The filter integrated in the bag also performs the function of preventing the return
of aspirated liquids towards the aspirator. In this case, to restore device operation, it is necessary to
replace the disposable bag. For the cleaning and disinfecting operations of the tubes (7-8) and vessel (1),
sterilise the single parts in an autoclave at a maximum temperature of 121° C, or by boiling for 10 minutes.
The bag is disposable and must always be replaced after every use. The bag must be completely inserted
in the vessel in order to prevent any vacuum losses.
N.B.: maximum disposable bag usage vacuum: – 0.75 bar (75 kPa).
4.2.1 Connection: connect one end of the short sterilisable silicon tube (7) to the yellow connector (VACUUM)
of the top (photograph 3b) and the other end to the "INLET" connector of the aspirator. Connect one end
of the long sterilisable silicon tube to the red connector (PATIENT) and connect the disposable sterile manual
regulator (11) and the disposable sterile cannula (10) to the other.
N.B.: only use the disposable bags supplied by 3A - Code 3A1687.
The MINIASPEED BATTERY EVO PLUS is fitted with a LED working light (10) which allows use of the device in
dark conditions and/or at night.
Press the button (11) to switch on the light, as shown in Figure 5 of page 3; press the button (11) again to switch
it off. The light switches off automatically after about 60 minutes.
The light is of LED type, so the amount of current it consumes is minimal and it can be used even during
treatment; however, it should be switched off whenever it is not required and/or at the end of the treatment.
N.B.: If using chemical disinfectants, follow the manufacturer's instructions exactly.
•
The cannula and the aspirated flow manual command are sterile, disposable products and must be replaced
after every application.
•
The antibacterial disposable filter must be replaced after every application.
•
Never leave the appliance in water or submerged; clean the external casing of the appliance using only a
damp cloth with detergent (non abrasive).
DESCRIPTION OF AMBULANCE MOUNTING / RELEASE SYSTEM
1.
Fit the bottom of the bracket fixed to the aspirator into the recess provided in the bottom of the bracket
mounted in the ambulance (as shown in Figure 6 of page 3).
2.
Keeping the device engaged with the bracket, push it until it engages with the hook in the top of the yellow
mobile bracket (as shown in Figure 6a):
N.B.: to ensure that the device engages correctly, press the mobile bracket, push the device fully down
and release the mobile bracket (as shown in Figure 6b).
ALWAYS CHECK THAT THE DEVICE HAS ENGAGED WITH THE BRACKET.
3.
To release the device, press the yellow mobile bracket and lift the aspirator up and towards you (as shown
in Figure 6c).
KEEP A FIRM GRIP ON THE HANDLE OF THE ASPIRATOR WHILE RELEASING IT.
DESCRIPTION OF USE OF WORKING LIGHT
CLEANING AND DISINFECTION OPERATIONS
20
