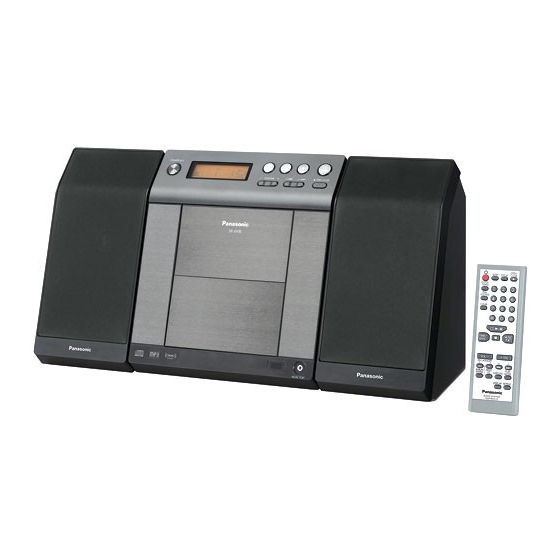
Panasonic SA-EN35 Manuale di istruzioni per l'uso - Pagina 2
Sfoglia online o scarica il pdf Manuale di istruzioni per l'uso per Impianto stereo Panasonic SA-EN35. Panasonic SA-EN35 9. Cd stereo system model no. sc-en35; sc-en33
Anche per Panasonic SA-EN35: Manuale di istruzioni per l'uso (9 pagine)

Supplied accessories
Use the numbers indicated in parentheses when asking for replacement
parts.
(As of January 2007)
1 Remote control [ ➡ page 2]
(N2QAYB000107)
SC-EN35
(N2QAYB000108)
SC-EN33
1 FM/AM antenna [ ➡ page 3]
2 Batteries [➡ page 2]
•
The included AC mains lead is for use with this unit only. Do not use it with other
equipment.
•
Do not use an AC mains lead from other equipment.
Control guide
SLEEP timer operation ON/OFF or SLEEP time setting
Clock and Timer setting [CLOCK/TIMER]
CD/MP3 Program, Tuner Preset (Manual) [PGM, -AUTO PRESET]
CD/MP3/USB: Delete all programs [CLEAR]
SC-EN33
[TUNER/BAND]
Selector switch to Tuner
for FM and AM.
Selector switch to USB. Direct USB Play/USB Pause [USB q/h]
SC-EN35
Turn the volume up/down [VOL-], [+VOL]
Confirm track selection during MP3/USB Program Mode [ENTER]
SC-EN35
FM/AM/MUSIC PORT select button [FM/AM/MUSIC P.]
SC-EN33
Standby/on switch [8]
Press to switch the unit from on to
standby mode or vice versa.
In standby mode, the unit is still
consuming a small amount of power.
USB port
Placement of speakers
Right Speaker
AC mains lead
2
Left and right speakers are different.
1 AC mains lead [ ➡ page 3]
For Australia and N.Z.
For other areas
[SLEEP]
Standby/on switch [^]
[Long press] Tuner Preset (Auto)
Delete last programmed track [DEL]
SC-EN35
[FM/AM]
Selector switch to Tuner for
FM and AM.
Previous/Next Album [
,
ALBUM]
Preset EQ mode selector [PRESET EQ]
FM/AM select button [TUNER/BAND]
Display
Remote control signal sensor
Left Speaker
Note
•
Keep your speakers at least 10 mm away from the
system for proper ventilation.
•
These speakers do not have magnetic shielding. Do
not place them near televisions, personal computers
L
or other devices easily influenced by magnetism.
R
•
You cannot take the front net off the speakers.
DC in cord to connect to main set
The remote control
R6/LR6, AA
SA-EN35
Remote control signal sensor
SC-EN35
SA-EN35
■ Batteries
•
Insert so the poles (+ and – ) match those
in the remote control.
•
Do not use rechargeable type batteries.
■ Use
•
Aim at the sensor, avoiding obstacles, at a
maximum range of 7 m directly in front of
the unit.
•
Operation can be affected by strong light
sources, such as direct sunlight, and the
glass doors on cabinets.
[z PLAY] Timer PLAY ON/OFF
[;, OPEN/CLOSE] Open and Close CD lid
[1-9, 0, ≧10] Numbered buttons
To select a 2-digit number
e.g. 16: [ ≧10] [1] [6]
To select a 3-digit number
e.g. 226: [ ≧10] [ ≧10] [2] [2] [6]
[CD q/h] Selector switch to CD.
Direct CD Play/CD Pause
[MUSIC PORT] Selector switch to MUSIC PORT
[g] Stop button
[2/u, 1\i] CD: Skip/Search
MP3/USB: Track Skip
TUNER: Tune up/down, [Long press] Auto tuning
[PLAY MODE] Play mode button
[SURROUND] SURROUND mode ON/OFF
[REPEAT] Repeat ON/OFF
[DISPLAY]
CD: CD Display (Elapsed play time/Remaining play time)
MP3: MP3 Display (Elapsed time/Album name/Track name/
ID3 [Album]/ID3 [Track]/ID3 [Artist])
USB: USB Display (Elapsed time/Remaining time/Album
name/Track name/ID3 [Album]/ID3 [Track]/ID3 [Artist])
RDS: RDS Display (Station Name/Program Type/Frequency)
[USB q/h] Selector switch to USB. Direct USB Play/USB Pause
[MUSIC PORT] Selector switch to MUSIC PORT
SC-EN33
[g] Stop button
[CD q/h] Selector switch to CD. Direct CD Play/CD Pause
[; OPEN/CLOSE] Open and Close CD lid
[2/u, 1\i] CD: Skip/Search
MP3/USB: Track Skip
TUNER: Tune up/down, [Long press] Auto tuning
[- VOLUME +] To adjust the volume
0
50
(Minimum)
(Maximum)
Music port jack
Caution
•
Use the speakers only with the
recommended system. Failure to do so
may lead to damage to the amplifier and/or
speakers, and may result in the risk of
fire. Consult a qualified service person if
damage has occurred or if you experience
a sudden change in performance.
•
Do not attach these speakers to walls or
ceilings.
