HTC VIVE N CHILL Istruzioni per l'installazione
Sfoglia online o scarica il pdf Istruzioni per l'installazione per Cuffie per la realtà virtuale HTC VIVE N CHILL. HTC VIVE N CHILL 5.
Installation Instructions v1.1
The [VIVE N CHILL] is easy to install under a minute. It is non-permanent on the headset if you decide to move it or need
to remove it for any reason. Both Standard and Deluxe Audio Headstrap (DAS) install instructions are listed below.
1. First clean the mounting surface of the Vive where the [VIVE N CHILL] by wiping it with a moist towelette or
damp cloth to remove any grease or residue on the adhesive surface.
2. Carefully slide forward the front accessory door of the Vive. There are two tabs on either side of the interior
and there will be tension from the cabling so make sure you clear the tabs completely.
3. With the [VIVE N CHILL] held underneath the top head strap, route the USB power cable through the hole in
the top of the door and plug into the USB accessory port.
4. Route the switch up through the hole in the harness and bring it forward so it rest on the Vive cables (if you
have the DAS installed on the headstrap) with the button facing outward.
5. Carefully slide the Vive door back into place.
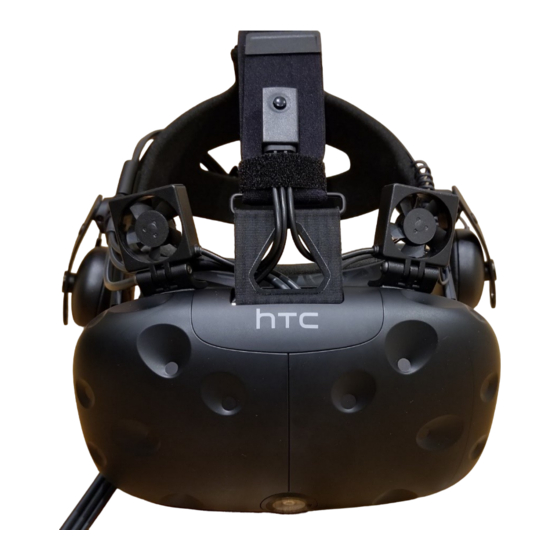
6. Test fit the fan mounts with the fans at 90 degrees. You should find the sweet spot where the contour fits the
headset and the location should be similar to the pictures below.
7. Remove the adhesive backing on the mounts and take your time aligning them to both sides of the headset
where you've decided to place them. They should face slightly inward toward the center.
8. Standard Heastrap: Use the provided Velcro strap or ziptie to hold the switch to the cabling.
9. DAS: If you have the DAS we recommend the Velcro tie to hold the switch to the headstrap and a ziptie on the
right side to hold the 3-1 cable to the side of the strap. Route cabling on top of the right fan mount and keep it
low where it doesn't interfere with airflow or folding. Use the strap to prevent the cable from putting pressure
against the mount when cabling expands or contracts.
Figure 1. Opening Accessory Door.