Crestron 8x8 DigitalMedia DM-MD8X8 Manuale di avvio rapido - Pagina 4
Sfoglia online o scarica il pdf Manuale di avvio rapido per Interruttore Crestron 8x8 DigitalMedia DM-MD8X8. Crestron 8x8 DigitalMedia DM-MD8X8 4. 8x8 digitalmedia switcher
Anche per Crestron 8x8 DigitalMedia DM-MD8X8: Opuscolo (3 pagine)
DM-MD8X8/16X16/32X32
10
Commission System
A. The initial setup provided by this QuickStart guide involves the two
Commission System functions: HDCP Check and Data Rate Check, part
of the Installer Tools mode procedures. All other Installer Tools mode
procedures are described in the latest version of the DigitalMedia Switch-
ers Operations Guide (Doc. 6755).
B. Following completion of Steps 8 and 9 on page 3, press the MENU
button once or twice until Enter Password is displayed. You need to enter
a password to continue. The default password is 1 2 3 4. Use the IN
buttons to enter the pasword, then press ENTER to initiate the Installer
Tools mode. This mode provides a series of menus and sub-menus that
let you perform a first time setup and basic configuration options.
1. Use the Selection Knob to scroll through the list of
functions until "Commission System" is highlighted, and
press ENTER to select it.
2. Follow the on-screen instructions for each function.
3. Press the ENTER button to select an on-screen choice.
4. Use soft buttons to select choices at the bottom of a menu
screen.
5. The MENU button always takes you back to the previous
menu.
6. When all Installer Tools mode functions are completed, use
the MENU button to exit.
Advanced setup information and operational details are covered in
the latest version of the DigitalMedia Switchers
Operations Guide (Doc. 6755).
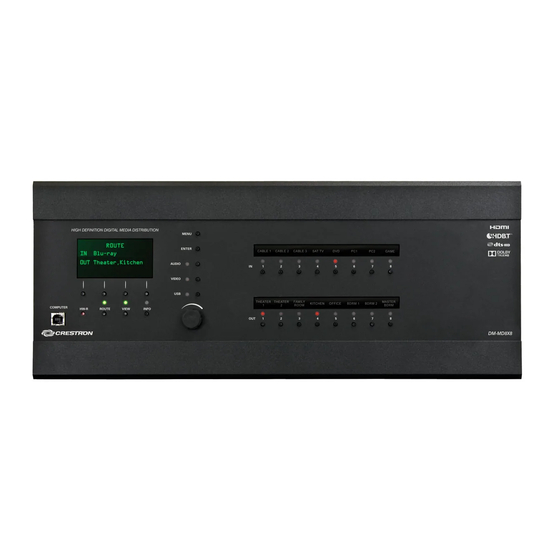
Soft Buttons
Selection Knob
Input Source
Buttons (IN)
4
For details, refer to the latest version of the DM-MD8X8/16X16/32X32
DigitalMedia
™
Switchers Operations Guide, Doc. 6755.
QUICKSTART DOC. 6756D (2022813, 2 of 2)
DigitalMedia
™
Switchers
Commission System
HDCP Check
Data Rate Check
Installer Tools
Inputs
Outputs
Network
Control
Message Log
Commission System
MENU Button
ENTER Button
NOTE: The switcher controls the IP setup of connected DM-RMC-100s.
•
When the switcher is set to DHCP on, all DM-RMC-100s will also be set to DHCP on.
•
When the switcher is set to DHCP off, all DM-RMC-100s and input cards with USB
connectors will also be set to DHCP off and their static IP address will be set by the
switcher in the following fashion:
<DM-MD8X8 IPaddress> + <slot #> = <DM-RMC IP address>
EX: DM-MD8X8: 192.168.1.200
DMC-HD (slot 1): 192.168.1.201
DM-RMC-100 output 1 (slot 17): 192.168.1.217
DM-RMC-100 output 8 (slot 24): 192.168.1.224
This reduces the time required to set up the IP configuration of DM devices.
For details on setting IP addresses of the input and output cards for each switcher, refer
to the latest version of the DigitalMedia Switchers Operations Guide (Doc. 6755).
www.crestron.com
04.10
©2010 Specifications subject to
change without notice.
HDCP Check
HDCP Check
The HDCP check will result
Please verify that all sources
in all routes being
and endpoints are powered
cleared. Continue?
on before proceeding.
No
Yes
The HDCP Check verifies that each HDMI
source can hold enough keys to be routed to
any output. If possible distribution is larger
than the maximum number of HDCP keys,
then the source cannot be routed to all
outputs simultaneously, and an error message
will be displayed. Refer to the latest version of
the DigitalMedia Design Guide (Doc. 4789) for
details.
Confirm DM Cable Type
Select Outputs to Test
* Digital Media
* Kid's Room
Category 6
* Living Room
Category 5e
* Kitchen
Next
All
None
The data rate check ensures that each cable is
able to support all video formats that you are
using. If the cables are not able to show the
desired resolutions, you may need to install a
DM-DR Repeater, sold separately, to decrease the
length of individual cables.
888.273.7876
201.767.3400
All brand names, product names, and trademarks
are the property of their respective owners.
HDCP Check Status
Use the Selection Knob to
1. Non-HDCP Card
highlight the input to be tested,
2. Will be Tested
and press OK to begin the test.
3. Will be Tested
OK
Back
OK
HDCP Check Status
HDCP Check Complete
Test in Progress . . .
All devices can be routed
to all outputs simultaneously
Press LIST to see results.
DONE
HDCP Check Results
Use the << and >>
Input 1 (DVD)
softbuttons to check
Max HDCP Keys: 9
other inputs.
Possible Destinations: 8
DONE <<
Data Rate Check
Please verify that all sources and
selected endpoints are powered
on before proceeding.
Next
OK
Data Rate Check
Data Rate Check - Success
Test in Progress . . .
ids' Room – 2.22Gbps (1080p
K
Living Room – 6.75Gbps (Deep
Kitchen – 4.44Gbps (1080p 60
OR
Resolution
Typical Resolution/Data Rate
Data Rate Check - Error
Configurations
Kids' Room – No Video
RESOLUTION
DATA RATE
Living Room – No Video
Kitchen – 4.44Gbps (1080p 60
480p 60Hz
810Mbps
Resolution
1024X768 60Hz
1.95Gbps
720p 60Hz
2.22Gbps
To view the resolution of the
3.24Gbps
1280X1024 30Hz
signal, press the Resolution
2.22Gbps
1080i 30Hz
softbutton. (The softbutton name
2.22Gbps
changes to Data Rate.) Refer to
1080p 24Hz
the adjacent table for typical
4.44Gbps
1080p 60Hz
resolution/data rate configurations.
4.62Gbps
1920X1200 60Hz
Press the Done softbutton when
6.75Gbps
Deep Color
the tests are finished.
11
Setup EDID Configuration Using DM Tools
Configure the switcher's EDID information using Crestron's
DigitalMedia Tools application.
™
Open Crestron Toolbox
– click on the toolbar DMTool icon (
connect to your DM switcher. Visit www.crestron.com/digitalmedia
for more information on using the DM Tools.
LIST
>>
Done
Done
) and