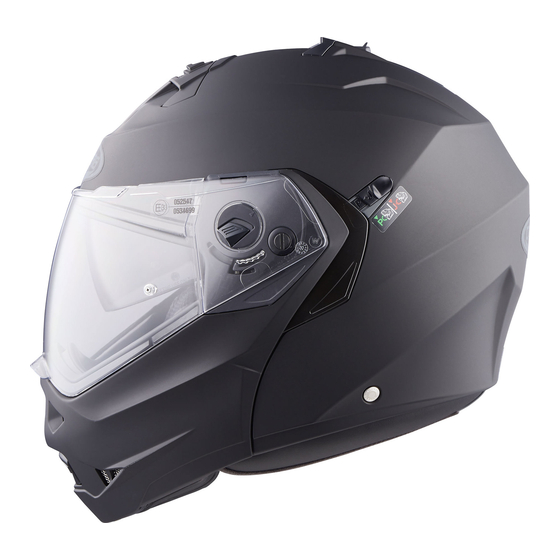
Caberg DUKE II Manuale - Pagina 6
Sfoglia online o scarica il pdf Manuale per Accessori per moto Caberg DUKE II. Caberg DUKE II 16.

ENG
ENG
Your helmet DUKE thanks to the double homologation P/J can be used in 2 confi-
Your helmet DUKE thanks to the double homologation P/J can be used in 2 confi-
gurations (chinguard closed "P" and chinguard open "j")
gurations (chinguard closed "P" and chinguard open "j")
Lever P/J
Lever P/J
When the P/J lever is positioned on "J" it is possible to block the chinguard in the
When the P/J lever is positioned on "J" it is possible to block the chinguard in the
open position (Fig.1). The selection on the position "J" can be done before the ope-
open position (Fig.1). The selection on the position "J" can be done before the ope-
ning of the chinguard.
ning of the chinguard.
WARNING! In this position it is not possible to close the chinguard. Do not
WARNING! In this position it is not possible to close the chinguard. Do not
force the closure as this could cause damages to the closing mecha-
force the closure as this could cause damages to the closing mecha-
nism of the helmet.
nism of the helmet.
To be able to close the chinguard it is necessary to move the P/J lever
To be able to close the chinguard it is necessary to move the P/J lever
to the "P" position.
to the "P" position.
When the lever P/J is positioned on "P" the chinguard can be opened and closed (Fig.2)
When the lever P/J is positioned on "P" the chinguard can be opened and closed (Fig.2)
WARNING!
WARNING!
The level of protection of this helmet is in function of the configuration adopted by
The level of protection of this helmet is in function of the configuration adopted by
the user: full protection with the chinguard closed and partial protection when the
the user: full protection with the chinguard closed and partial protection when the
chinguard is open.
chinguard is open.
Whilst on the move do not ride with the chinguard in the open postion if
Whilst on the move do not ride with the chinguard in the open postion if
the P/J lever is not positioned in the configuration "J"
the P/J lever is not positioned in the configuration "J"
1.
1.
HOW TO FIX AND REMOVE THE CLEAR VISOR
HOW TO FIX AND REMOVE THE CLEAR VISOR
1.1 Open the visor until the arrow on the ground plate and the arrow on the visor
1.1 Open the visor until the arrow on the ground plate and the arrow on the visor
meet. Press button A towards the back of the helmet and detach the visor (Fig.3)
meet. Press button A towards the back of the helmet and detach the visor (Fig.3)
1.2 Repeat the same process on the other side and remove the visor.
1.2 Repeat the same process on the other side and remove the visor.
To assemble back the visor, repeat the above process in inverse order
To assemble back the visor, repeat the above process in inverse order
2.
2.
INSTRUCTION TO REMOVE THE SMOKED VISOR
INSTRUCTION TO REMOVE THE SMOKED VISOR
2.1 Drive forward the top lever to remove the smoked visor (Fig.4)
2.1 Drive forward the top lever to remove the smoked visor (Fig.4)
2.2 Demount the smoked visor putting up with a flat screwdriver the slider which
2.2 Demount the smoked visor putting up with a flat screwdriver the slider which
fix it to the lever (Fig.5)
fix it to the lever (Fig.5)
2.3 Release the smoked visor by pulling slightly outward (Fig.6)
2.3 Release the smoked visor by pulling slightly outward (Fig.6)
3.
3.
INSTRUCTION TO ASSEMBLE THE SMOKED VISOR
INSTRUCTION TO ASSEMBLE THE SMOKED VISOR
3.1 Clip the smoked visor accommodating its side parts into their seating slightly
3.1 Clip the smoked visor accommodating its side parts into their seating slightly
pressing. (Fig.7)
pressing. (Fig.7)
3.2 Drive forward the top lever (Fig.4)
3.2 Drive forward the top lever (Fig.4)
3.3 Drive the smoked visor inside till to fix it to the slider (Fig.7)
3.3 Drive the smoked visor inside till to fix it to the slider (Fig.7)
4
4
DUKE
DUKE
onfi-
onfi-
n the
n the
ope-
ope-
not
not
cha-
cha-
ever
ever
Fig.2)
Fig.2)
d by
d by
n the
n the
on if
on if
visor
visor
Fig.3)
Fig.3)
hich
hich
ghtly
ghtly
W
W
W
W
le
le
4.
4.
4.
4.
4.
4.
4.
4.
C
C
5.
5.
5.
5.
5.
5.
5.
5.
5.
5.
C
C
•
•
•
•
C
C
ot
ot
6.
6.
6.
6.
6.
6.
6.
6.
6.
6.
6.
6.
6.
6.
C
C
