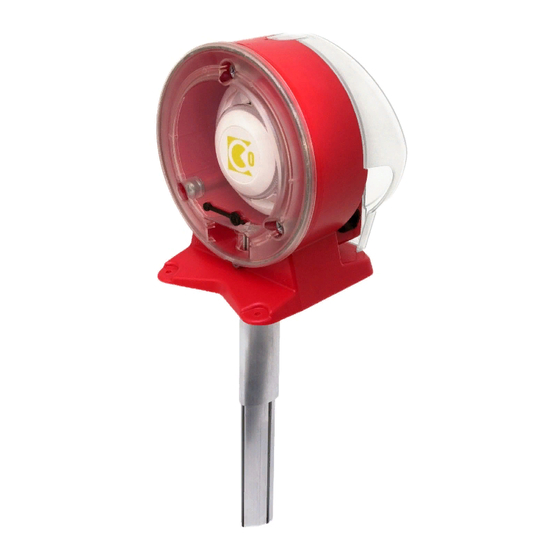
CALECTRO Uniguard Superflow UG-3-J Istruzioni per l'installazione - Pagina 2
Sfoglia online o scarica il pdf Istruzioni per l'installazione per Allarme fumo CALECTRO Uniguard Superflow UG-3-J. CALECTRO Uniguard Superflow UG-3-J 4.
Anche per CALECTRO Uniguard Superflow UG-3-J: Istruzioni per l'installazione (5 pagine), Istruzioni per l'installazione (4 pagine)

Montering av VR-F på kanalen
• Borra hål i kanalen (se punkt 9).
• Mät ventilationskanalen.
• Kapa eventuellt röret.
• Röret bör helst täcka minst 90% av
kanalens diameter.
OBS! Se även punkt 7.
• Sätt i ändpluggen.
2
1
1. Sätt i den grå tätningen i kanalhålet.
2. För in fläktröret så långt att det röda fläkthuset ligger emot
tätningen på ventilationskanalen.
3. Sätt på monteringsbeslaget över fläktröret utan att skruva fast
det på ventilationskanalen.
4. Träd på den svarta packningen på fläktröret.
5. Montera Uniguard Superflow på fläktröret. Dra åt
fläktrörets låsskruv och skruva fast Uniguard Superflow på
monteringsbeslaget (3 skruvar).
Observera luftflödesriktningen i ventilationskanalen.
6. Fäst monteringsbeslaget på ventilationskanalen.
Flödesindikator
UG-3 är försedd med en indikator, en röd
plasttunga, som – när detektorn är rätt
installerad – svängs ut av luftströmmen.
Elinstallation UG-3
• Öppna locket över kopplingshuset genom
att lyfta på snäpplåset.
• För in kabeln genom valfri,
kabelgenomföring.
Vid användning av annan typ av
genomföring demonteras de förmonterade
genom att först trycka igenom ena sidan
och därefter den andra (1-2).
Uniguard Superflow har 4 st. förmonterade IP67 godkända och
automatiskt dragavlastande genomföringar för kabeldiameter
4-11mm, typ Klikseal.
Eftersom Klikseal består av inbyggda "hullingar" får kabel endast
föras i en riktning genom Klikseal: in i Uniguard. Vid ett eventuellt
byte av monterad kabel, ska denna klippas av på utsidan av
Uniguard och resten av kabeln dras ur Klikseal, från insidan.
Klikseal är godkänd enligt EN 50262.
Kapa EJ denna ände!
Do NOT cut this end!
2
3
3
Flödesindikator.
Flow indicator.
4
Snäpplås.
Snap locking.
(1)
(2)
Mounting of VR-F on the duct
1
Ändplugg.
End plugg.
4
1. Mount the grey seal in the duct hole.
2. Insert the pipe until the red booster fan housing touches the
seal on the ventilation duct.
3. Mount the mounting bracket over the booster fan pipe without
fasten it on the ventilation duct.
4. Mount the black gasket on the booster fan pipe.
5. Mount Uniguard Superflow on the booster fan pipe. Secure the
pipe with the locking screw and secure Uniguard Superflow on
the mounting bracket (3 screws).
Note the air flow direction in the ventilation duct.
6. Secure the mounting bracket on the ventilation duct.
Flow indicator
The UG-3 is supplied with an indicator, a red plastic
"tongue", which – when the detector is correct installed
– is bent outwards due to the airflow.
Uniguard Superflow has 4 pieces pre-mounted IP67 approved
glands for cable diameter 4-11mm, type Klikseal.
As Klikseal contains of barbs, the cable must only be pulled
through the Klikseal in one direction: into the Uniguard. To
exchange a mounted cable: cut the cable outside of Uniguard and
pull out the rest from the inside.
Klikseal is approved according to EN50262.
• Drill a hole in the duct (see para 9).
• Measure the diameter of the duct.
• Shorten the pipe, if necessary.
• The pipe should penetrate approximately
90% of the diameter of the duct.
NOTE! See para 7.
• Insert the end plug.
5
6
Electrical installation UG-3
• Open the cover by opening the snap locking.
• Enter the cable through one of the cable
entrys.
When using another type of cable entry
dismount the ones already installed by
first pressing one side through the hole
and then the other one (1-2).
