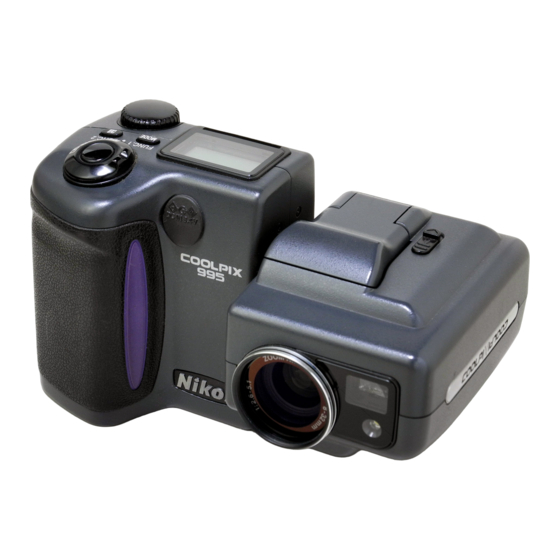
Nikon COOLPIX 995 Aiuto
Sfoglia online o scarica il pdf Aiuto per Camera Accessories Nikon COOLPIX 995. Nikon COOLPIX 995 2. Quick ceph systems
Anche per Nikon COOLPIX 995: Manuale del software (7 pagine), Istruzioni (2 pagine)

Nikon Coolpix 995 Help
The camera settings shown below offer a starting point for taking pictures with the Nikon Coolpix 995 digital camera.
We encourage you to familiarize yourself with the settings and usage of this camera.
Nikon also includes a help manual on the "Reference Manuals CD-ROM", packaged with each camera.
A
Recommended Settings for Extraoral Photographs
Turn the camera on by set-
1
ting it to the
setting
A
located on top of the camera,
as shown to the right.
We suggest using either a wall mounted lightbox with a built-in slave flash or a bare slave flash
4
to eliminate shadows on the facial photos. If you are using a bare slave flash, we have found that
it works best when placed precisely behind the patient's head, facing toward a white background.
You may need to adjust the brightness on the background lighting that you use in order to generate
accurate soft tissue hues. Overhead fluorescent lighting may also affect the color of the images.
You can replace the fluorescent bulbs with halogen lighting to produce better color images.
Professional photographers spend time setting up their studios for just the right picture. We also
have to invest time in setting up our offices for the right lighting for digital images.
Tips for Taking Extraoral Images
When you are taking the lateral head image, make sure the patient's head is level, with no tilting or
canting. We suggest that you place a mirror in front of the patient with a vertical line and have them
align themselves to it. This will make it easier to align the photos to the x-ray tracings. You should
capture the photo with the camera lens aligned with the patient's Frankfurt Horizontal plane to
ensure the most accuracy.
B
Recommended Settings for Intraoral Photographs
For intraoral photographs, we recommend switching to the Manual mode on the camera. This allows you to take higher
quality pictures than in the auto mode, and allows for greater control over the exposure and depth of field of the images. The
manual settings only need to be set once, as the camera "memorizes" these settings.
To access the manual set-
1
tings, turn the camera on by
setting it to the
M
located on top of the camera.
Adjusting ISO film speed:
3
The ISO settings define how quickly the camera
takes the picture. A higher ISO number means the
camera will take the picture quickly, so there's less
chance of blurry pictures. This is especially useful
for intraoral pictures.
To set the ISO settings, hold down the flash button
on the back of the camera and rotate the "Command
Dial" located at the top of the camera as shown:
The letters ISO should appear in the Control Panel.
You should stop rotating the dial when ISO 400
appears.
http://www.quickceph.com/docs/1028Nikon_995_help.pdf
Adjust image quality:
2
Click on the
the back of the camera until
the FINE option is displayed.
General settings:
2
To take intraoral images, the camera must be switched to the Macro Close-up
mode. To activate this mode, press the
setting
the Control Panel and the LCD monitor. The Anytime Flash mode should be
turned on as well.
Adjusting Aperture Priority:
4
For a better depth of field, you should adjust the Aperture settings. Setting the cam-
era on "Aperture Priority" allows you to adjust the camera so you can take pictures
where the foreground and the background are both sharp. This is crucial for intra-
oral photographs.
To enable "Aperture Priority", hold down the "Mode" button and rotate the
"Command Dial" located on the top of the camera until the
Next, rotate the "Command Dial" all the way to the right until the you reach an F-
Stop of about 9.0, which appears in the control panel screen at the top of the cam-
era. You will need to use the Zoom buttons to fine tune the value. The
macro icon
Quick Ceph
Adjust flash settings:
3
button on
Make sure to open the flash. Then, click on the
flash button
the flash displays only the
the Anytime Flash mode.
will then appear yellow on the LCD monitor.
Page 1
®
Systems
on the back of the camera until
symbol. This enables
Your Control Panel
should look like this.
FINE
FINE mode with Anytime
Flash enabled.
button until the
icon appears in
icon appears:
Doc ID# 1028Nikon_995_help - Revision 3-26-02
