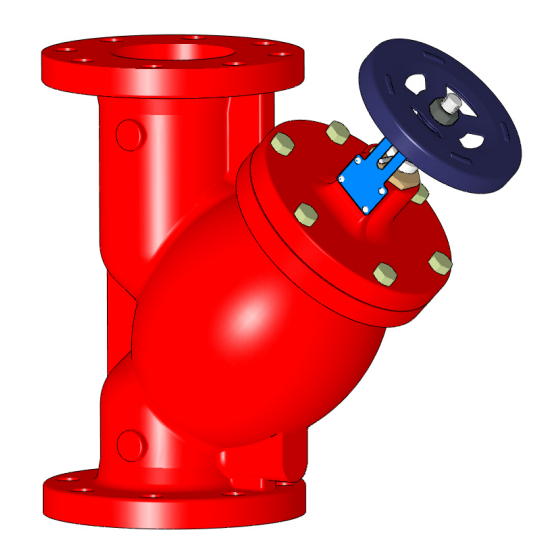
Armstrong FTV Istruzioni per l'installazione e il funzionamento - Pagina 4
Sfoglia online o scarica il pdf Istruzioni per l'installazione e il funzionamento per Unità di controllo Armstrong FTV. Armstrong FTV 4. 350mm to 600mm flo-trex valve

6.0 - DISASSEMBLY & ASSEMBLY
General: Before beginning to disassemble the Flo-Trex valve, become fully familiar with the construction
details and disassembly and re-assembly instructions prior to beginning any work.
Before undertaking any maintenance on the Flo-Trex valve it must be isolated from the system and any
pressure must be allowed to safely normalize to atmosphere.
To ensure that the Flo-Trex valve is re-assembled properly, it is necessary to mark certain parts and measure
and record certain dimensions. Additionally, ensure that spare and replacement parts such as o-rings,
gaskets, etc. are on hand before beginning the disassembly procedure.
6.1 - DISASSEMBLY
CAUTION: The Flo-Trex valve must be isolated from the system line and any pressure must be allowed
to normalize to atmosphere.
Remove handle by disengaging lock-nut from the stem.
Disassemble the travel indicator by removing the snap ring.
Unscrew guide bushing (The o-ring / gasket must be thoroughly cleaned. If there are any indications of
wear and/or scratches, they must be replaced.)
Release hex bolts and turn anti-clockwise until spring is slack.
Disassemble the cover, upper stem, spring and gasket. (The upper and lower stem, seat and disc must
be thoroughly cleaned. If there are any indications of bending, wear and/or scratches, they must
be replaced.)
When disassembling the disc assembly (disc holder, disc, lower stem) carefully lift the stem assembly
straight out of the body in order to avoid causing unnecessary damage.
If there is no damage to the seating surface, do not disassemble the seat.
6.2 - ASSEMBLY
Prior to assembly, be sure that all parts are clean and reassemble in reverse order of the disassembly.
Check to see that flange gaskets are properly positioned before tightening the bolts.
Tighten bolts gradually in a back and forth clockwise rotation.
Gradually adjust the stem until the proper flow rate is reached.
S. A. Arms
trong Limited
Armstrong Integrated Limited
23 Bertrand Avenue
Wenlock Way
Toronto, Ontario
Manchester
Canada, M1L 2
P3
United Kingdom, M12 5JL
T: 416-755-2
291
T: +44 (0) 8444 145 145
F: 416-759-9
101
F: +44 (0) 8444 145 146
For Armstrong locations worldwide, please visit www.armstrongintegrated.com
Armstrong Design Private Ltd.
(Unit 1 - Armstrong Manufacturing Center)
490-L, 4th Phase, Peenya Industrial Area,
Bangalore, India 560 058
T: +91(80) 4906 3555
F: +91(80) 2334 3535
Page 4 of 4
© S.A. Armstrong Limited 2011
