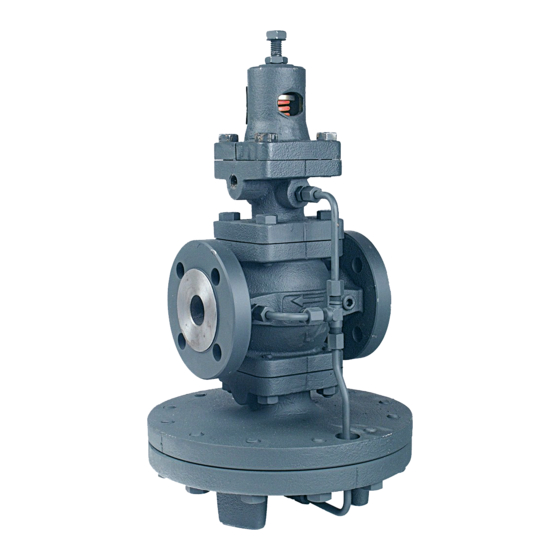
Armstrong GP-2000R Manuale - Pagina 7
Sfoglia online o scarica il pdf Manuale per Unità di controllo Armstrong GP-2000R. Armstrong GP-2000R 8. Pressure reducing valves
Anche per Armstrong GP-2000R: Manuale (2 pagine)

I. Pilot Valve Replacement:
- Loosen the lock nut (29) and turn the adjusting screw (28)
counterclockwise until pressure is relieved from spring (25);
- Unscrew the bolts and take out the adjusting spring (25),
the bottom plate (26) and the 2 pilot diaphragms;
- Remove the pilot valve capsule (19) and disassemble it. If
necessary clean the internal parts or replace complete pilot
valve capsule (19) if necessary.
II. Main Valve Replacement:
- Disassemble the copper tubing on the side of the valve (31
A, B & C);
- Unscrew the 4 bolts linking the pilot body (2) to the main
body (1). If the pilot is mounted remotely, remove the cover
from the top of the main body (1);
- Remove the spring retainer (16), the screen (17), the main
spring (15) and the main valve (6). Clean or replace main
valve (6) if necessary;
- Unscrew the 4 bolts between the main body (1) and the top
of the diaphragm case. Remove main valve seat (7) and clean
or replace it if necessary.
III. Main Diaphragm Replacement:
- Remove all bolts and nuts linking the top diaphragm case
and the bottom diaphragm case;
- Remove the 2 main diaphragms (13), the retainer (11) and
the main spindle (9);
- Replace the diaphragms (13) if they are damaged.
I. Austausch des Vorsteuerventils:
- Sicherungsmutter (29) lösen und die Stellschraube (28)
gegen den Uhrzeigersinn drehen, bis Druck von der Feder
(25) abgelassen wird;
- Schrauben herausdrehen und Stellfeder (25), Grundplatte
(26) und die 2 Vorsteuermembrane herausnehmen;
- Vorsteuerventilkapsel (19) herausnehmen und demontieren.
Je nach Bedarf die Innenbauteile reinigen oder die komplette
Vorsteuerventilkapsel (19) austauschen.
II. Austausch des Hauptventils:
- Kupferrohrleitungen auf der Ventilseite abnehmen (31 A,
B & C);
- Die 4 Schrauben herausdrehen, mit denen das
Vorsteuerventilgehäuse (2) am Hauptventilgehäuse (1)
befestigt ist. Ist das Vorsteuerventil extern montiert, den
Deckel von der Oberseite des Hauptventilgehäuses (1)
abnehmen;
- Federhalterung (16), Sieb (17), Hauptfeder (15) und
Hauptventil (6) herausnehmen. Hauptventil je nach Bedarf
reinigen oder austauschen;
- Die 4 Schrauben zwischen Hauptventilgehäuse (1) und
der Oberseite des Membrangehäuses herausschrauben.
Hauptventilsitz (7) herausnehmen und je nach Bedarf reinigen
oder austauschen.
III. Austausch der Hauptmembrane:
- Alle Schrauben und Muttern entfernen, mit denen das obere
Membrangehäuse am unteren Membrangehäuse befestigt ist;
- Die beiden Hauptmembrane (13), die Halterung (11) und die
Hauptspindel (9) herausnehmen;
- Membrane (13) bei Beschädigung austauschen.
I. Cambio de válvula piloto
- Afloje la tuerca de seguridad (29) y gire el tornillo de ajuste
(28) en el sentido contrario a las agujas del reloj hasta que se
haya eliminado la presión del muelle (25);
- Destornille los pernos y saque el muelle de ajuste (25), el
plato inferior (26) y los 2 diafragmas piloto;
- Quite la cápsula de válvula piloto (19) y desmóntela. Si lo
considera necesario limpie las partes internas o cambie la
cápsula de válvula piloto (19) por completo.
II. Cambio de la válvula principal:
- Desmonte los tubos de cobre en el lado de la válvula (31
A, B y C);
- Destornille los 4 pernos que conectan el cuerpo piloto (2) al
cuerpo principal (1). Si el piloto se monta a distancia, quite
la cubierta de encima del cuerpo principal (1);
- Quite el tapón del muelle (16), el filtro (17), el muelle
principal (15) y la válvula principal (6). Limpie o cambie la
válvula principal (6) si lo considera necesario;
- Destornille los 4 pernos entre el cuerpo principal (1) y
la parte superior de la caja del diafragma. Quite el asiento
principal de la válvula (7) y límpielo o cámbielo si lo
considera necesario.
III. Cambio del diafragma principal:
- Quite todos los pernos y tuercas que conectan la parte
superior de la caja del diafragma con la parte inferior;
- Quite los 2 diafragmas principales (13), el tapón (11) y el
eje principal (9);
- Cambie los diafragmas (13) si están dañados.
I. Vervangen van de stuurklep:
- Draai de stopmoer (29) los en draai de afstelschroef (28)
linksom tot de veer (25) niet meer onder druk staat;
- Draai de bouten los en verwijder de afstelveer (25), de
bodemplaat (26) en de 2 stuurmembranen;
- Verwijder de stuurklepcapsule (19) en demonteer deze.
Reinig de interne onderdelen of vervang indien nodig de
gehele stuurklepcapsule (19).
II. Vervangen van de hoofdklep:
- Demonteer de koperen leidingen aan de klep (31 A, B & C);
- Draai de 4 bouten los waarmee het stuurklephuis (2)
is bevestigd op het huis (1). Als de stuurklep remote is
gemonteerd, verwijdert u het deksel bovenaan het huis (1);
- Verwijder de veerhouder (16), de zeef (17), de hoofdveer
(15) en de hoofdklep (6). Reinig of vervang de hoofdklep (6)
indien nodig;
- Draai de 4 bouten tussen het huis (1) en de bovenzijde van
het membraanhuis los. Verwijder de hoofdklepzitting (7) en
reinig of vervang deze indien nodig.
III. Vervangen van het hoofdmembraan:
- Verwijder alle bouten en moeren waarmee de bovenzijde en
de onderzijde van het membraanhuis zijn bevestigd;
- Verwijder de 2 hoofdmembranen (13), de houder (11) en de
hoofdspindel (9);
- Vervang de membranen (13) als deze zijn beschadigd.
