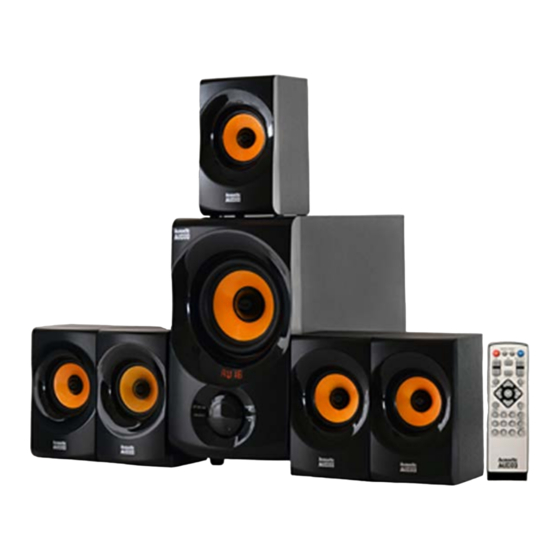
Acoustic Audio AA5170 Manuale - Pagina 2
Sfoglia online o scarica il pdf Manuale per Altoparlanti Acoustic Audio AA5170. Acoustic Audio AA5170 2. 5.1 multimedia speaker system

Using The Remote Control
(1) ___
-----=::::�...i;;::::::=-
(2)
(3)
(4)
(5)
(6)
(7)
(8)
(9)
1. MEMORY
2. ST-BY
3.DVD
4.AUX
5. FRONT
6. P REVIOUS
7. VOL-
8.SURROUND
9. 0-9 NUMBERS
10. PRESET
11. MUTE
1. MEMORY: In FM mode, using the"TUNI NG +/-"buttons choose a preferred station,
press"MEMORY" once, choose the channel to coincide with this station (1-9) and press
"MEMORY" again to program that station to that channel. Repeat this process with up
to 9 different stations. To remove a channel, press"MEMORY" once, then use the
"P REVIOUS" or "NEX T" button to find the channel you'd like to remove and press the
"P LAY/ PA USE " button to remove it. Press and hold th "MEMORY" button to scan and
save stations automatically.
2. ST-BY: Use the"ST-BY" button to start the system.
Rear Panel
(1)
(11)
(12)
ANTENNA
1.)
AUX Input
2.)
FL/FR Input
3.)
C/SW Input
4.)
SL/SR Input
5.)
FR Output
6.)
---(10)
(11)
(12)
(13)
(14)
(15)
(16)
(17)
(18)
(19)
(20)
(21)
(22)
12. FM
13. BLUETOOTH
14. USB/SD
15. 5.1/2.1
Amuatlc
16.CENTER
AUDIO
17. VOL+
18.NEXT
19. PLAY/ PAUSE
20. SUB-WOOFER
21.TUNING +
22.TUNING-
(2)
(3)
(4)
(5)
(6)
(7)
(8)
(9)
(10 )
7.) FL Output
SR Output
8. )
9.) SL Output
CEN Output
10.)
POWER ON-OFF
11.)
12.)
AC Power Supply Cord
PAGE4
3. DVD: Press "D V D" once to use DVD input mode.
4.
AUX: Press "AUX" once to use AUX input mode.
5. FRONT: Press"FRON T"to select the front speakers. The output level can be adjusted
using the "VOL -/+• buttons.
6.
PREVIOUS: In USB/SD mode, press "k◄"to play the previous song. In FM mode, press
"k◄"to go to the previous radio station channel.
7.
VOLUME - : Press"VOL-"to decrease the volume.
8.
SURROUND: Press "SUR R"to select the rear speakers. The output level can be adjusted
using the "VOL -/+• buttons.
9. 0-9
NUMBER BUTTONS: In US B/SD mode, use the number buttons to select the
desired track. In FM mode, use the number buttons to select the desired radio station.
10. PRESET: Press "P RESET"to go through previously saved radio station channels.
11. MUTE: Press "MUTE"to suspend and activate all sound. LED Display will blink in mute
mode.
12. FM: Press "FM" once to use FM input mode.
13. BLUE-TOOTH: Press "BLU ETOOTH"to use blue-tooth input mode. The LED Display will
blink while searching for blue-tooth device. On your mobile device, pair with" B T S PEAKER"
in your mobile device blue-tooth menu. Once you have successfully paired your mobile
device to the system the LE D Display will stop blinking. You can use your device for
P REV/NEX T/PLAY/PAUSE/VOL +/- functions. Use the remote for MUTE/ VOL+/- functions.
►
Press and hold·
II" for 3 seconds to force disconnect from blue-tooth.
14. USB/SD: Press " USB/S D" once to use USB/SD input mode.
15. 5.1/2.1: Press "5.1/2.l"to change from 2.1 to 5.1 surround sound
16. CENTER: Press "CEN" to select the center speaker. The output level can be adjusted
using the "VOL-/+" buttons.
17. VOLUME+: Press "VOL +"to increase the volume.
18. NEXT: In US B/SD mode, press "
to the next radio station channel.
19. PLAY/PAUSE: Press •
20. SUB-WOOFER: Press "SUB"to select the sub speakers. The output level can be
adjusted using the "VOL-/+" buttons.
21. TUNING+: press once to ascend FM channels, press and hold to scan FM channels
ascending
22. TUNING - : press once to descend FM channels, press and hold to scan FM channels
descending
Note: if remote loses function, please replace the 2 AA batteries.
PAGE 6
1. Insert all satellite speaker cables into their respective output sockets
located at the rear of the sub-woofer. ( FL: Front Left Speaker, FR: Front
Right S p eaker, SL: Surround Left Speaker, SR: Surround Right Speaker,
CEN : Center Speaker
For 5.1 surround sound, insert audio cables from your device into the
2.
respective DVD speaker sockets located at the rear of the sub-woofer
above the satellite speaker sockets.
For dimensional sound, insert audio cable into respective AUX
3.
socket.
4. For clearer, stronger FM si g nal, insert antenna cord into Antenna
socket.
Once you've connected the s y stem in your preferred method, insert
5.
the p ower plug into -120V wall outlet and switch power to ON.
Note: Please avoid leaving magnetic objects near the system
►►
l"to play the next song. In FM mode, press "
►
II· to play or pause the music.
System Connections
CEN
PAGE 5
►►l
" to go
PAGE 7
