Acoustic Image Clarus Manuale d'uso - Pagina 3
Sfoglia online o scarica il pdf Manuale d'uso per Altoparlanti Acoustic Image Clarus. Acoustic Image Clarus 12. S4plus
Anche per Acoustic Image Clarus: Manuale d'uso (10 pagine)

-Headphone output
-Switchable limiter
-Mute switch
-Mono or stereo ouput from the preamp section
-Selectable internal jumper options for gain and stereo
operation
-High fidelity, low noise operation: 110 dB SNR at direct
out
-Automatic voltage switching for universal AC mains
operaton
-650 Watt output at 4 ohms (music power)
-Dual speaker outputs with speakon connectors
-Comes with padded case and speakon to 1/4 inch adapter
The features of the S4plus combo amps are:
-Clarus amp docks in cabinet using our exclusive Cabrio
Docking System
-Sealed two-way speaker system
-Coda:
-Lightweight (22 lbs) structural foam cabinet
-10 inch poly cone woofer + 5 inch extended
range midrange with level switch
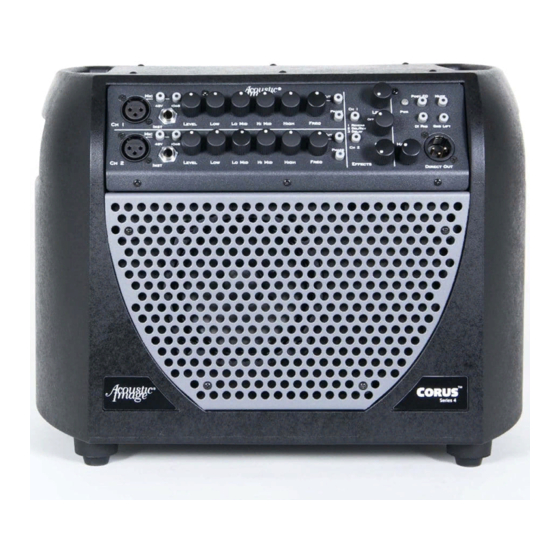
-Corus:
-Lightweight (22 lbs) structural foam cabinet
-10 inch paper cone woofer + 5 inch extended
range midrange with level switch
-Ten2
-Lightweight (34 lbs) structural foam cabinet
-Downfiring + forward firing poly cone 10 inch
drivers + 2.5 inch tweeter with level control
-Exclusive Room Coupling Control for DF woofer
-All combos come with a fitted slip cover
While our combos and speakers are designed to play loudly--and
clearly--enough so that you can be heard in most gigging situations,
they are not suited to playing at extreme volumes. Generating high
SPLs may require an extension cabinet like the Coda EX, Corus EX,
Ten2 EX or augmentation by a larger house system.
The instructions that follow apply to all of the S4plus products due to
the many common elements in the different units. Where there are
specific differences that are unique to one or more units, those
differences are described. The Clarus amp head is described first
followed by the common elements of the combo amps (docking
system, tilt mechanism, cabinet placement, etc). The specifics of each
cabinet type are then described followed by detailed specifications of
all of the models.
2
Operation--Clarus Head
Power
Rtn
Snd
Auto Voltage Switch
AC Input
Ch 1
100-240 V
~
50/60 Hz
Ch 2
600 Watts
H/P
Preamp Out
Effects Loops
Power Switch Fuse
Clarus Rear Panel
Rtn
Snd
Auto Voltage Switch
AC Input
Ch 1
100-240 V
~
50/60 Hz
Ch 2
600 Watts
H/P
Preamp Out
Effects Loops
Power Switch Fuse
Speaker Input
W
8 300W
Coda, Corus and Ten2 Rear Panel
(shown in the docked position)
Plug the detachable AC power cord into the receptacle on the back of
the amp and into a wall receptacle. A power switch next to the AC input
turns on power to the pre- and power amps, illuminating a "power on"
indicator on the front panel of the amp.
mounted in the drawer marked with the fuse symbol that is part
of the AC receptacle. To replace the fuse, turn off the amp,
remove the AC cord and use a small screwdriver to pry the
drawer out of the receptacle. Remove and replace the fuse.
that a spare fuse is mounted inside the drawer.
Our amps and combos all operate with AC voltages between 100V
and 240V, 50/60 Hz. An internal switch automatically selects the
correct mode of operation for that voltage range. No user action is
required to set the unit to operate with different AC voltages. Note that
the correct AC power cord must be used for connection to the
appropriate wall plug. If you do not have the right cord, you can buy
one from an electronics or computer store.
Note that when the power switch is off and the power indicator is off,
power is not completely removed from the amp. To completely remove
power, disconnect the power cord. Always leave the power cord
accessible so that you can easily disconnect power from the unit.
Note that there is a 5 to 10 second delay after the power has been
turned before the amp becomes operational. This is done so that
"start up" noises are not heard.
Preamp
Refer to the signal flow and the control panel diagrams (page 9).
3
W
Speaker Output 2
min. Use Class 2 Wiring
CAUTION
Risk of Electric
L
Shock. Do Not
Open. Do Not
R
Expose to Rain
Or Moisture
Off On
Limiter
Stereo Out
W
Speaker Output 2
min. Use Class 2 Wiring
CAUTION
Risk of Electric
L
Shock. Do Not
Open. Do Not
R
Expose to Rain
Or Moisture
Off On
Limiter
Stereo Out
Presence
A 6.3-amp fast blow fuse is
Note
