Balmar MAX CHARGE MC-614 Manuale di installazione e funzionamento - Pagina 4
Sfoglia online o scarica il pdf Manuale di installazione e funzionamento per Controllore Balmar MAX CHARGE MC-614. Balmar MAX CHARGE MC-614 9. Multi-stage voltage regulator
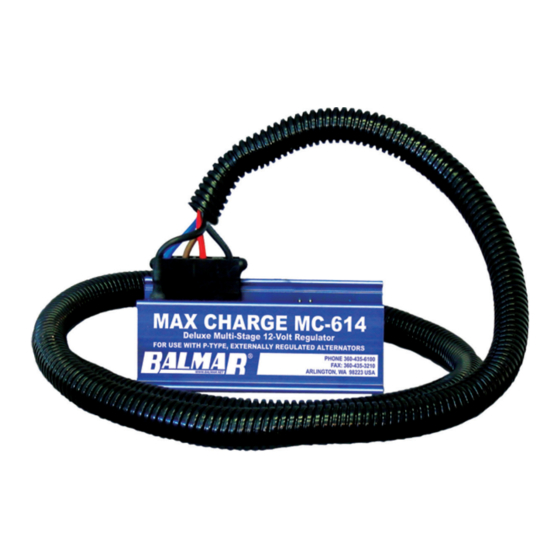
Anche per Balmar MAX CHARGE MC-614: Manuale di installazione e funzionamento (20 pagine), Manuale di installazione e funzionamento (20 pagine), Manuale di avvio rapido (2 pagine)
Installation By Wire
Install BLACK Ground Wire
The BLACK Ground Wire (#1 in diagram at right) are included in the four-wire Ford-style plug on the wiring harnessand
are factory installed on regulator packages designated with "H" at the end of the model number. The other end of the
Ground Wire is fitted with a ring terminal connector. In most applications, this
wire can be connected directly to the alternator's ground terminal post. Both
alternators and regulators must be connected to system ground.
Install RED Power Wire
The RED Power Wire (#2 in diagram at right) is included in the four-wire Ford-
style plug and is factory installed on regulator packages designated with "H" at
the end of the model number. The other end of the Power Wire is fitted with a ring
terminal connector. In most applications, this wire can be connected directly to
the alternator's positive output post. When a diode-type battery isolator is used,
the power and voltage sense (#9) wires must be connected to the battery side
of the battery isolator. Power Wire is equipped with 10-amp ATC type fuse. The
Power Wire must be fused to ensure against damage to the voltage regulator.
Install BROWN Ignition Wire
The BROWN Ignition Wire (#3 in diagram at right) provides the ON/OFF voltage
for the regulator. This wire is included in the Ford-style plug at the regulator end
of the wiring harness. The other end of the wire is fitted with a butt connector.
Typically, the ignition wire is connected to the ON side of the ignition switch. This
may be at the actual switch, or to the wire in the existing engine wiring loom that
delivers switched voltage from the ignition switch. In some cases, an oil pres-
sure switch may be used to activate the regulator. In either case, the regulator's ignition wire must see zero volts when
the engine ignition is switched off.
Install BLUE Field Wire
The BLUE Field Wire (#4 in diagram at right) provides regulated current to control alternator output. The wire is included
in the wiring harness Ford-style plug and is pre-connected at the regulator. At the other end of the wire, you'll find either
a plug or a ring terminal, depending on the alternator's field terminal connection. Attach the field wire to the alternator's
field terminal.
Install Alternator Temperature Sensor
The optional Alternator Temperature Sensor (MC-TS-A) allows your MC-614 voltage regulator to monitor your alternator
for temperatures in excess of safe operating levels. The MC-TS-A
sensor includes a 54" cable, a sensing attachment lug and positive
and negative regulator plug-in connectors. To install the MC-TS-A:
1. Connect the sensor lug to one of the four bolts that hold the alter-
nator's front and rear cases together. Extend sensor cable to the
regulator. The cable can be included within the regulator's wiring
harness, or can be run alongside the harness and attached with
cable ties.
2. Connect the positive and negative female connectors to the Al-
ternator Temp. Sense terminals on the regulator (#5 is negative.
#6 is positive). It is essential that the terminals match the polarity
of the regulator connection pins (red wire to positive terminal and
black wire to negative terminal).
Install Battery #1 Temperature Sensor
The optional Battery Temperature Sensor (MC-TS-B) allows your Max Charge MC-614 voltage regulator to monitor your
battery bank for changes in battery temperature, and adjust charging voltages to suit. The MC-TS-B sensor includes a
20-foot cable, a sensing attachment lug and positive and negative regulator plug-in connectors. To install the MC-TS-B:
1. Connect the sensor lug to the battery negative post closest to the center of the battery bank. Extend sensor cable to
the regulator
2. Connect the positive and negative female connectors to the Battery temperature sensors on the regulator (#7 is nega-
tive. #8 is positive). It is essential that the terminals match the polarity of the regulator connection pins (red wire to
positive terminal and black wire to negative terminal connectors).
- 4 -
Additional Regulator Features
Small Engine Mode
In situations where additional power is needed for propulsion, the MC-614 provides the option to manually reduce regula-
tor field output by approximately one half. This option, called Small Engine Mode, can be accessed by creating a direct
pathway between the positive and negative Alternator #1 Temperature Sensor terminals.
4
This can be done by splicing into the positive and negative wires of the Alternator Tem-
perature Sensor cable (MC-TS-A) with a switched wire. With the switch in the OFF posi-
tion, the Alternator #1 Temperature Sensor will work normally. With the switch in the ON
position, the regulator will reduce field output by approximately 50%.
3
To enable the Small Engine Mode:
1. If the Alternator Temperature Sensor cable is being used, replace the female termi-
nal connectors on the cable with Multi-Stack Connectors (Ancor Part # 230612).
2
2. Install a standard ON/OFF switch in a location that's easily reached from the helm.
3. Run wires from the switch back to the positive and negative terminals of the Alterna-
tor #1 Temperature Sensor terminals (terminals #5 and #6).
1
4. Add appropriate connectors to the switched wires and connect to the positive and
negative terminal connections.
Dash Lamp
The MC-614 provides a Dash Lamp circuit that's capable of providing a signal to a user supplied and installed audible or
visual alert if the following issues were to occur while the regulator is in operation;
•
Low Battery Voltage <12.8V
•
High Battery Voltage >15.5V
•
High Alternator Temperature >225˚F (Requires installation of MC-TS-A sensor cable.) Temperature adjustable.
•
High Battery Temperature >125˚F (Requires installation of MC-TS-B sensor cable.)
•
Alternator Failure (No voltage on stator).
Aux #1 Lamp
The MC-614 provides an Auxiliary Lamp circuit that's capable of providing a signal to a user supplied and installed audible
or visual alert to indicate the following while the regulator is in operation:
•
Small Engine Mode is activated,
•
Regulator is at full field.
System Troubleshooting
Regulator Troubleshooting
The majority of charging difficulties can be attributed to damage, corrosion or wear at wiring, fusing or wiring connec-
tions. Before attempting to troubleshoot alternator or regulator issues, be sure to address the following:
1. Remove and clean all charging system electrical connections (positive and negative). Check the voltage regula-
tor's harness for continuity. Wires and terminals can and will become corroded, and need to be cleaned or replaced.
Ensure that the regulator's ground wires are provided with a clean connection to system ground.
2. Inspect and replace 10A and 1A ATC type fuses in the regulator wiring harness if fuses appear to be damaged or
corroded. Ensure that the fuse holder is also free of corrosion.
3. Charge all batteries to their proper fully charged state, and determine if they are serviceable. If your batteries are
flooded-type, use your hydrometer to determine their condition.
4. Check and tighten alternator belt. If the belt show signs of wear or damage, replace it. Always replace existing belts
with the finest quality replacements available.
If batteries and wiring are in suitable condition, use the tests on the following page to determine if charging problems are
a result of a faulty alternator or regulator. These tests provide an opportunity to isolate the alternator, regulator and wir-
ing harness in order to determine the problem source. In order to perform these tests, you will need an independent DC
meter (preferably a digital type). In an emergency, a 12V light bulb or test light can be used to help determine if power or
working grounds exist. An amp meter and a battery hydrometer with a thermometer are also helpful diagnostic tools.
- 13 -