Balt Wind-Surfer 44162 Istruzioni per il montaggio - Pagina 4
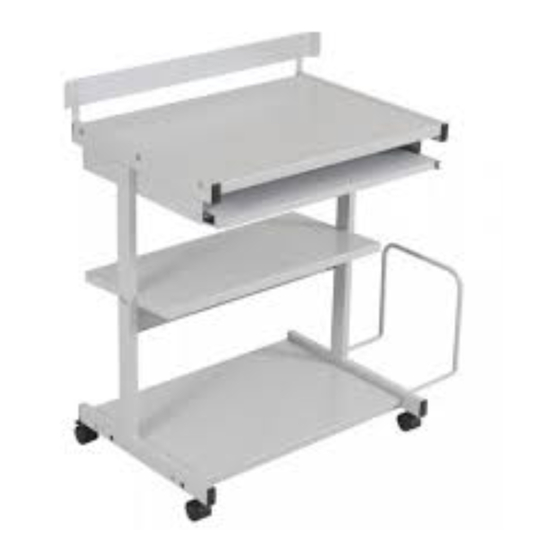
Sfoglia online o scarica il pdf Istruzioni per il montaggio per Desktop Balt Wind-Surfer 44162. Balt Wind-Surfer 44162 4. Tri-level computer workstation
6. Attach Stability Panel (P-5) to
Right Leg (P-1) and Left Leg
(P-2) using 4 Flat Head
Screws (A).
7. Secure Middle Shelf (P-6) with
2 Sheet Metal Screws (C)
through holes in Stability Panel
(P-5) as shown in illustration # 2.
Illustration # 3
P-9
H
10. Attach Monitor Rail (P-8) to Right Leg (P-1) and Left Leg (P-2) using 4 Flat Head Screws (A) as
shown in illustration # 4. Tighten all the Screws securely using Allen Wrench (F).
P-7
Use 2nd hole from
front of slide
11. Attach 2 Inner slides (L) to the Keyboard
Platform (P-7) using 4 Long screws (M).
Insert Keyboard Assembly into the 'Slides'
on the Right and Left Legs (P-1 & P-2) as
shown in illustration # 4.
( Before inserting Keyboard assembly,
pull the 'Rollers' to the front of the Slide.)
P-2
P-6
P-10
K
J
Spring Clip goes to the
back of Keyboard Shelf.
L
M
Illustration # 2
8. Place 1 each Hex Nut (H), and 1 each Flat Washer
(J) on each CPU Rod (P-10). Insert 2 CPU Rods
through the Right Leg (P-1) or the Left Leg (P-2)
as shown in illustration # 3.
9. Place 1 each Black Plastic Spacer (K) over each
CPU Rod and secure each Rod with 1 each Hex
Nut (H). Slide CPU Sleeve (P-9) over ends of CPU
Rods as shown in illustration # 3.
Pull the Rollers on
the Slide forward to
the front of the unit
before inserting the
Keyboard Shelf.
P-5
C
Illustration # 4
P-2
P-8
Wind new asm - 01/04/00
P-1
A
A
P-1