DLS GOTHIA 1 Installazione - Pagina 2
Sfoglia online o scarica il pdf Installazione per Altoparlanti DLS GOTHIA 1. DLS GOTHIA 1 2. Ultimate tweeters
Installation of Ultimate UP1i tweeter
Surface mounting:
For angled surface mount use the angled cup (5):
The tweeter driver (1) is attached to the cup by fitting the three
wings on the angled cup into the tracks of the tweeter driver and
then turn it clockwise to lock. When removing the driver from the
cup, turn it ccw and lift it up. The cable goes through the hole in the
rear side of the cup. Attach to the surface with screws (6) or the
round adhesive tape cushions (7). A good place for installation is on
the dash board at the A-pillar directed towards a place between the
front seats.
Recessed mounting:
Drill a hole with a diameter of 48 mm / 1,89" in the door side.
The cup (2) is attached to the door side with the metal wing(3)
pressed to the back side of the door. Fasten the metal wing using
the two M3 screws (4).
Put the tweeter driver (1) into the cup with the cable going out
through the bottom hole. Then attach the driver into the cup and
turn it clockwise to lock in the cup. When removing the driver from
the cup, turn it ccw and lift it out.
5
3
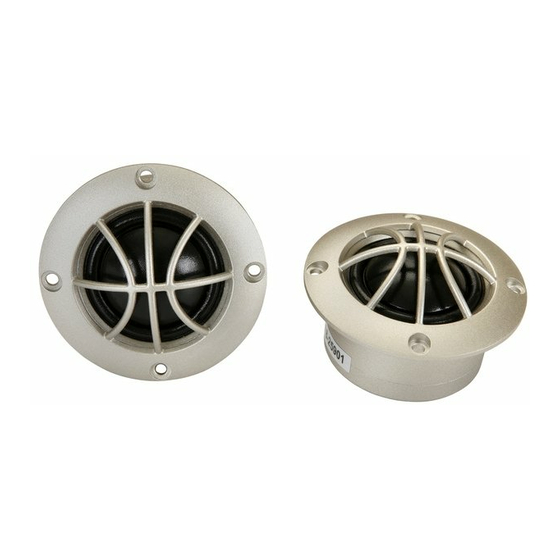
Installation of Nordica 1 / Gothia 1 tweeter:
Recessed mounting 1:
You need a hole with a diameter of 46 mm / 1,88" in the door
side, fasten with four screws. A strong baffle will improve the
sound.
Recessed mounting 2:
Sometimes it´s necessary to install the tweeter at places where
you cant use the round flange. The flange (A) is possible to
remove from the tweeter driver (B) by turning it CCW.
If you prefer to install the tweeter with the flange attached to the
tweeter driver, we recommend you to add a string of strong glue
on the bottom side, between flange and chamber, to secure it.
This gives you the best sound reproduction in this installation.
1
6
7
4
:
2
B
A