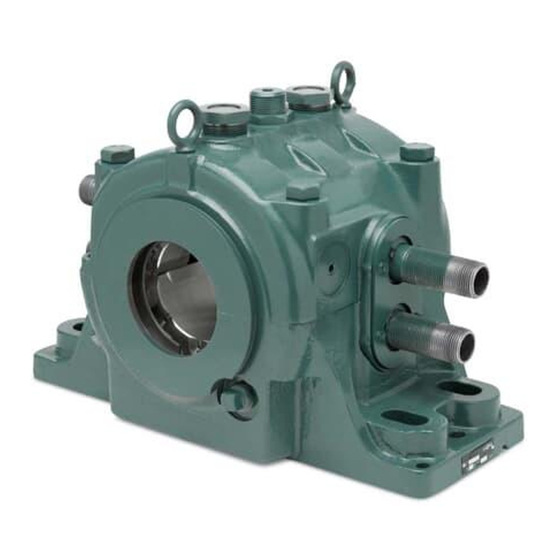
Dodge Sleevoil SSL 12 XC Manuale di istruzioni
Sfoglia online o scarica il pdf Manuale di istruzioni per Apparecchiature industriali Dodge Sleevoil SSL 12 XC. Dodge Sleevoil SSL 12 XC 8. Pillow blocks

Instruction Manual for Sleevoil
These instructions must be read thoroughly before installation or operation. This instruction manual was accurate at the time of
printing. Please see www.dodgeindustrial.com for updated instruction manuals.
WARNING: To ensure that drive is not unexpectedly started,
turn off and lock out or tag power source before proceeding.
Failure to observe these precautions could result in bodily
injury.
WARNING: All products over 25 kg (55 lbs) are noted on the
shipping package. Proper lifting practices are required for
these products.
CAUTION: Do not scrape, rebabbitt or otherwise alter this
product. Such action adversely affects bearing performance
and may result in damage to or destruction of equipment.
INSTALLATION
Before mounting the pillow block read all instructions in this
manual to become familiar with the mounting procedure and
pillow block parts nomenclature. Refer to applicable contract/
assembly drawings to verify that all parts are available prior to
assembly. Disassemble and thoroughly clean all parts of the
pillow block (including pipe plugs). The installer is the last person
to inspect all parts for fit, damage and cleanliness. Care MUST be
taken to avoid contaminating the internal surfaces of the bearing.
All instructions in this manual pertain to both standard (STL)
and short series (SSL) pillow blocks with the exception of Step 8
which does not apply to SSL style bearings.
1.
Check mounting structure making sure it is rigid, level and
well supported. Inspect shaft to insure it is smooth (32 micro-
inch finish or better), free of burrs or rough spots. Clean
shaft in the bearing area. Standard shaft tolerance should
be +.000 / -.002 on all sizes unless otherwise specified on
shaft detail.
2.
Disassemble and thoroughly clean all parts of the pillow
block. For ease of installation, the housings and liners are
split and match-marked. The split halves are machined
together and must not be interchanged. Housing and liners
should be interchanged as assemblies only.
WARNING: Because of the possible danger to persons(s) or
property from accidents which may result from the improper
use of products, it is important that correct procedures be
followed: Products must be used in accordance with the
engineering information specified in the catalog. Proper
installation,
maintenance
must be observed. The instructions in the instruction
manuals must be followed. Inspections should be made
as necessary to assure safe operation under prevailing
conditions. Proper guards and other suitable safety devices
or procedures as may be desirable or as may be specified in
safety codes should be provided, and are neither provided
by Dodge Industrial, Inc. nor are the responsibility of Dodge
Industrial, Inc. This unit and its associated equipment must
be installed, adjusted and maintained by qualified personnel
who are familiar with the construction and operation of all
equipment in the system and the potential hazards involved.
When risk to persons or property may be involved, a holding
device must be an integral part of the driven equipment
beyond the speed reducer output shaft.
Sleevoil
SSL* Pillow Blocks
®
Sizes 9" through 12" XC and Plain
and
operation
procedures
STL Pillow Blocks and
®
NOTE: Liner assembly has critical machined surfaces
which are easily damaged. Use care in handling to
protect these surfaces. Liner parts should be placed on
a soft, CLEAN surface.
WARNING: Rust preventatives and solvents can be
toxic and/or flammable. Follow directions and safety
procedures recommended by their manufacturers.
3.
Position housing base on pedestal so that oil gage is in the
position specified on the construction drawing. Also check
construction drawings for special modifications on housing
and/or liner. Do not tighten housing base to pedestal. Apply
oil to the spherical seats in the housing base.
4.
Set liner base in housing base. Make sure the two
thermocouple/RTD holes in the liner are aligned with the
two thermocouple/RTD holes in the housing. If the shaft is
already supported in place, the liner can be rolled around
the shaft into the housing seat. To do this, remove one of
the water pipes from the liner base. Plug the water pipe
hole with clean rag to prevent contaminants from entering
the housing. Apply oil to the liner bearing surface and roll
the liner around the shaft into place. It may be necessary to
bolt the housing base down to allow the liner to slip into the
housing seat. Remove the rag and reinstall water pipe using
pipe sealant. Apply oil to the liner bore.
NOTE: Liner has been machined to close tolerances.
Scraping of bore is not recommended.
NOTE: If shaft is in place, care should be taken when
reinstalling coolant pipes. Use pipe sealant and tighten
securely. Over tightening may result in liner damage.
5.
Apply oil to shaft in the bearing area and set shaft in place.
6.
Check alignment of pillow block by noting clearance
between housing and shaft at each end of the housing—
clearance should be uniform within 1/32". Shim bearing
pedestal where possible, otherwise use full length shims
under base as required. Alignment of pillow block should
be as accurate as possible. The self-alignment feature of
the unit is to compensate for normal shaft deflection and
possible settling of the supports.
7.
Oil rings are shipped disassembled with two extra screws.
Place oil rings around outside of liner base and around top
of shaft.
NOTE: Oil ring halves are match-marked and MUST NOT
be interchanged.
Install and tighten the four screws in each oil ring using low
strength thread locker. Make sure oil rings rotate freely on
shaft.
Older "T-section" brass oil rings have been replaced by new
split bronze Trapezoidal Oil Rings (2014). "T-section" oil
rings have been discontinued. Use Trapezoidal Oil Rings.
NOTE: If pillow block is to be arranged for circulating
oil, read section headed "Circulating Oil".
1
*Short Series
