CytoTherm CT-DR Manuale d'uso - Pagina 4
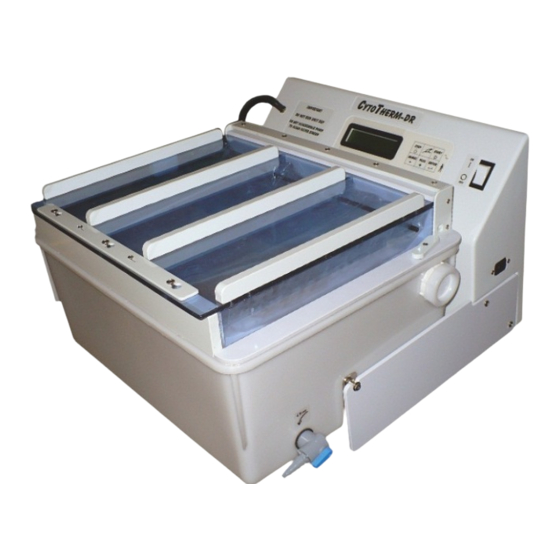
Sfoglia online o scarica il pdf Manuale d'uso per Apparecchiature di laboratorio CytoTherm CT-DR. CytoTherm CT-DR 10. Dry plasma thawing with rocking action
LEAKS
In case of a leak, the alarm will sound and the thawing will stop. Open the LID to see which bag leaked. The leak will be
confined to only one of the 3 sections. The other sections are not contaminated.
Determine what leaked:
1. Plasma bag leaked. Open the LID. Push down on the front of the RACK. Any leaked solution will flow to
the front of the RACK. This will let you identify which section leaked. Pick up the plasma bag and observe for
leaks. If there is a leak, discard the bag(s). Check if the Bladder also leaked. See # 3 below. If the BLADDER
did not leak, use a paper towel to soak up the visible leaked solution. Remove the BLADDER by first lifting the
top of the BLADDER up to drain out as much of its internal water as possible. Remove the INLET and
OUTLET FITTINGS by holding the FITTINGS and twisting them as you pull up.
If you need to rush thawing the plasma bags in the non-contaminated section, you can do the full clean up
later. Use the plastic plugs to close off the stainless steel ports, turn the unit on and start thawing. You will have
to watch the plasma bags to see when they are thawed, because the count down timer will restart from the full
thaw time.
Rinse the BLADDER under flowing water and wipe with a bleach towelette or a 10% bleach solution.
Wipe out the inside of the RACK and then wipe it with a bleach towelette or a 10% bleach solution. Remount
the cleaned BLADDER in the RACK.
2. BLADDER leaked. If the plasma bag did not leak, the leak must be in the bladder. Wipe off and place the
plasma bag(s) aside. Remove and discard the BLADDER by first lifting the top of the BLADDER up to drain
out as much of its internal water as possible. Remove the INLET and OUTLET FITTINGS by holding the
FITTINGS and twisting them as you pull up. Wipe up all the leaked solution inside the RACK. Wipe the inside
of the RACK with a bleach towelette or a 10% bleach solution. Remount a new BLADDER. You are ready to
start thawing again. Rinse off the bleach with water.
3. Plasma bag and BLADDER both leaked. It is a very unlikely case. After you determine that the plasma bag
leaked, discard the plasma bag(s), push down on the front of the RACK and squeeze down lightly on the
BLADDER. If the bladder is also leaking, the volume of the leaked solution in the front of the RACK will
increase. Remove the BLADDER (see #2 above) and discard it. Wipe the section of the RACK with bleach
towelettes or a 10% bleach solution. Rinse off the bleach with water.
If you need to rush thawing the plasma bags in the sterile section, you can do the full clean up later. Use plugs
to close off the stainless steel ports, turn the unit on and start thawing. You will have to watch the plasma bags
to see when they are thawed, because the count down timer starts at the full thawing time.
Do a full clean up. Remove the SENSOR CONNECTOR. Lift the front of the RACK, disconnect the RACK
TUBE and place the RACK aside. Drain the BATH. (See MAINTENANCE). Wipe the inside of the BATH and
the RACK with a bleach towelette or a 10% bleach solution. Do not use concentrated bleach. Mount a new
BLADDER to replace the leaked BLADDER in the RACK. Reassemble (See SETTING-UP). Plug in and turn
on the unit and push START and let it run for a few minutes so that the water passes through and rinses the
pump and the BLADDERS on the inside. Turn the unit off, drain out all the water a second time. Reassemble
(see SETTING-UP).
BLADDER REPLACEMENT
Hold the BLADDER so that the holes in the FITTINGS (water connectors) face down. Push the top of the BLADDER
underneath the black rod that passes across the RACK near the back of the RACK. Gently pull the BLADDER up. Push
down of the FITTING as you twist back and forth until the FITTING stops against the bottom of the RACK.
Mount the other FITTING the same way.
BLADDER STORAGE
When storing, fold the bladders up loosely. If the bladder is dry it can be stored in a zip lock bag. If the bladder is wet
then allow air flow around the bladder.
4